.png.6dd3056f38e93712a18d153891e8e0fc.png.1dbd1e5f05de09e66333e631e3342b83.png.933f4dc78ef5a5d2971934bd41ead8a1.png)
Search the Community
Showing results for tags 'storage'.
-
 Described by Nature as the “gilded cousin of Graphene”, Goldene is a one-atom-thick sheet of gold created by scientists from Linköping University (LiU) in Sweden. It has unique properties that the researchers believe could pave the way for applications such as carbon dioxide conversion, hydrogen production, water purification, and communication. Shun Kashiwaya, a researcher at the Materials Design Division at LiU, explains, "If you make a material extremely thin, something extraordinary happens. As with Graphene, the same thing happens with gold. As you know, gold is usually a metal, but if single-atom-layer thick, the gold can become a semiconductor instead." An accidental discovery Historically, attempts to create single-atom sheets of gold have been hindered due to the metal’s propensity to lump together. However, the successful creation of Goldene was achieved via a century-old Japanese smithing technique called Murakami’s reagent, which etches away carbon residue. For this task the team used an oxidizing reagent. To produce Goldene, the researchers used a three dimensional base material with layers of gold sandwiched between titanium and carbon. There was an element of serendipity to the creation of Goldene however, as Lars Hultman, professor of thin film physics at LiU admits. “We had created the base material with completely different applications in mind. We started with an electrically conductive ceramics called titanium silicon carbide, where silicon is in thin layers. Then the idea was to coat the material with gold to make a contact. But when we exposed the component to high temperature, the silicon layer was replaced by gold inside the base material.” The LiU researchers now plan to turn their attention to exploring whether other noble metals could undergo a similar process and yield yet more unimaginable applications. Funding for this research was provided by a range of institutions, including the Swedish Research Council, the Swedish Government's Strategic Research Area in Materials Science, and Linköping University. More from TechRadar Pro Future computers will have chips made with exotic materialsScientists inch closer to holy grail of memory breakthroughScientists build a silicon-less computer that use light waves View the full article
-
 Author: Akihiro Suda (NTT) Read-only volume mounts have been a feature of Kubernetes since the beginning. Surprisingly, read-only mounts are not completely read-only under certain conditions on Linux. As of the v1.30 release, they can be made completely read-only, with alpha support for recursive read-only mounts. Read-only volume mounts are not really read-only by default Volume mounts can be deceptively complicated. You might expect that the following manifest makes everything under /mnt in the containers read-only: --- apiVersion: v1 kind: Pod spec: volumes: - name: mnt hostPath: path: /mnt containers: - volumeMounts: - name: mnt mountPath: /mnt readOnly: true However, any sub-mounts beneath /mnt may still be writable! For example, consider that /mnt/my-nfs-server is writeable on the host. Inside the container, writes to /mnt/* will be rejected but /mnt/my-nfs-server/* will still be writeable. New mount option: recursiveReadOnly Kubernetes 1.30 added a new mount option recursiveReadOnly so as to make submounts recursively read-only. The option can be enabled as follows: --- apiVersion: v1 kind: Pod spec: volumes: - name: mnt hostPath: path: /mnt containers: - volumeMounts: - name: mnt mountPath: /mnt readOnly: true # NEW # Possible values are `Enabled`, `IfPossible`, and `Disabled`. # Needs to be specified in conjunction with `readOnly: true`. recursiveReadOnly: Enabled This is implemented by applying the MOUNT_ATTR_RDONLY attribute with the AT_RECURSIVE flag using mount_setattr(2) added in Linux kernel v5.12. For backwards compatibility, the recursiveReadOnly field is not a replacement for readOnly, but is used in conjunction with it. To get a properly recursive read-only mount, you must set both fields. Feature availability To enable recursiveReadOnly mounts, the following components have to be used: Kubernetes: v1.30 or later, with the RecursiveReadOnlyMounts feature gate enabled. As of v1.30, the gate is marked as alpha. CRI runtime: containerd: v2.0 or later OCI runtime: runc: v1.1 or later crun: v1.8.6 or later Linux kernel: v5.12 or later What's next? Kubernetes SIG Node hope - and expect - that the feature will be promoted to beta and eventually general availability (GA) in future releases of Kubernetes, so that users no longer need to enable the feature gate manually. The default value of recursiveReadOnly will still remain Disabled, for backwards compatibility. How can I learn more? Please check out the documentation for the further details of recursiveReadOnly mounts. How to get involved? This feature is driven by the SIG Node community. Please join us to connect with the community and share your ideas and feedback around the above feature and beyond. We look forward to hearing from you! View the full article
 -
 Google has always pioneered the development of large and scalable infrastructure to support its search engine and other products. Its vast network servers have enabled us to store and manage immense volumes of data. As cloud computing gained notoriety, Google expanded its operations and launched Google Cloud Platform (GCP). The Google Cloud Storage (GCS) allows […]View the full article
 -
 Storage-dense workloads need consistent performance, high SSD density, and predictable maintenance that preserves SSD data. Last week at Google Cloud Next ‘24, we announced the general availability of the Z3 machine series, our first storage-optimized VM family. With an industry-leading 6M 100% random-read and 6M write IOPs, an incredibly dense storage configuration of up to 409 SSD (GB) per vCPU and a highmem configuration (1 vCPU : 8 GB RAM), Z3 VMs provide a consistent performance and maintenance experience with minimal disruptions for storage-dense workloads such as horizontal, scale-out databases and log analytics workloads, allowing you to reduce total cost of ownership by offering more storage capacity for fewer cores. The Z3 machine series brings together the enterprise-grade performance and reliability of the 4th Gen Intel Xeon scalable processor (code-named Sapphire Rapids), Google’s custom Intel Infrastructure Processing Unit (IPU), and the latest generation of Local SSD to Google Compute Engine and Google Kubernetes Engine customers. Z3 is also the debut of next generation Local SSD, with up to 3x disk throughput over prior-generation instances and up to 35% lower disk latency. Z3 is ideal for horizontal, scale-out databases, flash-optimized databases, data warehouses, and other applications with dense storage requirements. Initially, Z3 comes in two shapes: 176 vCPU with 1.4T of DDR5 memory, and 88 vCPU with 704 GB of DDR5 memory, both with 36TB of next generation Local SSD. What our customers are saying “Google’s Z3 instances help fulfill Aerospike's commitment to deliver superior cost performance for real-time database users. Our testing shows that they not only meet the high expectations of our mutual customers, but can also reduce their cluster sizes by more than 70%, simplifying their environments and reducing overall costs.” - Srini Srinivasan, Chief Technology Officer, Aerospike “bi(OS) is the real-time database that ‘scales up and scales out.’ GCP’s Z3 instance is the first cloud VM that can unleash its true potential. Over 72 hours, using only three Z3-88 instances, bi(OS) delivered ~164,000 rows/sec of throughput at a mean latency < 32 ms. All inserts (49%), upserts (12%), and selects (39%) were performed with five 9s reliability across three zones.” - Darshan Rawal, Founder and CEO, Isima "When we tested ScyllaDB on the new Z3 instances, ScyllaDB exhibited a significant throughput improvement across workloads versus the previous generation of N2 instances. We observed a 23% increase in write throughput, 24% for mixed workloads, and 14% for reads – and that’s with 8 fewer cores (z3-highmem-88 vs n2-highmem-96). On these new instances, a cluster of just three ScyllaDB nodes can achieve around 2.2M OPS for writes and mixed workloads and around 3.6M OPS for reads. We are excited for the incredible performance and value that these new instances will offer our customers." - Avi Kivity, Co-founder and CTO, ScyllaDB Enhanced maintenance experience Z3 VMs come with a variety of new infrastructure lifecycle technologies that provide tighter control and specificity around maintenance. Z3 VMs receive notice from the system several days in advance of a maintenance event. You can then schedule the maintenance event at a time of your choosing, or default to the scheduled time. This allows you to more predictively plan ahead of a disruptive event, while allowing us to deliver more performant and secure infrastructure. You’ll also receive in-place upgrades that preserve your data through planned maintenance events. Powered by Titanium Z3 VMs are built on Titanium, Google’s system of purpose-built custom silicon, security microcontrollers, and tiered scale-out offloads. The end result is better performance, lifecycle management, reliability, and security for your workloads. Titanium enables Z3 to deliver up to 200 Gbps of fully encrypted networking, 3x faster packet-processing capabilities than prior generation VMs, near-bare-metal performance, integrated maintenance updates for the majority of workloads, and advanced controls for the more sensitive workloads. “Building on our successful partnership with Google Cloud since 2016, we're proud to collaborate on Google Cloud’s first storage-optimized VM family. This collaboration delivers Intel’s 4th Gen Intel Xeon processor and Google’s custom Intel IPU that unlocks new levels of efficiency and performance.” - Suzi Jewett, General Manager - Intel Xeon Products, Intel Corporation Hyperdisk storage Hyperdisk is Google Cloud’s latest-generation block storage. Built on Titanium, Hyperdisk delivers significantly higher levels of performance, flexibility, and efficiency by decoupling storage processing from the virtual machine host. With Hyperdisk, you can dynamically scale storage performance and capacity independently to efficiently meet the storage I/O needs of data-intensive workloads such as data analytics and databases. Now, you don’t have to choose expensive, large compute instances just to get higher storage performance. Get started with Z3 today Z3 VMs are available today in the following regions: us-central1 (Iowa), europe-west4 (Netherlands), and asia-southeast1 (Singapore). To start using Z3 instances, select Z3 under the new Storage-Optimized machine family when creating a new VM or GKE node pool in the Google Cloud console. Learn more at the Z3 machine series page. Contact your Google Cloud sales representative for more information on regional availability. View the full article
 -
 RudderStack isn't just an alternative to Segment, but a different approach for businesses who want to turn their customer data into a competitive advantage.View the full article
 -
 Kubernetes has transformed container Orchestration, providing an effective framework for delivering and managing applications at scale. However, efficient storage management is essential to guarantee the dependability, security, and efficiency of your Kubernetes clusters. Benefits like data loss prevention, regulations compliance, and maintaining operational continuity mitigating threats underscore the importance of security and dependability. This post will examine the best practices for the top 10 Kubernetes storage, emphasizing encryption, access control, and safeguarding storage components. Kubernetes Storage Kubernetes storage is essential to contemporary cloud-native setups because it makes data persistence in containerized apps more effective. It provides a dependable and scalable storage resource management system that guarantees data permanence through migrations and restarts of containers. Among other capabilities, persistent Volumes (PVs) and Persistent Volume Claims (PVCs) give Kubernetes a versatile abstraction layer for managing storage. By providing dynamic provisioning of storage volumes catered to particular workload requirements, storage classes further improve flexibility. Organizations can build and manage stateful applications with agility, scalability, and resilience in various computing settings by utilizing Kubernetes storage capabilities. 1. Data Encryption Sensitive information kept in Kubernetes clusters must be protected with data encryption. Use encryption tools like Kubernetes Secrets to safely store sensitive information like SSH keys, API tokens, and passwords. Encryption both in transit and at rest is also used to further protect data while it is being stored and transmitted between nodes. 2. Use Secrets Management Tools Steer clear of hardcoding private information straight into Kubernetes manifests. Instead, use powerful secrets management solutions like Vault or Kubernetes Secrets to securely maintain and distribute secrets throughout your cluster. This guarantees that private information is encrypted and available only to approved users and applications. 3. Implement Role-Based Access Control (RBAC) RBAC allows you to enforce fine-grained access controls on your Kubernetes clusters. Define roles and permissions to limit access to storage resources using the least privilege concept. This lowers the possibility of data breaches and unauthorized access by preventing unauthorized users or apps from accessing or changing crucial storage components. 4. Secure Persistent Volumes (PVs) and Persistent Volume Claims (PVCs) Ensure that claims and persistent volumes are adequately secured to avoid tampering or unwanted access. Put security rules in place to limit access to particular namespaces or users and turn on encryption for information on persistent volumes. PVs and PVCs should have regular audits and monitoring performed to identify and address any security flaws or unwanted entry attempts. 5. Enable Network Policies To manage network traffic between pods and storage resources, use Kubernetes network policies. To guarantee that only authorized pods and services may access storage volumes and endpoints, define firewall rules restricting communication to and from storage components. This reduces the possibility of data exfiltration and network-based assaults and prevents unauthorized network access. 6. Enable Role-Based Volume Provisioning Utilize Kubernetes’ dynamic volume provisioning features to automate storage volume creation and management. To limit users’ ability to build or delete volumes based on their assigned roles and permissions, utilize role-based volume provisioning. This guarantees the effective and safe allocation of storage resources and helps prevent resource abuse. 7. Utilize Pod Security Policies To specify and implement security restrictions on pods’ access to storage resources, implement pod security policies. To manage pod rights, host resource access, and storage volume interactions, specify security policies. By implementing stringent security measures, you can reduce the possibility of privilege escalation, container escapes, and illegal access to storage components. 8. Regularly Update and Patch Kubernetes Components Monitor security flaws by regularly patching and updating Kubernetes components, including storage drivers and plugins. Keep your storage infrastructure safe from new attacks and vulnerabilities by subscribing to security advisories and adhering to best practices for Kubernetes cluster management. 9. Monitor and Audit Storage Activity To keep tabs on storage activity in your Kubernetes clusters, put extensive logging, monitoring, and auditing procedures in place. To proactively identify security incidents or anomalies, monitor access logs, events, and metrics on storage components. Utilize centralized logging and monitoring systems to see what’s happening with storage in your cluster. 10. Conduct Regular Security Audits and Penetration Testing Conduct comprehensive security audits and penetration tests regularly to evaluate the security posture of your Kubernetes storage system. Find and fix any security holes, incorrect setups, and deployment flaws in your storage system before hackers can exploit them. Work with security professionals and use automated security technologies to thoroughly audit your Kubernetes clusters. Considerations Before putting suggestions for Kubernetes storage into practice, take into account the following: Evaluate Security Requirements: Match storage options with compliance and corporate security requirements. Assess Performance Impact: Recognize the potential effects that resource usage and application performance may have from access controls, encryption, and security rules. Identify Roles and Responsibilities: Clearly define who is responsible for what when it comes to managing storage components in Kubernetes clusters. Plan for Scalability: Recognize the need for scalability and the possible maintenance costs related to implementing security measures. Make Monitoring and upgrades a Priority: To ensure that security measures continue to be effective over time, place a strong emphasis on continual monitoring, audits, and upgrades. Effective storage management is critical for ensuring the security, reliability, and performance of Kubernetes clusters. By following these ten best practices for Kubernetes storage, including encryption, access control, and securing storage components, you can strengthen the security posture of your Kubernetes environment and mitigate the risk of data breaches, unauthorized access, and other security threats. Stay proactive in implementing security measures and remain vigilant against emerging threats to safeguard your Kubernetes storage infrastructure effectively. The post Mastering Kubernetes Storage: 10 Best Practices for Security and Efficiency appeared first on Amazic. View the full article
-
- 1
-

-
- kubernetes
- storage
- (and 11 more)
-
Tech company Western Digital breaks new ground as they have created the world’s first 4TB microSD card for laptops and cameras, the SanDisk Extreme PRO SDUC UHS-1 memory card. The company says the upcoming SanDisk model is set to release next year “and will be showcased at NAB 2024” in Las Vegas. We can infer much about the upcoming card's performance by looking at its name. UHS-1 refers to the Ultra High Speed-1 interface, which boasts a maximum data transfer rate of 104 MB/s, according to AnandTech. High transfer speeds don’t really matter to the average person, as slower cards can meet most people's needs, but speed matters greatly to photographers. Photographers who take a ton of pictures in rapid succession using a camera’s burst mode need SD cards that can keep up with them. Plus, the SanDisk 4TB card reportedly meets Video Speed Class V30, allowing it to support write speeds of 30MB/s. AnandTech states that level of speed is “good enough for 8K video recording.” If you’re going to shoot footage in 8K, you’ll need all the space you can get. Speculation Besides that, very little is known about the SanDisk 4TB card, but its name does offer more interesting tidbits. SDUC, for example, stands for Secure Digital Ultra Capacity, which is a storage standard enabling drives of up to a theoretical maximum of 128TB. AnandTech speculates the device could “support the off-spec DDR200/DDR208 mode” to push transfer rates beyond what UHS-1 can do normally. Speeds can get as high as 170 MB/s, as seen with the SanDisk Extreme Pro SDXC 1TB card. We wouldn’t be surprised if this new card has the same level of performance, if not a better. Of course, that’s assuming Western Digital decides to implement it in the first place. For what it’s worth, the 1TB Extreme Pro card retails for $140 on Amazon at the time of this writing. The 4TB SanDisk card will likely retail for several hundred dollars more. Be sure to check out TechRadar's list of the best SD cards for 2024. Spoiler alert: SanDisk shows up three times. You might also like DJI Avata 2 review – FPV flight has never felt more immersiveThe best cheap camera for 2024: finest budget cameras you can buyDell XPS 14 vs MacBook Pro 14: which is the best option for pros and casual users? View the full article
-
Spectra Logic has introduced the Spectra Cube tape library, a cloud-optimized system for on-premise, hybrid cloud, and IaaS environments that is designed to be quickly deployed, dynamically scaled, and easily serviced without tools or downtime. The Spectra Cube library is managed by the company's recently announced LumOS library management software, which provides secure local and remote management and monitoring. The tower is compatible with LTO-6, LTO-7, LTO-8, and LTO-9 technology generations and will reportedly support LTO-10 when it becomes available. LTO-6 support allows users to read old tapes all the way back to LTO-4 with an LTO-6 tape drive. The solution features high tape cartridge exchange performance, a TeraPack Access Port for easy tape handling, and drive interfaces including Fibre Channel and SAS. Up to 30PB of native capacity With a capacity-on-demand expansion model, the Spectra Cube allows for additional tape slots and drives to be enabled via software without downtime. The library offers up to 30PB of native capacity and supports up to 16 partitions for shared or multi-tenant environments. "As cloud data continues to grow rapidly, the escalating costs of public cloud storage have forced a reckoning, leading to significant interest in moving data to more economical locations including on-prem clouds and hybrid clouds,” said Matt Ninesling, senior director of tape portfolio management at Spectra Logic. “Compared to typical public cloud options, Spectra Cube solutions can cut the costs of cold storage by half or more, while providing better data control and protection from existential threats like ransomware.” The price of a fully-fledged Spectra Cube library ranges from under $60,000 to over $500,000 depending on configuration, number of tape drives, amount of media, and other additions to the base library. More from TechRadar Pro We've rounded up the best cloud storage solutions around today256TB SSDs could land before 2026 using a trick borrowed from tapeRemember VHS era tape? It’s back with a vengeance and a 50TB capacity View the full article
-
 There is no AI without data Artificial intelligence is the most exciting technology revolution of recent years. Nvidia, Intel, AMD and others continue to produce faster and faster GPU’s enabling larger models, and higher throughput in decision making processes. Outside of the immediate AI-hype, one area still remains somewhat overlooked: AI needs data (find out more here). First and foremost, storage systems need to provide high performance access to ever growing datasets, but more importantly they need to ensure that this data is securely stored, not just for the present, but also for the future. There are multiple different types of data used in typical AI systems: Raw and pre-processed data Training data Models Results All of this data takes time and computational effort to collect, process and output, and as such need to be protected. In some cases, like telemetry data from a self-driving car, this data might never be able to be reproduced. Even after training data is used to create a model, its value is not diminished; improvements to models require consistent training data sets so that any adjustments can be fairly benchmarked. Raw, pre-processed, training and results data sets can contain personally identifiable information and as such steps need to be taken to ensure that it is stored in a secure fashion. And more than just the moral responsibility of safely storing data, there can be significant penalties associated with data breaches. Challenges with securely storing AI data We covered many of the risks associated with securely storing data in this blog post. The same risks apply in an AI setting as well. Afterall machine learning is another application that consumes storage resources, albeit sometimes at a much larger scale. AI use cases are relatively new, however the majority of modern storage systems, including the open source solutions like Ceph, have mature features that can be used to mitigate these risks. Physical theft thwarted by data at rest encryption Any disk used in a storage system could theoretically be lost due to theft, or when returned for warranty replacement after a failure event. By using at rest encryption, every byte of data stored on a disk, spinning media, or flash, is useless without the cryptographic keys needed to unencrypt the data. Thus protecting sensitive data, or proprietary models created after hours or even days of processing. Strict access control to keep out uninvited guests A key tenet of any system design is ensuring that users (real people, or headless accounts) have access only to the resources they need, and that at any time that access can easily be removed. Storage systems like Ceph use both their own access control mechanisms and also integrate with centralised auth systems like LDAP to allow easy access control. Eavesdropping defeated by in flight encryption There is nothing worse than someone listening into a conversation that they should not be privy to. The same thing can happen in computer networks too. By employing encryption on all network flows: client to storage, and internal storage system networks no data can be leaked to 3rd parties eavesdropping on the network. Recover from ransomware with snapshots and versioning It seems like every week another large enterprise has to disclose a ransomware event, where an unauthorised 3rd party has taken control of their systems and encrypted the data. Not only does this lead to downtime but also the possibility of having to pay a ransom for the decryption key to regain control of their systems and access to their data. AI projects often represent a significant investment of both time and resources, so having an initiative undermined by a ransomware attack could be highly damaging. Using point in time snapshots or versioning of objects can allow an organisation to revert to a previous non-encrypted state, and potentially resume operations sooner. Learn more Ceph is one storage solution that can be used to store various AI datasets, and is not only scalable to meet performance and capacity requirements, but also has a number of features to ensure data is stored securely. Find out more about how Ceph solves AI storage challenges: Find out more about Ceph here. Additional resources What is Ceph? Blog : Ceph storage for AI Webinar : AI storage with Ceph White paper – A guide to software-defined storage for enterprises Explore Canonical’s AI solutions View the full article
 -
 Seagate has listed the latest BarraCuda 530 PCIe 4.0 SSD on the company's website. View the full article
-
 Introduction Amazon Elastic Container Service (Amazon ECS) has now enhanced its functionalities by integrating support for Amazon Elastic Block Store (Amazon EBS) volume attachment to Amazon ECS tasks. This feature simplifies using Amazon ECS and AWS Fargate with Amazon EBS. Amazon ECS facilitates seamless provisioning and attachment of EBS volumes to ECS tasks on both Fargate and Amazon Elastic Cloud Compute (Amazon EC2) platforms. In Amazon ECS tasks, you have the flexibility to select EBS volume attributes, such as size, type, IOPS, and throughput, tailoring the storage to meet the specific needs of your application. Additionally, the capability to create volumes from snapshots allows for the rapid deployment of new tasks with pre-populated data. With this feature, Amazon ECS streamlines the deployment of storage-heavy and data-intensive applications, such as ETL processes, media transcoding, and machine learning (ML) inference. For a comprehensive understanding of integrating Amazon ECS with Amazon EBS, see Channy Yun’s launch post, which offers detailed guidance on getting started with this integration. In this post, we discuss performance benchmarking results for Fargate tasks using EBS volumes. The goal aims to assess the performance profiles of various EBS volume configurations under simulated workloads. The insights garnered from this analysis can assist you in identifying the optimal storage configurations for I/O intensive workloads. For context, the data and observations presented in this post are specific to the Oregon Region, reflecting the state of the Fargate’s On-Demand data plane as observed in February 2023. Note that the situation might have changed, offering a different landscape today. EBS volume types Amazon EBS offers a range of block storage volumes, leveraging both Solid State Drive (SSD) and Hard Disk Drive (HDD) technologies to cater to different workload requirements: General Purpose SSD volumes (gp2 and gp3) Provisioned IOPS SSD volumes (io1 and io2 Block Express) Throughput Optimized HDD volumes (st1) Cold HDD volumes (sc1) General Purpose SSD volumes are the most commonly used block storage volume. Backed by solid-state drives, these volumes offer a balanced performance for a broad range of transactional workloads, including boot volumes, medium-sized databases, and low-latency interactive applications. They strike an optimal balance between cost and performance, making them suitable for a variety of use cases that demand consistent, moderate IOPS with reliable throughput. Provisioned IOPS SSD io1 and io2 volumes feature solid-state drives, marking them as Amazon EBS’s storage solutions for high IOPS and low latency needs. Both are tailored for critical applications that demand consistent, rapid access, promising IOPS reliability at a 99.9% rate, suitable for high-performance databases and applications. However, io2 differentiates itself by offering increased durability, larger capacity options, and consistent latency. However, both volumes serve distinct needs depending on the specific requirements of the workload, making sure of flexibility in choice. Throughput Optimized HDD st1 volumes are designed to offer low-cost magnetic storage prioritized for throughput over IOPS. These volumes align with the needs of workloads that benefit from large, sequential reads and writes, making them ideal for processes such as big data analytics, log processing, and data warehousing. Cold HDD sc1 volumes, similar to st1 volumes, focus on throughput but at a more economical rate and with a lower threshold. Best suited for less frequently accessed, sequential cold data, these volumes represent a lowest-cost solution for storage needs that don’t demand constant access. Testing methodology We tested each EBS volume type across multiple Fargate task sizes with XFS. The baseline EBS volume IOPS and throughput available for a Fargate task depend on the total CPU units you request. The difference in storage performance is clear in the results. For example, tasks with 16 vCPUs provide higher IOPS and throughput as compared to tasks with 0.25 vCPUs. To make sure of a thorough examination, we explored a spectrum of Fargate task sizes, ranging from tasks allocated with 0.25 vCPUs up to those with 16 vCPUs, across the following configurations: .25 vCPU | 1 GB .5 vCPU | 2 GB 1 vCPU | 4 GB 2 vCPU | 6 GB 4 vCPU | 8 GB 8 vCPU | 16 GB 16 vCPU | 32 GB Our testing methodology for General Purpose SSD and Provisioned IOPS SSD volumes involved conducting 16 KB random read and write operations, adhering to the guidelines specified in the EBS documentation. For tasks equipped with Throughput Optimized HDD or Cold HDD volumes, our approach entailed executing 1 MiB sequential read and write operations to better gauge their performance under workload conditions typical for these storage types. By repeating each test three times and calculating the mean values, we aimed to make sure of the reliability and accuracy of our performance measurements. General purpose SSD – gp3 volumes Given the versatility and price-to-performance ratio of gp3, we expect this volume type to be the most commonly used block storage for Fargate tasks. gp3 volumes deliver a baseline performance of 3,000 IOPS and 125 MiB/s at any volume size. Fargate supports gp3 volumes with support for a maximum of 16,000 IOPS and 1,000 MiB throughput. We performed tests on gp3 volumes configured with 2,000 GiB size, 16,000 IOPS, and 1000 MiB/s throughput to guarantee maximum storage performance. General purpose SSD – gp3 volumes Given the versatility and price-to-performance ratio of gp3, we expect this volume type to be the most commonly used block storage for Fargate tasks. gp3 volumes deliver a baseline performance of 3,000 IOPS and 125 MiB/s at any volume size. Fargate supports gp3 volumes with support for a maximum of 16,000 IOPS and 1,000 MiB throughput. We performed tests on gp3 volumes configured with 2,000 GiB size, 16,000 IOPS, and 1000 MiB/s throughput to guarantee maximum storage performance. We learned Fargate offers consistent IOPS performance across most task sizes. Tasks with 0.25 vCPU and 1 GB memory are an outlier in this group, as they do not deliver the maximum 16,000 IOPS. Task sizes from 1 vCPU onward achieve the maximum configured IOPS. Tasks with 0.25 vCPU couldn’t go beyond 200 MiB/s and 150 MiB/s in read and write tests respectively. General Purpose SSD – gp2 volumes We recommend customers opt for gp3 volumes over gp2 for several reasons. Firstly, gp3 volumes allow for the provisioning of IOPS independently from storage capacity, offering more flexibility. Secondly, they are more cost-effective, with a 20% lower price per GB compared to gp2 volumes. The gp2 volume performance relies on a burst bucket model, where the size of the volume dictates its baseline IOPS. This baseline determines the rate at which the volume accumulates throughput credits. For those customers with specific needs, Fargate continues to support gp2 volumes. Our decision to include gp2 volumes in our benchmarking was straightforward, as our testing setup was already compatible. We benchmarked gp2 volumes at a size of 6,000 GiB. At this size, gp2 volumes can achieve 16,000 IOPS, the maximum for gp2, due to the volume size proportionally influencing the IOPS allocation. The IOPS performance on gp2 volumes was consistent across all task sizes except 0.5 and 0.25 vCPUs. Tasks with 1 vCPU and larger achieved maximum provisioned throughput of 16,000 IOPS. Throughput performance on gp2 was very similar to gp3 volumes. The test results offer another proof of why customers should prefer gp3 over gp2. Provisioned IOPS SSD – io1 volumes Amazon EBS io1 volumes are ideal for both IOPS-intensive and throughput-intensive workloads that require low latency and have moderate durability requirements or include built-in application redundancy. io1 and io2 volume types provide higher throughput and IOPS compared to gp3 volumes. We performed tests on io1 volumes configured with 2,000 GiB size and 64,000 IOPS Only tasks with 8 or more vCPUs achieved more than 20,000 IOPS. Even though the io1 volumes attached to the tasks supported up to 64,000 IOPS, none of the tasks approached the maximum IOPS mark in our tests. Considering these results, gp3 may turn out to be more cost-effective storage for tasks with fewer than 8 vCPUs. Tasks with io1 volumes reported more I/O throughput as compared with gp3. For applications that need higher throughput and IOPS, io1 volumes are more suitable. All tasks, except 0.25 vCPU, achieved at least 300 MiB/s of throughput. Compare this to gp3, which achieved a maximum of 260 MiB/s. Provisioned IOPS SSD – io2 Block Express volumes Amazon EBS io2 Block Express offers the highest performance block storage in the cloud with 4x higher throughput, IOPS, and capacity than gp3 volumes, along with sub-millisecond latency. io2 Block Express is designed to provide 4,000 MB/s throughput per volume, 256,000 IOPS/volume, up to 64 TiB storage capacity, and 1,000 IOPS per GB as well as 99.999% durability. The io2 volumes we used in benchmarking had 2,000 GiB size and 10,000 IOPS. io2 volumes attained more IOPS on Fargate than io1 volumes on tasks with more vCPUs. However, the IOPS performance of io1 and io2 volumes is identical for tasks with less than 8 vCPUs. Even tasks with 8 and 16 vCPUs achieved about 40,000 IOPS on io2 volumes with 10,000K provisioned IOPS. Note that random write performance on tasks with io2 volumes was much higher than io1, but it’s only applicable for larger tasks. The throughput scaling with task size observed with io2 volumes is similar to that of io1, with io2 volumes demonstrating higher write throughput. Note that in most scenarios, io2 is a more advantageous choice over io1. Although both volume types start at the same price point, io2’s tiered IOPS pricing model makes it a more cost-effective option for configurations requiring high IOPS. Throughput Optimized HDD – st1 Throughput Optimized HDD (st1) volumes provide low-cost magnetic storage that defines performance in terms of throughput rather than IOPS. This volume type is a good fit for large, sequential workloads, such as Amazon EMR, ETL, data warehouses, and log processing. st1 volumes offer low-cost storage for workloads that need large and sequential I/O. Like gp2, st1 uses a burst bucket model for performance. Volume size determines the baseline throughput of your volume, which is the rate at which the volume accumulates throughput credits. st1 volumes provide burst throughput of up to 500 MiB/s. We configured st1 volumes with 13,000 GiB size, which results in a base throughput of 500 MiB/s. st1 volumes are throughput optimized, throughput is a more appropriate measurement of performance. We’ve included IOPS results to be consistent. To summarize, all tasks with over 1 vCPU attain about 500 IOPS. st1 offers consistent throughput across most task sizes. Although io1 and io2 provide over 500 MiB/s throughput on tasks with 8 and 16 vCPUs, st1 offers about 500 MiB/s throughput on most task sizes. This makes st1 better suited for workloads that need higher throughput with smaller task sizes. Cold HDD – sc1 volumes Cold HDD (sc1) volumes provide low-cost magnetic storage that, like st1, defines performance in terms of throughput rather than IOPS. sc1 volumes have lower throughput than st1, making them ideal for large, sequential cold-data workloads. sc1 (such as gp2 and st1) also uses a burst bucket model. Volume size determines the baseline throughput. We maxed the size of sc1 volumes to 16 TiB storage in order to guarantee the maximum throughput of 192 MiB/s. All sc1 volumes have burst throughput of 250 MiB/s. Our tests showed that sc1 volumes achieved about half of the IOPS when compared to st1 volumes. Once again, tasks with one and more vCPUs had consistent IOPS performance. sc1 volumes reported about half of the throughput when compared to st1 volumes. Given that sc1 volumes cost a third of a similarly sized st1 volume, sc1 volumes are great for workloads that need infrequent access to data. Conclusion This post reviewed Amazon EBS performance across different Fargate task sizes. It found that for the majority of workloads on Fargate, gp3 volumes, aptly named for their general-purpose use, are appropriate. However, it is advised against using io1 and io2 volumes for tasks requesting 0.25, 0.5, or 1 vCPU due to insufficient CPU cycles to leverage their potential for more than 30,000 IOPS and 300 MiB throughput. Instead, these high-performance volumes are recommended for workloads requiring significant IOPS and throughput. For tasks needing sequential I/O, st1 volumes, or the more economical sc1 volumes, are also beneficial. View the full article
 -
 You can add/mount an SMB/CIFS share from your Windows OS or NAS device on Proxmox VE as storage for storing ISO images, container images, VM disk images, backups, etc. In this article, I am going to show you how to add a Windows SMB/CIFS share on Proxmox VE as storage. Table of Contents: Adding an SMB/CIFS Share as Storage on Proxmox VE Accessing the SMB/CIFS Storage on Proxmox VE Conclusion Adding an SMB/CIFS Share as Storage on Proxmox VE: To add an SMB/CIFS share on Proxmox VE as storage, navigate to Datacenter > Storage and click on Add > SMB/CIFS as marked in the screenshot below. Type in an ID/name for the SMB/CIFS storage[1], the domain name or IP address of the SMB/CIFS server[2], and the login username[3] and password[4] of the SMB/CIFS server. If all the details are correct, you should be able to select the SMB/CIFS share you want to add to Proxmox VE from the Share dropdown menu[5]. You can also add a subdirectory of the SMB/CIFS share on Proxmox VE. To do that, type in a subdirectory path in the Subdirectory section[6]. From the Content dropdown menu, you can select the type of data you want to store on the SMB/CIFS share. Disk image: If selected, the disks of the Proxmox VE virtual machines can be stored on this storage. ISO image: If selected, the ISO installation images of different operating systems can be stored on this storage. Container template: If selected, the LXC container template files can be stored on this storage. VZDump backup file: If selected, the Proxmox VE virtual machine and container backups can be stored on this storage. Container: If selected, the disks of the Proxmox VE LXC containers can be stored on this storage. Snippets: If selected, you can store Proxmox VE snippets on this storage. Once you’re done, click on Add. A new SMB/CIFS storage should be added to Proxmox VE[1]. You can also find the mount path of the SMB/CIFS share in the Datacenter > Storage section[2]. The SMB/CIFS storage should also be displayed in the Proxmox VE server tree[3]. Accessing the SMB/CIFS Storage on Proxmox VE: You can access only the Proxmox VE contents stored on the SMB/CIFS storage from the Proxmox VE dashboard. In the Summary section of the SMB/CIFS storage, you will see usage information of the SMB/CIFS storage. For each selected content, you will see respective sections in the SMB/CIFS storage. For example, for ISO image content type, I have a section ISO Images on my SMB/CIFS storage nas-datastore that shows all the ISO installation images that I have stored on the SMB/CIFS storage. You can access all the files of the SMB/CIFS storage on your Proxmox VE server from the command line. In this case, the nas-datastore SMB/CIFS storage is mounted in the path /mnt/pve/nas-datastore and all the files of the SMB/CIFS storage are available in that mount path. Conclusion: In this article, I have shown you how to add an SMB/CIFS share as storage on Proxmox VE. I have also shown you how to access the SMB/CIFS storage on Proxmox VE. View the full article
 -
Disk Station Manager v7 (DSM 7) is the operating system of Synology NAS devices. You can configure the Let’s Encrypt SSL certificates for your Synology NAS from the DSM 7 web interface. By default, Synology DSM 7 uses the HTTP-01 challenge to verify the ownership of the domain (that you want to use for your Synology NAS) and issue an SSL certificate for the domain. But the HTTP-01 challenge won’t work unless you have a public IP address and your computer is accessible from the internet. So, if you want to use the Let’s Encrypt SSL certificates for your home network or private network, you have to use the DNS-01 challenge instead. When the DNS-01 challenge is used, Let’s Encrypt verifies the ownership of the domain using the DNS server of the domain. So, it works for private networks as well. Sadly, the Synology DSM 7 web interface does not provide any way of obtaining the Let’s Encrypt SSL certificates using the DNS-01 challenge. Luckily, the “acme.sh” program can be installed on your Synology NAS and is used to generate and renew the Let’s Encrypt SSL certificates using the DNS-01 challenge. In this article, we will show you the following: How to install “sh” on your Synology NAS How to use “acme.sh” to generate a Let’s Encrypt SSL certificate (via the DNS-01 challenge) for the domain name that you’re using on your Synology NAS How to install the “acme.sh” generated Let’s Encrypt SSL certificate on your Synology NAS How to configure the DSM 7 operating system of your Synology NAS to use the generated Let’s Encrypt SSL certificate How to configure your Synology NAS to automatically renew the generated Let’s Encrypt SSL certificates using “acme.sh” NOTE: In this article, we will use the CloudFlare DNS server for demonstration. You can use other DNS services that are supported by acme.sh as well. All you have to do is make the necessary adjustments. Topic of Contents: Creating a Certadmin User on Synology NAS Configuring the CloudFlare DNS Server for LetsEncrypt DNS-01 Challenge Configuring Other DNS Services for LetsEncrypt DNS-01 Challenge Accessing the Synology NAS Terminal via SSH Downloading Acme.sh on Your Synology NAS Installing Acme.sh on Your Synology NAS Generating a Let’s Encrypt SSL Certificate Using Acme.sh for Your Synology NAS Installing the Let’s Encrypt SSL Certificate on Your Synology NAS Using Acme.sh Setting the Let’s Encrypt SSL Certificate as Default on Your Synology NAS Configure Synology NAS to Auto Renew a Let’s Encrypt SSL Certificate Using Acme.sh Conclusion References Creating a Certadmin User on Synology NAS First, you should create a new admin user on your Synology NAS to generate and renew the Let’s Encrypt SSL certificates. To create a new admin user on Synology NAS, click on Control Panel[1] > User & Group[2] from the DSM 7 web interface. Click on “Create” from the “User” tab. Type in “certadmin” as the user name[1], an optional short description for the user[2], the user login password[3], and click on “Next”[4]. To create an admin user, tick the “administrators” group from the list[1] and click on “Next”[2]. Click on “Next”. Click on “Next”. Click on “Next”. Click on “Next”. Click on “Done”. The certadmin user should now be created on your Synology NAS. Configuring the CloudFlare DNS Server for Let’s Encrypt DNS-01 Challenge To use the CloudFlare DNS server for the Let’s Encrypt DNS-01 challenge, you need to generate a CloudFlare DNS token. You can generate a CloudFlare DNS server token from the CloudFlare dashboard. For more information, read this article. Configuring Other DNS Services for Let’s Encrypt DNS-01 Challenge “Acme.sh” supports other DNS services. If you don’t want to use the CloudFlare DNS, you can use any one of the “acme.sh” supported DNS services. The configuration is a little bit different for different DNS services. For more information, check the “acme.sh” DNS API guide. Accessing the Synology NAS Terminal via SSH To install “acme.sh” and generate and install a Let’s Encrypt SSL certificate on your Synology NAS, you need to access the Terminal of your Synology NAS. For more information on enabling the SSH access on your Synology NAS and accessing the Terminal of your Synology NAS, read this article. Once you enabled the SSH access on your Synology NAS, open a terminal app on your computer and run the following command: $ ssh certadmin@<ip-domain-of-your-synology-nas> You will be asked to type in the login password of the certadmin user. Type in the login password of the certadmin user of your Synology NAS and press on <Enter>. You should be logged in to your Synology NAS as the certadmin user. Downloading Acme.sh on Your Synology NAS To download the latest version of the “acme.sh” client, run the following command: $ wget -O /tmp/acme.sh.zip https://github.com/acmesh-official/acme.sh/archive/master.zip The latest version of the “acme.sh” client archive “acme.sh.zip” should be downloaded in the “/tmp” directory of your Synology NAS. Installing Acme.sh on Your Synology NAS To extract the “/tmp/acme.sh.zip” archive in the “/usr/local/share” directory of your Synology NAS, run the following command and type in the login password of the certadmin user and press <Enter> when prompted for the password. The “/tmp/acme.sh.zip” archive should be extracted in the “/usr/local/share/acme.sh-master” directory. $ sudo 7z x -o /usr/local/share /tmp/acme.sh.zip For simplicity, rename the “acme.sh-master” directory to just “acme.sh” with the following command: $ sudo mv -v /usr/local/share/acme.sh-master /usr/local/share/acme.sh To make the certadmin user owner of the “/usr/local/share/acme.sh” directory and its contents, run the following command: $ sudo chown -Rfv certadmin /usr/local/share/acme.sh Generating a Let’s Encrypt SSL Certificate Using Acme.sh for Your Synology NAS To generate a Let’s Encrypt SSL certificate for the domain name that you’re using on your Synology NAS, navigate to the “/usr/local/share/acme.sh” directory as follows: $ cd /usr/local/share/acme.sh Now, you need to export the required DNS API token environment variables. We use the CloudFlare DNS to manage the domain name that we are using on our Synology NAS. So, for us, all we have to do is export the CF_Token environment variable with the value of the CloudFlare DNS API token. If you’re using some other DNS service, check the “acme.sh” DNS API documentation for the variables that you need to export for “acme.sh” to work with your DNS service. $ export CF_Token="<CloudFlare DNS API Token>" Also, export the required Synology environment variables so that “acme.sh” can install the generated SSL certificates on your Synology NAS. $ export SYNO_Username="certadmin" $ export SYNO_Password="Your_certadmin_login_Password" $ export SYNO_Certificate="Let’s Encrypt" $ export SYNO_Create=1 To generate a Let’s Encrypt SSL certificate for the “*.nodekite.com” (wildcard) domain name using the CloudFlare DNS plugin (–dns dns_cf), run the following command: $ ./acme.sh --server letsencrypt --issue --dns dns_cf --home $PWD -d "*.nodekite.com" NOTE: If you’re using other DNS services, you need to change the DNS plugin (–dns <dns-plugin-name>) in the previous command accordingly. For more information, check the “acme.sh” DNS API documentation. A Let’s Encrypt SSL certificate is being generated. It takes a while to complete. At this point, the Let’s Encrypt SSL certificate should be generated. Installing the Let’s Encrypt SSL Certificate on Your Synology NAS Using Acme.sh Once the Let’s Encrypt SSL certificate is generated for the domain name (*.nodekite.com in this case) of your Synology NAS, you can install it on your Synology NAS with the following command: $ ./acme.sh -d "*.nodekite.com" --deploy --deploy-hook synology_dsm --home $PWD If you have a two-factor authentication enabled for the certadmin user, you will receive an OTP code. You have to type in the OTP code and press <Enter>. If you don’t have the two-factor authentication enabled for the certadmin user, leave it empty and press <Enter>. Press <Enter>. The generated Let’s Encrypt SSL certificate should be installed on your Synology NAS. Once the Let’s Encrypt SSL certificate is installed on your Synology NAS, it will be displayed on the Control Panel > Security > Certificate section of the DSM 7 web interface of your Synology NAS. Setting the Let’s Encrypt SSL Certificate as Default on Your Synology NAS To manage the SSL certificates of your Synology NAS, navigate to the Control Panel > Security > Certificate section from the DSM 7 web interface of your Synology NAS. To set the newly installed Let’s Encrypt SSL certificate as the default so that the newly installed web services on your Synology NAS will use it by default, select the Let’s Encrypt SSL certificate and click on Action > Edit. Tick on “Set as default certificate”[1] and click on “OK”[2]. The Let’s Encrypt SSL certificate should be set as the default certificate for your Synology NAS. To configure the existing web services of your Synology NAS to use the Let’s Encrypt SSL certificate, click on “Settings”. As you can see, all the web services are using the Synology self-signed SSL certificate. To change the SSL certificate for a web service, click on the respective drop-down menu from the right. Then, select the Let’s Encrypt SSL certificate that you want to use for the web service from the drop-down menu. In the same way, select the Let’s Encrypt SSL certificate for all the installed web services of your Synology NAS and click on “OK”. Click on “Yes”. The changes are being applied. It takes a few seconds to complete. Once the Let’s Encrypt SSL certificate is applied to all the web services of your Synology NAS, refresh the web page and your DSM 7 web interface should use the Let’s Encrypt SSL certificate. Configuring Synology NAS to Auto Renew the Let’s Encrypt SSL Certificate Using Acme.sh To configure your Synology NAS to automatically renew the Let’s Encrypt SSL certificate, navigate to Control Panel > Task Scheduler from the DSM 7 web interface. From the Task Scheduler, click on Create > Scheduled Task > User-defined script. From the “General” tab, type in “Renew SSL Certs” in the “Task” section[1] and select “certadmin” from the “User” dropdown menu[2]. From the “Schedule” tab, select “Run on the following date”[1] and select “Repeat monthly” from the “Repeat” dropdown menu[2]. Navigate to the “Task Settings” tab, type in the following command in the “User-defined script” section [1], and click on “OK”[2]. /usr/local/share/acme.sh/acme.sh –renew –server letsencrypt -d “*.nodekite.com” –home /usr/local/share/acme.sh A new task should be created. The “Renew SSL Certs” task will run every month and make sure that the Let’s Encrypt SSL certificate is renewed before it expires. Conclusion In this article, we showed you how to install and use the “acme.sh” ACME client to generate a Let’s Encrypt SSL certificate via the DNS-01 challenge on your Synology NAS. We also showed you how to install the generated Let’s Encrypt SSL certificate on your Synology NAS and configure the web services of your Synology NAS to use it. Finally, we showed you how to configure a scheduled task on your Synology NAS to automatically renew the Let’s Encrypt SSL certificate before it expires. References: Synology DSM 7 with Lets Encrypt and DNS Challenge Automatically renew Let’s Encrypt certificates on Synology NAS using DNS-01 challenge acmesh-official/acme.sh: A pure Unix shell script implementing ACME client protocol View the full article
-
Sunday, March 31st, 2024, is World Backup Day — and some of the biggest storage manufacturers celebrate with great deals on SSDs and more. View the full article
-
The iPhone 15 offers "lots of storage for lots of photos," or at least that's what Apple boasts in its latest ad. Whether that rings true for you depends on what you do with your iPhone, and which storage option you choose. But before you open your wallet, here are some things to consider. The entry-level storage tier for the iPhone 15 is 128GB. That's a notable increase from the 64GB baseline that persisted until the iPhone 13 in 2021. When you consider that 2018's iPhone X came with as little as 64GB, the base storage option for Apple's latest device might even begin to sound generous. However, this generational upward shift simply reflects the growing demand for more storage space as our digital habits broaden to encompass everything from high-resolution photography and multi-gigabyte triple-A games to extensive app libraries. With the iPhone 15's camera capabilities now including 48-megapixel photos and 4K video recording, the space required for these high-resolution files is substantial. These advancements undoubtedly enhance the quality of content captured, but they also eat up local storage capacity, rendering what once seemed like ample space insufficient for the needs of many users. iCloud to the Rescue? Apple's iCloud service presents a solution to device storage limitations, offering a range of plans that extend beyond the meager 5GB of free storage – which, frankly, is insufficient for most users. Apple's paid iCloud+ storage subscription plans offer 50GB, 200GB, and 2TB. All the plans include additional features like iCloud Private Relay, Hide My Email, and Custom Email Domains. Currently, subscribers pay $0.99 per month for 50GB of cloud storage, $2.99 per month for 200GB, and $9.99 per month for 2 TB. Recently, Apple also added options for 6TB and 12TB of storage, addressing the needs of users with extensive storage requirements. However, these come at a cost, both financially and in terms of the reliance on an internet connection for access to your files. The 6TB iCloud+ plan is priced at $29.99 per month and the 12TB plan costs $59.99 per month. (For comparison, Google's 5TB and 10TB cloud storage plans cost $24.99 and $49.99 per month.) iPhone Storage vs. iCloud While the standard iPhone 15 models and the iPhone 15 Pro models start with 128GB of storage, Apple offers 256GB and 512GB upgrade options, with an additional 1TB option for the iPhone 15 Pro. (The iPhone 15 Pro Max models start with double the storage at 256GB, with 512GB and 1TB available when upgrading.) By offering a maximum capacity of 1TB for the iPhone 15 Pro, Apple is catering to users who prioritize having vast amounts of storage directly on their device. However, this option costs $1,499, which is $700 more expensive than the base model. Therefore it's worth thinking about whether opting for a lower capacity model and supplementing it with additional iCloud storage might be a more economical and practical choice. For example, five years of 2TB iCloud storage would cost $500 – that's $200 cheaper than a 1TB iPhone 15, and could well outlast the lifetime of your device. Whatever your decision, it will depend on your usage patterns and the value you place on having immediate, offline access to your files versus the flexibility and potential cost savings of cloud storage. The Future of iPhone Storage Given the current trajectory, it seems only reasonable that Apple increases the starting capacity of all its iPhone models to 256GB in future generations. Hopefully it also reassesses the paltry 5GB of free iCloud storage it offers – a more generous allocation that reflects the reality of modern digital consumption patterns is surely overdue. This article, "Is 128GB Enough iPhone Storage?" first appeared on MacRumors.com Discuss this article in our forums View the full article
-
Data will soon be able to be stored in DNA. French startup Biomemory has already shipped a DNA storage device to the general public. Now the DNA Data Storage Alliance, a technology affiliate of the Storage Networking Industry Association (SNIA), has unveiled the first specifications for storing vendor and CODEC information within a DNA data archive. Unlike traditional storage mediums such as tape, HDD, and SSD, DNA lacks a fixed physical structure, necessitating a unique mechanism for reading or "booting up" a DNA archive. The SNIA DNA Archive Rosetta Stone (DARS) working group has developed two specifications, Sector Zero and Sector One, to enable archive readers to find the sequence to begin booting up the data. Getting closer Sector Zero provides the minimal information needed for the archive reader to identify the CODEC used to encode Sector One and the company that synthesized the DNA. Sector One includes information such as a description of contents, a file table, and parameters to transfer to a sequencer. “A key goal of the DNA Data Storage Alliance is to set and publish specifications and standards that allow an interoperable DNA data storage ecosystem to grow,” said Dave Landsman, of the DNA Data Storage Alliance Board of Directors. While there’s still a long way to go before DNA storage becomes the norm, Landsman believes we’re much closer to it than you might imagine. “With the publishing of the Alliance’s first specifications, we take an important step in achieving that goal,” he said. “Sector Zero and Sector One are now publicly available, allowing companies working in the space to adopt and implement.” More from TechRadar Pro DNA storage finally reaches mainstream (well, sort of)1200TB SSD modules are in the pipeline thanks to Pure StorageThis is what a ceramic cartridge with a 10,000TB capacity looks like View the full article
-
The demand for high capacity, high performance storage is crazy right now, driven primarily by AI/ML training and analytics. Traditional storage solutions, which can handle tens of terabyte capacity, are no longer deemed sufficient as modern applications require storage capacity in excess of 10PB. Samsung previously said it hopes to release a Petabyte SSD within a decade, but it has since hinted that dizzying milestone may be reached sooner. At the start of the year the tech giant announced plans for a Petabyte SSD subscription – PBSSD-as-a-service – although this is not a Petabyte SSD but rather a box housing multiple SSDs. While the exact details of Samsung’s PBSSD were vague at the time (four 256TB SSDs, revealed at Flash Memory Summit 2023, were our best guess), we now have our first look at what the company is offering: the PB SSD v2. Maximum performance The server is based on the 4th Generation AMD EPYC CPU, using a single socket to offer 32 to 84 cores and 128 PCIe Gen 5 lanes. The design allows for high capacity, with the server holding 16 E3.s data SSDs, each providing up to 15.36TB of storage, for a maximum of 244TB in a 1 RU chassis. Samsung has future plans to support 1PB in a 2 RU chassis, but hasn't revealed when that will arrive. The tech giant says the PB SSD v2 uses the NVMe protocol and connects the 16 SSDs directly to the PCIe interface of the server CPU for maximum performance. By eliminating the need for retimers and PCIe switches, it can deliver sequential reads of 232GB/s, sequential writes of 98GB/s, random reads of 9550 KIOPS, and sustained random writes of 5075 KIOPS. Fewer components also mean less power draw, making the server more energy-efficient. Advanced power management and built-in power consumption reporting capabilities further enhance its energy efficiency; Samsung says it is aiming to reduce the TCO of storage without sacrificing performance. As mentioned previously, Samsung is also introducing a cloud-like business model, offering affordable monthly subscriptions for the PB SSD v2, reducing upfront costs of storage. Customers can order the desired capacity in increments of 244TB and choose a subscription duration of 1, 3, or 5 years at a fixed monthly fee. More from TechRadar Pro Samsung to showcase the world’s fastest GDDR7 memorySamsung beats Micron to 36GB HBM3E memoryHuawei has a game-changing 10 Petabyte storage product View the full article
-
Qumulo has launched Azure Native Qumulo Cold (ANQ Cold), which it claims is the first truly cloud-native, fully managed SaaS solution for storing and retrieving infrequently accessed “cold” file data. Fully POSIX-compliant and positioned as an on-premises alternative to tape storage, ANQ Cold can be used as a standalone file service, a backup target for any file store, including on-premises legacy scale-out NAS, and it can be integrated into a hybrid storage infrastructure, enabling access to remote data as if it were local. It can also scale to an exabyte-level file system in a single namespace. “ANQ Cold is an industry game changer for economically storing and retrieving cold file data,” said Ryan Farris, VP of Product at Qumulo. “To put this in perspective with a common use case, hospital IT administrators in charge of PACS archival data can use ANQ Cold for the long-term retention of DICOM images at a fraction of their current on-premises legacy NAS costs, while still being able to instantly retrieve over 200,000 DICOM images per month without extra data retrieval charges common to native cloud services.” Insurance against ransomware ANQ Cold also provides a robust, secure copy of critical data as insurance against ransomware attacks. Kiran Bhageshpur, CTO at Qumulo said. “In combination with our cryptographically signed snapshots, customers can create an instantly accessible “daily golden” copy of their on-premises NAS data, Qumulo or legacy scale-out NAS storage. There is simply no other solution that is as affordable on an on-going basis while also allowing customers to recover to a known good state and resume operations as quickly as with ANQ Cold.” The service is priced at from $9.95 per TB per month (depending on where in the world you are). Customers receive 5TB of data retrieval each month, with additional retrieval charged at $0.03/GB. The minimum data limit is for 250TB a month, however, with minimum billable amount of $2487.50 per month. There is also a minimum 120-day retention period. You can start a free trial today. More from TechRadar Pro These are the best free cloud storage servicesGoogle One is hiding one of its best-value cloud storage plansBox gets even smarter with Azure OpenAI Service integration View the full article
-
Amazon Elastic File System (Amazon EFS) has increased the throughput per file system to up to 20 GiB/s of read throughput and up to 5 GiB/s of write throughput. View the full article
-
We’ve written previously about some of the technology that powers the Las Vegas Sphere, including the 16K interior LED screen, and the ultra-high resolution 18K camera system. Now, details have emerged of the storage employed by the massive music and entertainment arena located east of the Las Vegas Strip. Everything about the Sphere is bleeding edge, and Hitachi Vantara has detailed how its software technology processes Sphere's original and immersive content and helps stream it to both the 160,000 square-foot interior LED display and 580,000 square-foot Exosphere. Hitachi Content Software for File, which Hitachi describes as a “high-performance, software-defined, distributed parallel filesystem storage solution” is an integral part of things. It consists of 27 nodes, with 4PB of flash storage for playback within Sphere. Postcard from Earth The system streams content in real-time to 7thSense media servers, each streaming 4K video at 60 frames per second. As you might expect, this is a world-first in terms of technology capability at this scale. "Sphere represents a new, completely immersive and visually powerful entertainment experience," said Octavian Tanase, Chief Product Officer, Hitachi Vantara. "To make sure that the technology behind it was ready to meet the challenge, Hitachi Vantara worked closely with the Sphere team to test, measure, and enhance how the data is processed, streamed, and projected. Quality-wise, the resolution and color are second to none, and this project has exceeded our already high expectations." For Darren Aronofsky's original immersive film, Postcard from Earth, the system had to handle over 400GB/s of throughput at sub 5 milliseconds of latency and a 12-bit color display at a 444 subsampling. "Sphere is home to many firsts, one of which is streaming immersive, high-resolution video content on a scale that has never been done before," added Alex Luthwaite, SVP, Show Systems Technology, Sphere Entertainment. "Hitachi Vantara worked with our team to develop a solution that's fast, reliable, and efficient." More from TechRadar Pro Las Vegas Sphere uses Matrox technology to power a staggering 256 million pixelsThe inside of the world’s largest spherical screen is jaw-droppingFirm behind software used by Nvidia unveils own supercomputer View the full article
-
Today's best flash drives are faster and speedier than ever. We've tested dozens to find the best. View the full article
-
AWS Systems Manager Fleet Manager now provides a new toolset that aims to streamline on-instance volume management by providing an easy GUI based way to manage EBS volumes on your Windows Instances. With this new Fleet Manager capability, customers can readily browse the set of volumes attached to an instance identify volume mount points in the instance file system, view metadata for attached disks and mount as well as format unused EBS volumes. View the full article
-
 Microsoft's Azure storage is a powerful solution for securely storing, managing, and accessing various types of data in the cloud. Whether you're dealing with images, videos, or structured data, Azure Storage provides a scalable and reliable platform to meet your storage needs. To harness the full potential of Azure Storage, you need an efficient way to interact with your data and resources. That's where Azure Storage Explorer comes into play. When used alongside Azure Functions, Azure Storage Explorer streamlines and automates data workflows and event-driven processes... View the full article
 -
 In this How to Make Tech Work tutorial, Jack Wallen shows how to create a Docker volume that can be used for any number of containers. View the full article
 -
KVM virtualization technology supports various disk image formats. Two of the most popular and widely used disk formats are qcow2 and raw disk images. The View the full article


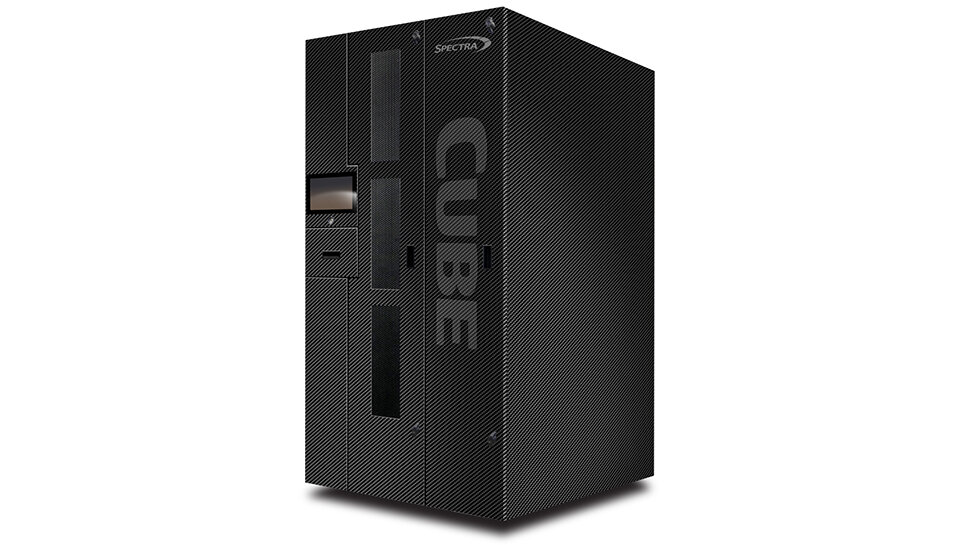
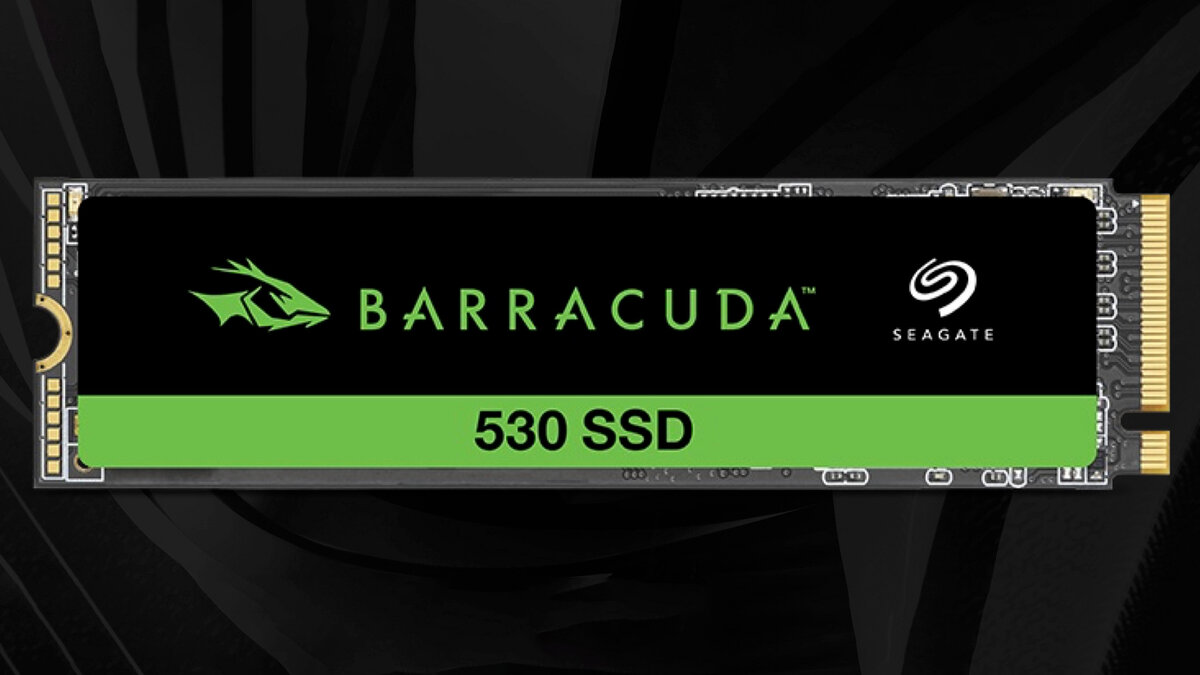


-
Forum Statistics
43.3k
Total Topics42.7k
Total Posts