.png.6dd3056f38e93712a18d153891e8e0fc.png.1dbd1e5f05de09e66333e631e3342b83.png.933f4dc78ef5a5d2971934bd41ead8a1.png)
Search the Community
Showing results for tags 'pcie'.
Found 6 results
-
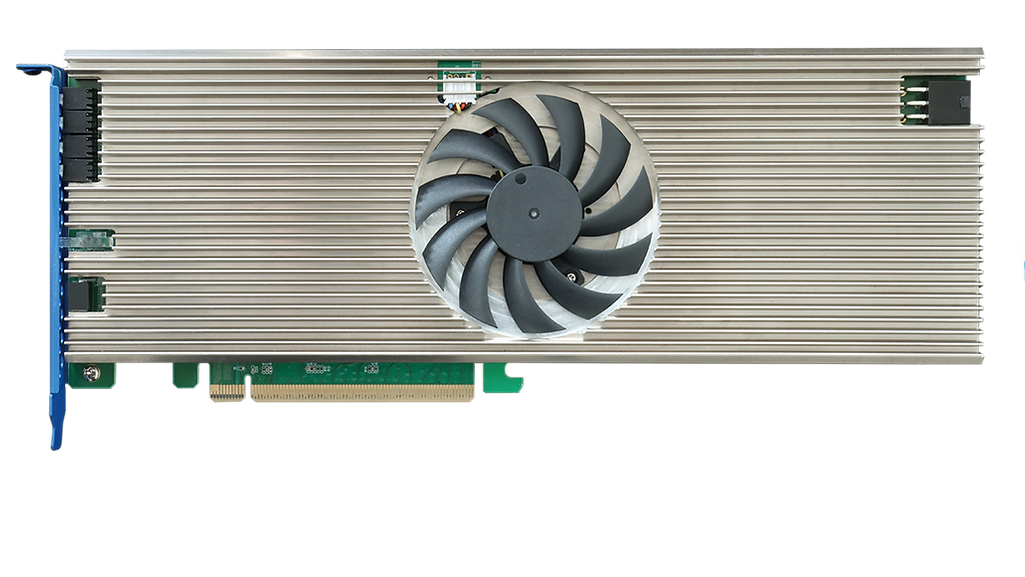
 HighPoint has unveiled the industry’s first 8-Channel PCIe Gen5 x16 NVMe Switch and NVMe RAID product lines. Powered by Broadcom’s PEX89048 IC, these are designed to cater to high-demand, data-intensive applications and integrate Broadcom’s Gen5 PCIe switching technology to utilize x16 lanes of Gen5 host bandwidth, direct from the CPU, across Intel and AMD platforms. HighPoint says this unique architecture enables each AIC/Adapter to maximize transfer performance for up to 8 independent device channels, and support as many as 32 NVMe devices via backplane connectivity. Synthetic Hierarchy The Rocket 1600 series NVMe Switch uses native inbox drivers, meaning that a 2PB solution is possible using Solidigm 61.44TB SSDs, providing they already work with the system in question. HighPoint's PCIe Gen5 NVMe AICs high-performance switching architecture integrates Broadcom’s 48-Channel PEX89048 switch IC to provide x16 lanes of dedicated PCIe Gen5 upstream bandwidth, ensuring x4 lanes of downstream bandwidth are available for each NVMe device channel. HighPoint says “The innovative hardware architecture enables our Gen5 NVMe product series to deliver up to 64GB/s of transfer bandwidth, minimize latency, facilitate consistent, robust I/O throughput.” The PCIe Gen5 and Gen4 Switching Architecture employs a technique known as a “Synthetic Hierarchy” to isolate the host system’s operating system from any PCIe physical changes. It enables the AIC/Adapter to directly manage resource allocation to the downstream PCIe channels and provide true hot-swap /hot-plug capability. The NVMe Switch Series consists of the Rocket 1628A, which is a PCIe Gen5 x16 to 4-MCIOx8 NVMe switch adapter, the Rocket 1608A, a PCIe Gen5 x16 to 8-M.2x4 NVMe switch AIC, and the Rocket 1528D, a PCIe Gen4 x16 to 4-SlimSASx8 NVMe switch adapter. HighPoint’s RocketRAID 7600 PCIe Gen5 NVMe RAID AICs and Adapters are built on the foundation of the Rocket 1600 Switch series, and provide RAID capabilities using HighPoint’s drivers, which are compatible with qualified NVMe drives from the company’s ecosystem partners. The Rocket 7600 Series AICs/Adapters can directly support up to eight M.2 or U.2/U.3/E3.S NVMe SSDs. The NVMe RAID Series includes the Rocket 7628A, a PCIe Gen5 x16 to 4-MCIOx8 NVMe RAID adapter, the Rocket 7608A which is a PCIe Gen5 x16 to 8-M.2x4 NVMe RAID AIC, and the Rocket 7528D, a PCIe Gen4 x16 to 4-SlimSASx8 NVMe RAID adapter. HighPoint says its PCIe Gen5 NVMe AICs will begin shipping globally in Q3 2024. More from TechRadar Pro These are the best SSDs available now61.44TB Solidigm SSD finally goes on sale1200TB SSD modules are in the pipeline thanks to Pure Storage View the full article
-
Ampere Computing unveiled its AmpereOne Family of processors last year, boasting up to 192 single-threaded Ampere cores, which was the highest in the industry. These chips, designed for cloud efficiency and performance, were Ampere's first product based on its new custom core leveraging internal IP, signalling a shift in the sector, according to CEO Renée James. At the time of the launch, James said, "Every few decades of compute there has emerged a driving application or use of performance that sets a new bar of what is required of performance. The current driving uses are AI and connected everything combined with our continued use and desire for streaming media. We cannot continue to use power as a proxy for performance in the data center. At Ampere, we design our products to maximize performance at a sustainable power, so we can continue to drive the future of the industry." AmpereOne-3 on its way Jeff Wittich, chief product officer at Ampere, recently spoke with The Next Platform about future generations of AmpereOne. He told the site that an updated chip, with 12 memory channels and an A2 core with improved performance, would be out later this year in keeping with the company's roadmap. This chip, which The Next Platform calls AmpereOne-2, will reportedly have a 33 percent increase in DDR5 memory controllers and up to 50 percent more memory bandwidth. However, what’s coming up beyond that, at some point in 2025, sounds the most exciting. The Next Platform says the third generation chip, AmpereOne-3 as it is calling it, will have 256 cores and be “etched in 3 nanometer (3N to be precise) processes from TSMC”. It will use a modified A2+ core with a “two-chiplet design on the cores, with 128 cores per chiplet. It could be a four-chiplet design with 64 cores per chiplet.” The site expects the AmpereOne-3 will support PCI-Express 6.0 I/O controllers and maybe have a dozen DDR5 memory controllers, although there’s some speculation here. “We have been moving pretty fast on the on the compute side,” Wittich told the site. “This design has got about a lot of other cloud features in it – things around performance management to get the most out of all of those cores. In each of the chip releases, we are going to be making what would generally be considered generational changes in the CPU core. We are adding a lot in every single generation. So you are going to see more performance, a lot more efficiency, a lot more features like security enhancements, which all happen at the microarchitecture level. But we have done a lot to ensure that you get great performance consistency across all of the AmpereOnes. We are also taking a chiplet approach with this 256-core design, which is another step as well. Chiplets are a pretty big part of our overall strategy.” The AmpereOne-3 is reportedly being etched at TSMC right now, prior to its launch next year. More from TechRadar Pro How Ampere Computing plans to ride the AI waveAmpere's new workstation could bring in a whole new dawn for developersPlucky CPU maker beats AMD and Intel to become first to offer 320 cores per server View the full article
-
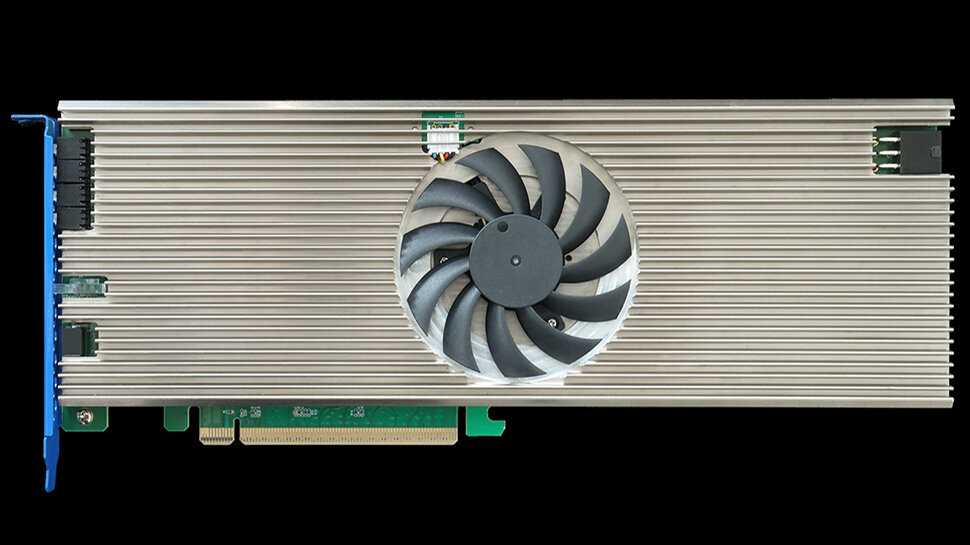
 HighPoint releases NVMe Gen 5-tailored RAID controller cards with a throughput of up to 56 GB/s. View the full article
-
 Proxmox VE 8 is one of the best open-source and free Type-I hypervisors out there for running QEMU/KVM virtual machines (VMs) and LXC containers. It has a nice web management interface and a lot of features. One of the most amazing features of Proxmox VE is that it can passthrough PCI/PCIE devices (i.e. an NVIDIA GPU) from your computer to Proxmox VE virtual machines (VMs). The PCI/PCIE passthrough is getting better and better with newer Proxmox VE releases. At the time of this writing, the latest version of Proxmox VE is Proxmox VE v8.1 and it has great PCI/PCIE passthrough support. In this article, I am going to show you how to configure your Proxmox VE 8 host/server for PCI/PCIE passthrough and configure your NVIDIA GPU for PCIE passthrough on Proxmox VE 8 virtual machines (VMs). Table of Contents Enabling Virtualization from the BIOS/UEFI Firmware of Your Motherboard Installing Proxmox VE 8 Enabling Proxmox VE 8 Community Repositories Installing Updates on Proxmox VE 8 Enabling IOMMU from the BIOS/UEFI Firmware of Your Motherboard Enabling IOMMU on Proxmox VE 8 Verifying if IOMMU is Enabled on Proxmox VE 8 Loading VFIO Kernel Modules on Proxmox VE 8 Listing IOMMU Groups on Proxmox VE 8 Checking if Your NVIDIA GPU Can Be Passthrough to a Proxmox VE 8 Virtual Machine (VM) Checking for the Kernel Modules to Blacklist for PCI/PCIE Passthrough on Proxmox VE 8 Blacklisting Required Kernel Modules for PCI/PCIE Passthrough on Proxmox VE 8 Configuring Your NVIDIA GPU to Use the VFIO Kernel Module on Proxmox VE 8 Passthrough the NVIDIA GPU to a Proxmox VE 8 Virtual Machine (VM) Still Having Problems with PCI/PCIE Passthrough on Proxmox VE 8 Virtual Machines (VMs)? Conclusion References Enabling Virtualization from the BIOS/UEFI Firmware of Your Motherboard Before you can install Proxmox VE 8 on your computer/server, you must enable the hardware virtualization feature of your processor from the BIOS/UEFI firmware of your motherboard. The process is different for different motherboards. So, if you need any assistance in enabling hardware virtualization on your motherboard, read this article. Installing Proxmox VE 8 Proxmox VE 8 is free to download, install, and use. Before you get started, make sure to install Proxmox VE 8 on your computer. If you need any assistance on that, read this article. Enabling Proxmox VE 8 Community Repositories Once you have Proxmox VE 8 installed on your computer/server, make sure to enable the Proxmox VE 8 community package repositories. By default, Proxmox VE 8 enterprise package repositories are enabled and you won’t be able to get/install updates and bug fixes from the enterprise repositories unless you have bought Proxmox VE 8 enterprise licenses. So, if you want to use Proxmox VE 8 for free, make sure to enable the Proxmox VE 8 community package repositories to get the latest updates and bug fixes from Proxmox for free. Installing Updates on Proxmox VE 8 Once you’ve enabled the Proxmox VE 8 community package repositories, make sure to install all the available updates on your Proxmox VE 8 server. Enabling IOMMU from the BIOS/UEFI Firmware of Your Motherboard The IOMMU configuration is found in different locations in different motherboards. To enable IOMMU on your motherboard, read this article. Enabling IOMMU on Proxmox VE 8 Once the IOMMU is enabled on the hardware side, you also need to enable IOMMU from the software side (from Proxmox VE 8). To enable IOMMU from Proxmox VE 8, you have the add the following kernel boot parameters: Processor Vendor Kernel boot parameters to add Intel intel_iommu=on, iommu=pt AMD iommu=pt To modify the kernel boot parameters of Proxmox VE 8, open the /etc/default/grub file with the nano text editor as follows: $ nano /etc/default/grub At the end of the GRUB_CMDLINE_LINUX_DEFAULT, add the required kernel boot parameters for enabling IOMMU depending on the processor you’re using. As I am using an AMD processor, I have added only the kernel boot parameter iommu=pt at the end of the GRUB_CMDLINE_LINUX_DEFAULT line in the /etc/default/grub file. Once you’re done, press <Ctrl> + X followed by Y and <Enter> to save the /etc/default/grub file. Now, update the GRUB boot configurations with the following command: $ update-grub2 Once the GRUB boot configurations are updated, click on Reboot to restart your Proxmox VE 8 server for the changes to take effect. Verifying if IOMMU is Enabled on Proxmox VE 8 To verify whether IOMMU is enabled on Proxmox VE 8, run the following command: $ dmesg | grep -e DMAR -e IOMMU If IOMMU is enabled, you will see some outputs confirming that IOMMU is enabled. If IOMMU is not enabled, you may not see any outputs. You also need to have the IOMMU Interrupt Remapping enabled for PCI/PCIE passthrough to work. To check if IOMMU Interrupt Remapping is enabled on your Proxmox VE 8 server, run the following command: $ dmesg | grep 'remapping' As you can see, IOMMU Interrupt Remapping is enabled on my Proxmox VE 8 server. NOTE: Most modern AMD and Intel processors will have IOMMU Interrupt Remapping enabled. If for any reason, you don’t have IOMMU Interrupt Remapping enabled, there’s a workaround. You have to enable Unsafe Interrupts for VFIO. Read this article for more information on enabling Unsafe Interrupts on your Proxmox VE 8 server. Loading VFIO Kernel Modules on Proxmox VE 8 The PCI/PCIE passthrough is done mainly by the VFIO (Virtual Function I/O) kernel modules on Proxmox VE 8. The VFIO kernel modules are not loaded at boot time by default on Proxmox VE 8. But, it’s easy to load the VFIO kernel modules at boot time on Proxmox VE 8. First, open the /etc/modules-load.d/vfio.conf file with the nano text editor as follows: $ nano /etc/modules-load.d/vfio.conf Type in the following lines in the /etc/modules-load.d/vfio.conf file. vfio vfio_iommu_type1 vfio_pci Once you’re done, press <Ctrl> + X followed by Y and <Enter> to save the changes. Now, update the initramfs of your Proxmox VE 8 installation with the following command: $ update-initramfs -u -k all Once the initramfs is updated, click on Reboot to restart your Proxmox VE 8 server for the changes to take effect. Once your Proxmox VE 8 server boots, you should see that all the required VFIO kernel modules are loaded. $ lsmod | grep vfio Listing IOMMU Groups on Proxmox VE 8 To passthrough PCI/PCIE devices on Proxmox VE 8 virtual machines (VMs), you will need to check the IOMMU groups of your PCI/PCIE devices quite frequently. To make checking for IOMMU groups easier, I decided to write a shell script (I got it from GitHub, but I can’t remember the name of the original poster) in the path /usr/local/bin/print-iommu-groups so that I can just run print-iommu-groups command and it will print the IOMMU groups on the Proxmox VE 8 shell. First, create a new file print-iommu-groups in the path /usr/local/bin and open it with the nano text editor as follows: $ nano /usr/local/bin/print-iommu-groups Type in the following lines in the print-iommu-groups file: #!/bin/bash shopt -s nullglob for g in `find /sys/kernel/iommu_groups/* -maxdepth 0 -type d | sort -V`; do echo "IOMMU Group ${g##*/}:" for d in $g/devices/*; do echo -e "\t$(lspci -nns ${d##*/})" done; done; Once you’re done, press <Ctrl> + X followed by Y and <Enter> to save the changes to the print-iommu-groups file. Make the print-iommu-groups script file executable with the following command: $ chmod +x /usr/local/bin/print-iommu-groups Now, you can run the print-iommu-groups command as follows to print the IOMMU groups of the PCI/PCIE devices installed on your Proxmox VE 8 server: $ print-iommu-groups As you can see, the IOMMU groups of the PCI/PCIE devices installed on my Proxmox VE 8 server are printed. Checking if Your NVIDIA GPU Can Be Passthrough to a Proxmox VE 8 Virtual Machine (VM) To passthrough a PCI/PCIE device to a Proxmox VE 8 virtual machine (VM), it must be in its own IOMMU group. If 2 or more PCI/PCIE devices share an IOMMU group, you can’t passthrough any of the PCI/PCIE devices of that IOMMU group to any Proxmox VE 8 virtual machines (VMs). So, if your NVIDIA GPU and its audio device are on its own IOMMU group, you can passthrough the NVIDIA GPU to any Proxmox VE 8 virtual machines (VMs). On my Proxmox VE 8 server, I am using an MSI X570 ACE motherboard paired with a Ryzen 3900X processor and Gigabyte RTX 4070 NVIDIA GPU. According to the IOMMU groups of my system, I can passthrough the NVIDIA RTX 4070 GPU (IOMMU Group 21), RTL8125 2.5Gbe Ethernet Controller (IOMMU Group 20), Intel I211 Gigabit Ethernet Controller (IOMMU Group 19), a USB 3.0 controller (IOMMU Group 24), and the Onboard HD Audio Controller (IOMMU Group 25). $ print-iommu-groups As the main focus of this article is configuring Proxmox VE 8 for passing through the NVIDIA GPU to Proxmox VE 8 virtual machines, the NVIDIA GPU and its Audio device must be in its own IOMMU group. Checking for the Kernel Modules to Blacklist for PCI/PCIE Passthrough on Proxmox VE 8 To passthrough a PCI/PCIE device on a Proxmox VE 8 virtual machine (VM), you must make sure that Proxmox VE forces it to use the VFIO kernel module instead of its original kernel module. To find out the kernel module your PCI/PCIE devices are using, you will need to know the vendor ID and device ID of these PCI/PCIE devices. You can find the vendor ID and device ID of the PCI/PCIE devices using the print-iommu-groups command. $ print-iommu-groups For example, the vendor ID and device ID of my NVIDIA RTX 4070 GPU is 10de:2786 and it’s audio device is 10de:22bc. To find the kernel module a PCI/PCIE device 10de:2786 (my NVIDIA RTX 4070 GPU) is using, run the lspci command as follows: $ lspci -v -d 10de:2786 As you can see, my NVIDIA RTX 4070 GPU is using the nvidiafb and nouveau kernel modules by default. So, they can’t be passed to a Proxmox VE 8 virtual machine (VM) at this point. The Audio device of my NVIDIA RTX 4070 GPU is using the snd_hda_intel kernel module. So, it can’t be passed on a Proxmox VE 8 virtual machine at this point either. $ lspci -v -d 10de:22bc So, to passthrough my NVIDIA RTX 4070 GPU and its audio device on a Proxmox VE 8 virtual machine (VM), I must blacklist the nvidiafb, nouveau, and snd_hda_intel kernel modules and configure my NVIDIA RTX 4070 GPU and its audio device to use the vfio-pci kernel module. Blacklisting Required Kernel Modules for PCI/PCIE Passthrough on Proxmox VE 8 To blacklist kernel modules on Proxmox VE 8, open the /etc/modprobe.d/blacklist.conf file with the nano text editor as follows: $ nano /etc/modprobe.d/blacklist.conf To blacklist the kernel modules nouveau, nvidiafb, and snd_hda_intel kernel modules (to passthrough NVIDIA GPU), add the following lines in the /etc/modprobe.d/blacklist.conf file: blacklist nouveau blacklist nvidiafb blacklist snd_hda_intel Once you’re done, press <Ctrl> + X followed by Y and <Enter> to save the /etc/modprobe.d/blacklist.conf file. Configuring Your NVIDIA GPU to Use the VFIO Kernel Module on Proxmox VE 8 To configure the PCI/PCIE device (i.e. your NVIDIA GPU) to use the VFIO kernel module, you need to know their vendor ID and device ID. In this case, the vendor ID and device ID of my NVIDIA RTX 4070 GPU and its audio device are 10de:2786 and 10de:22bc. To configure your NVIDIA GPU to use the VFIO kernel module, open the /etc/modprobe.d/vfio.conf file with the nano text editor as follows: $ nano /etc/modprobe.d/vfio.conf To configure your NVIDIA GPU and its audio device with the <vendor-id>:<device-id> 10de:2786 and 10de:22bc (let’s say) respectively to use the VFIO kernel module, add the following line to the /etc/modprobe.d/vfio.conf file. options vfio-pci ids=10de:2786,10de:22bc Once you’re done, press <Ctrl> + X followed by Y and <Enter> to save the /etc/modprobe.d/vfio.conf file. Now, update the initramfs of Proxmove VE 8 with the following command: $ update-initramfs -u -k all Once initramfs is updated, click on Reboot to restart your Proxmox VE 8 server for the changes to take effect. Once your Proxmox VE 8 server boots, you should see that your NVIDIA GPU and its audio device (10de:2786 and 10de:22bc in my case) are using the vfio-pci kernel module. Now, your NVIDIA GPU is ready to be passed to a Proxmox VE 8 virtual machine. $ lspci -v -d 10de:2786 $ lspci -v -d 10de:22bc Passthrough the NVIDIA GPU to a Proxmox VE 8 Virtual Machine (VM) Now that your NVIDIA GPU is ready for passthrough on Proxmox VE 8 virtual machines (VMs), you can passthrough your NVIDIA GPU on your desired Proxmox VE 8 virtual machine and install the NVIDIA GPU drivers depending on the operating system that you’re using on that virtual machine as usual. For detailed information on how to passthrough your NVIDIA GPU on a Proxmox VE 8 virtual machine (VM) with different operating systems installed, read one of the following articles: How to Passthrough an NVIDIA GPU to a Windows 11 Proxmox VE 8 Virtual Machine (VM) How to Passthrough an NVIDIA GPU to a Ubuntu 24.04 LTS Proxmox VE 8 Virtual Machine (VM) How to Passthrough an NVIDIA GPU to a LinuxMint 21 Proxmox VE 8 Virtual Machine (VM) How to Passthrough an NVIDIA GPU to a Debian 12 Proxmox VE 8 Virtual Machine (VM) How to Passthrough an NVIDIA GPU to an Elementary OS 8 Proxmox VE 8 Virtual Machine (VM) How to Passthrough an NVIDIA GPU to a Fedora 39+ Proxmox VE 8 Virtual Machine (VM) How to Passthrough an NVIDIA GPU on an Arch Linux Proxmox VE 8 Virtual Machine (VM) How to Passthrough an NVIDIA GPU on a Red Hat Enterprise Linux 9 (RHEL 9) Proxmox VE 8 Virtual Machine (VM) Still Having Problems with PCI/PCIE Passthrough on Proxmox VE 8 Virtual Machines (VMs)? Even after trying everything listed in this article correctly, if PCI/PCIE passthrough still does not work for you, be sure to try out some of the Proxmox VE PCI/PCIE passthrough tricks and/or workarounds that you can use to get PCI/PCIE passthrough work on your hardware. Conclusion In this article, I have shown you how to configure your Proxmox VE 8 server for PCI/PCIE passthrough so that you can passthrough PCI/PCIE devices (i.e. your NVIDIA GPU) to your Proxmox VE 8 virtual machines (VMs). I have also shown you how to find out the kernel modules that you need to blacklist and how to blacklist them for a successful passthrough of your desired PCI/PCIE devices (i.e. your NVIDIA GPU) to a Proxmox VE 8 virtual machine. Finally, I have shown you how to configure your desired PCI/PCIE devices (i.e. your NVIDIA GPU) to use the VFIO kernel modules, which is also an essential step for a successful passthrough of your desired PCI/PCIE devices (i.e. your NVIDIA GPU) to a Proxmox VE 8 virtual machine (VM). References PCI(e) Passthrough – Proxmox VE PCI Passthrough – Proxmox VE The ultimate gaming virtual machine on proxmox – YouTube View the full article
 -
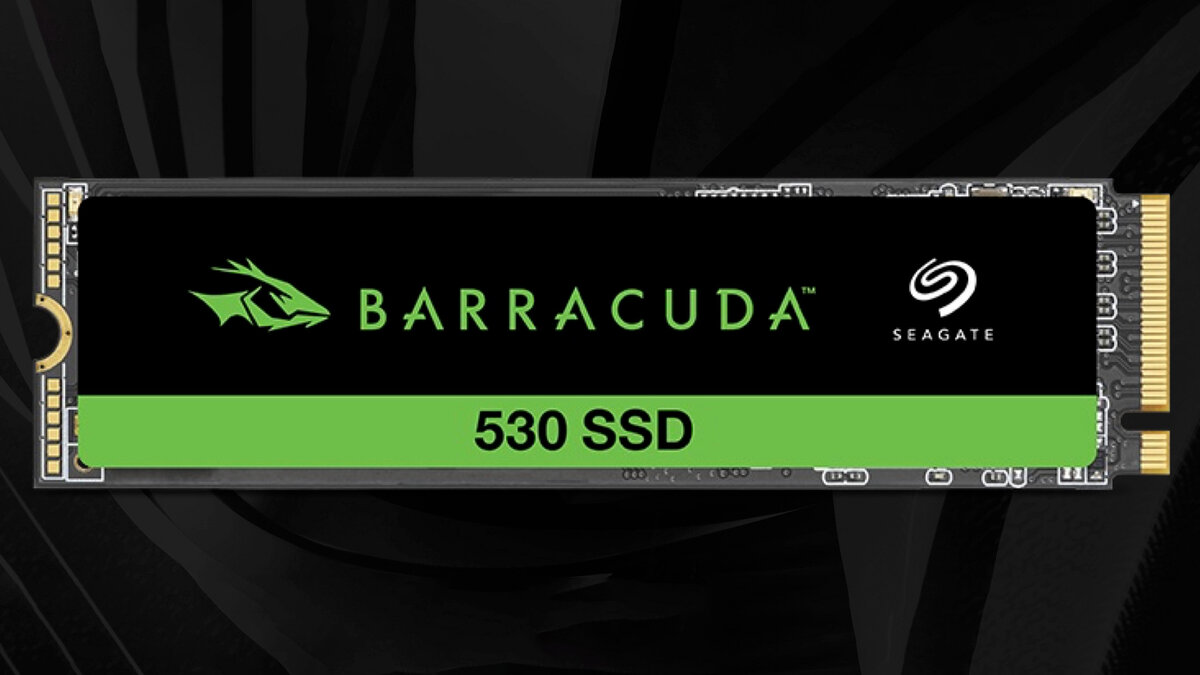
Seagate has listed the latest BarraCuda 530 PCIe 4.0 SSD on the company's website. View the full article
-
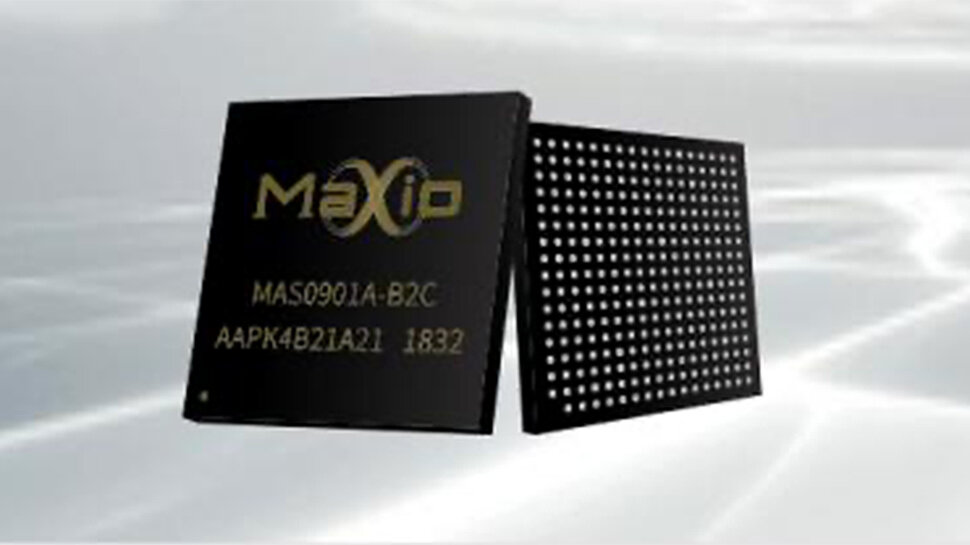
Chinese developer of SSD controllers rolls out a PCIe 5.0 x4 controllers for SSDs capable of 14.8 GB/s. View the full article

-
Forum Statistics
43.9k
Total Topics43.4k
Total Posts