.png.6dd3056f38e93712a18d153891e8e0fc.png.1dbd1e5f05de09e66333e631e3342b83.png.933f4dc78ef5a5d2971934bd41ead8a1.png)
Search the Community
Showing results for tags 'gpus'.
-
 The city government in Beijing has outlined plans to subsidize companies that buy Chinese-made processors. Its draft policy has a strong emphasis on GPUs, as they have been most badly affected by US export controls View the full article
-
Manor Lords was the most wishlisted game on Steam prior to its launch today. We've tested the initial early release version on a collection of 25 graphics cards to see just how much GPU horsepower you'll need to run the game well. View the full article
-
 PyTorch's flexibility and dynamic nature make it a popular choice for deep learning researchers and practitioners. Developed by Google, XLA is a specialized compiler designed to optimize linear algebra computations – the foundation of deep learning models. PyTorch/XLA offers the best of both worlds: the user experience and ecosystem advantages of PyTorch, with the compiler performance of XLA. PyTorch/XLA stack diagram We are excited to launch PyTorch/XLA 2.3 this week. The 2.3 release brings with it even more productivity, performance and usability improvements. Why PyTorch/XLA? Before we get into the release updates, here’s a short overview of why PyTorch/XLA is great for model training, fine-tuning and serving. The combination of PyTorch and XLA provides key advantages: Easy Performance: Retain PyTorch's intuitive, pythonic flow while gaining significant and easy performance improvements through the XLA compiler. For example, PyTorch/XLA produces a throughput of 5000 tokens/second while finetuning Gemma and Llama 2 7B models and reduces the cost of serving down to $0.25 per million tokens. Ecosystem advantage: Seamlessly access PyTorch's extensive resources, including tools, pretrained models, and its large community. These benefits underscore the value of PyTorch/XLA. Lightricks shares the following feedback on their experience with PyTorch/XLA 2.2: "By leveraging Google Cloud’s TPU v5p, Lightricks has achieved a remarkable 2.5X speedup in training our text-to-image and text-to-video models compared to TPU v4. With the incorporation of PyTorch XLA’s gradient checkpointing, we’ve effectively addressed memory bottlenecks, leading to improved memory performance and speed. Additionally, autocasting to bf16 has provided crucial flexibility, allowing certain parts of our graph to operate on fp32, optimizing our model’s performance. The XLA cache feature, undoubtedly the highlight of PyTorch XLA 2.2, has saved us significant development time by eliminating compilation waits. These advancements have not only streamlined our development process, making iterations faster but also enhanced video consistency significantly. This progress is pivotal in keeping Lightricks at the forefront of the generative AI sector, with LTX Studio showcasing these technological leaps." - Yoav HaCohen, Research team lead, Lightricks What's in the 2.3 release: Distributed training, dev experience, and GPUs PyTorch/XLA 2.3 keeps us current with PyTorch Foundation's 2.3 release from earlier this week, and offers notable upgrades from PyTorch/XLA 2.2. Here's what to expect: 1. Distributed training improvements SPMD with FSDP: Fully Sharded Data Parallel (FSDP) support enables you to scale large models. The new Single Program, Multiple Data (SPMD) implementation in 2.3 integrates compiler optimizations for faster, more efficient FSDP. Pallas integration: For maximum control, PyTorch/XLA + Pallas lets you write custom kernels specifically tuned for TPUs. 2. Smoother development SPMD auto-sharding: SPMD automates model distribution across devices. Auto-sharding further simplifies this process, eliminating the need for manual tensor distribution. In this release, this feature is experimental, supporting XLA:TPU and single-host training. PyTorch/XLA autosharding architecture Distributed checkpointing: This makes long training sessions less risky. Asynchronous checkpointing saves your progress in the background, protecting against potential hardware failures. 3. Hello, GPUs! SPMD XLA: GPU support: We have extended the benefits of SPMD parallelization to GPUs, making scaling easier, especially when handling large models or datasets. Start planning your upgrade PyTorch/XLA continues to evolve, streamlining the creation and deployment of powerful deep learning models. The 2.3 release emphasizes improved distributed training, a smoother development experience, and broader GPU support. If you're in the PyTorch ecosystem and seeking performance optimization, PyTorch/XLA 2.3 is worth exploring! Stay up-to-date, find installation instructions or get support on the official PyTorch/XLA repository on GitHub: https://github.com/pytorch/xla PyTorch/XLA is also well-integrated into the AI Hypercomputer stack that optimizes AI training, fine-tuning and serving performance end-to-end at every layer of the stack: Ask your sales representative about how you can apply these capabilities within your own organization. View the full article
 -
OpenCL is an open-source library for running compute tasks on GPUs. OpenCL enables 3D hardware acceleration for supported applications (i.e. LibreOffice) using the GPU hardware (i.e. Intel iGPU) you have installed on your computer. So, unless OpenCL is installed, OpenCL-supported applications (i.e. LibreOffice) will not have hardware acceleration enabled and may not perform well (i.e. UI might be laggy) as a result. So, it’s a good idea to install OpenCL on your newly installed Fedora 40 (or later) desktop operating system. In this article, I am going to show you how to install OpenCL for your Intel iGPU on Fedora 40 (or later). Table of Contents Updating DNF Package Repository Cache on Fedora Installing OpenCL for Intel GPU on Fedora Checking if OpenCL is Working on Fedora Conclusion References Updating DNF Package Repository Cache on Fedora To update the DNF package repository cache on Fedora 40 (and future versions), run the following command: $ sudo dnf makecache Installing OpenCL for Intel GPU on Fedora To install OpenCL libraries for Intel GPUs, run the following command: $ sudo dnf install intel-compute-runtime intel-opencl To confirm the installation, press Y and then press <Enter>. OpenCL for Intel GPU is being installed. It will take a few seconds to complete. OpenCL libraries for Intel GPU should be installed on your Fedora system. For the changes to take effect, restart your computer with the following command: $ sudo reboot Checking if OpenCL is Working on Fedora To check if OpenCL is working on your Fedora system, run the command below: $ clinfo -l If OpenCL is working, your Intel GPU should be listed as an OpenCL device as shown in the screenshot below. Conclusion In this article, I have shown you how to install OpenCL for Intel GPU on your Fedora 40 (or later) operating system so that OpenCL-supported applications can perform better using OpenCL hardware acceleration on Fedora. References GPGPU – ArchWiki View the full article
-
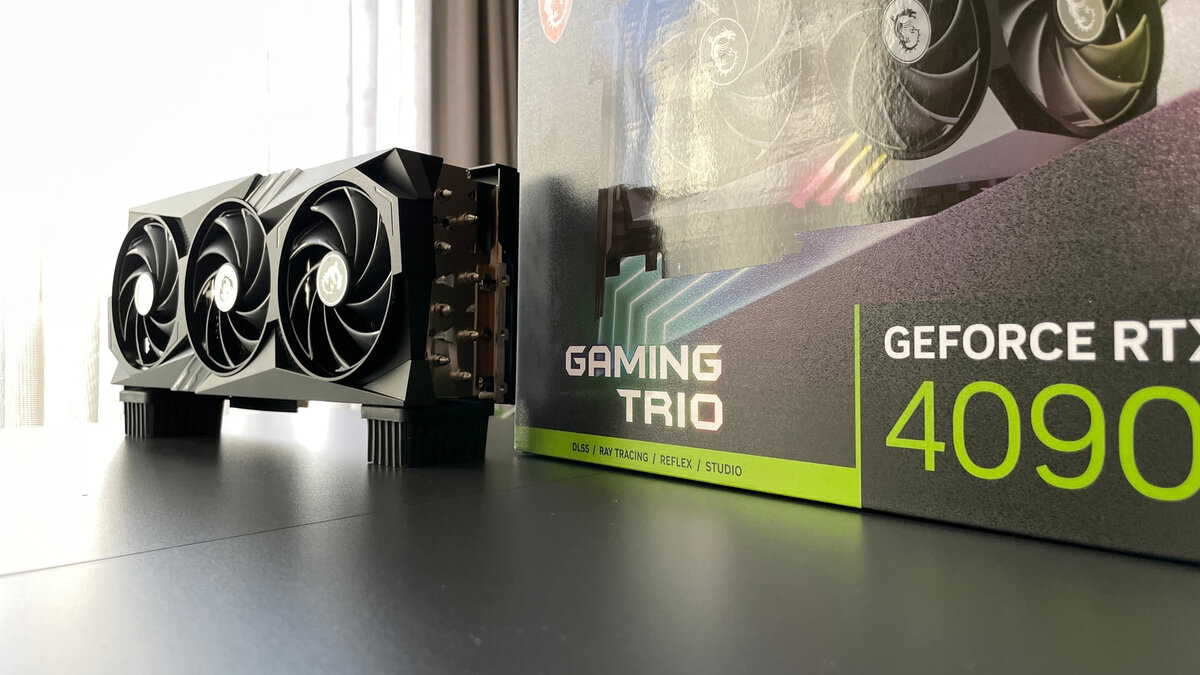
X user Jiacheng Liu got his hands on an early GeForce GTX 2070 engineering sample and benchmarked it. View the full article
-
Nvidia's Blackwell architecture is on the horizon, set to power the RTX 50-series graphics cards. We've gathered together what we know as well as rumors of what to expect from the next generation GPUs, including potential specs and release dates. Here's everything we know about Nvidia Blackwell GPUs. View the full article
-
A user on the ChipHell forums has posted supposed specs and leaked details of AMD's upcoming Strix Halo mobile APU, boasting 16 Zen 5 CPU cores, LPDDR5X memory, and more GPU cores than AMD's RX 7600 XT. View the full article
-
Beefed-up Nvidia A100 (Ampere) GPUs have emerged in the Chinese second-hand market. These GPUs include more memory and processing cores than the normal retail variants, and would also be subject to U.S. export restrictions if they weren't already in China. View the full article
-
 Once you’ve configured your Proxmox VE 8 server and NVIDIA GPU for PCI/PCIE passthrough and created a Windows 11 virtual machine (VM) on your Proxmox VE 8 server, you need to add your NVIDIA GPU to the Windows 11 Proxmox VE virtual machine. You also need to install the NVIDIA GPU drivers on the Windows 11 virtual machine and connect a monitor, a keyboard, and a mouse to use the Windows 11 Proxmox VE 8 virtual machine as a normal PC. Table of Contents Preparing Proxmox VE 8 for NVIDIA GPU Passthrough Creating a Windows 11 Virtual Machine on Proxmox VE 8 Adding Your NVIDIA GPU to the Windows 11 Proxmox VE 8 Virtual Machine (VM) Adding a Keyboard and Mouse to the Windows 11 Proxmox VE 8 Virtual Machine (VM) Checking if NVIDIA GPU Passthrough is Working on the Windows 11 Proxmox VE Virtual Machine Downloading and Installing NVIDIA GPU Drivers on the Windows 11 Proxmox VE Virtual Machine Removing the Virtual Graphics Adapter of the Windows 11 Proxmox VE Virtual Machine (VM) Conclusion Preparing Proxmox VE 8 for NVIDIA GPU Passthrough Before you can passthrough your NVIDIA GPU on Proxmox VE virtual machines (VMs), you must configure your NVIDIA GPU for PCI/PCIE passthrough on your Proxmox VE 8 server. For detailed information on how to configure NVIDIA GPUs for PCI/PCIE passthrough on Proxmox VE 8, read this article. Creating a Windows 11 Virtual Machine on Proxmox VE 8 To passthrough your NVIDIA GPU to a Windows 11 Proxmox VE 8 virtual machine, you will of course need a Windows 11 virtual machine on your Proxmox VE 8 server. For detailed information on how to create a Windows 11 virtual machine on Proxmox VE 8, read this article. Adding Your NVIDIA GPU to the Windows 11 Proxmox VE 8 Virtual Machine (VM) To add your NVIDIA GPU to a Windows 11 Proxmox VE virtual machine, open the Windows 11 virtual machine in your Proxmox VE dashboard, navigate to the Hardware section of the Windows 11 virtual machine, and click on Add > PCI Device as marked in the screenshot below. From the Add: PCI Device window, select Raw Device[1] and select your NVIDIA GPU (not the NVIDIA Audio Device of the GPU) from the Device dropdown menu[2]. Check All Functions[1], check PCI-Express[2], and click on Add[3]. Your NVIDIA GPU should be added to your selected Windows 11 Proxmox VE virtual machine (VM). Adding a Keyboard and Mouse to the Windows 11 Proxmox VE 8 Virtual Machine (VM) To use the Windows 11 Proxmox VE virtual machine as a normal PC, you need to add a keyboard and mouse to the virtual machine. First, connect a USB keyboard and a USB mouse to the USB ports of your Proxmox VE 8 server. Then, open the Windows 11 virtual machine on Proxmox VE dashboard, navigate to the Hardware section, and click on Add > USB Device. From the Add: USB Device window, select Use USB Vendor/Device ID[1] and select your mouse from the Choose Device dropdown menu[2]. Click on Add. The USB mouse should be added to your Windows 11 Proxmox VE virtual machine. In the same way, add your USB keyboard to the Windows 11 Proxmox VE virtual machine. The USB keyboard should be added to the Windows 11 Proxmox VE virtual machine. Checking if NVIDIA GPU Passthrough is Working on the Windows 11 Proxmox VE Virtual Machine To check if the NVIDIA GPU passthrough is working on the Windows 11 Proxmox VE virtual machine (VM), you need to start the Windows 11 virtual machine and see if it starts without any errors. If the NVIDIA GPU passthrough fails, the Windows 11 virtual machine won’t start. To start the Windows 11 virtual machine, open it on the Proxmox VE dashboard and click on Start. The Windows 11 virtual machine should start without any issues. If the NVIDIA GPU passthrough is successful, you will see two display adapters in the Device Manager of the Windows 11 virtual machine. NOTE: To open Device Manager on Windows 11, right-click (RMB) on the Start Menu and click on Device Manager. Downloading and Installing NVIDIA GPU Drivers on the Windows 11 Proxmox VE Virtual Machine Once you’ve added your NVIDIA GPU to the Windows 11 Proxmox VE virtual machine (VM), you need to install the NVIDIA GPU drivers on the Windows 11 virtual machine for it to work properly. The process of downloading and installing the NVIDIA GPU drivers on the Windows 11 virtual machine is the same as on a real Windows 11 PC. To download the latest version of the NVIDIA GPU drivers, visit the official NVIDIA GPU Drivers downloads page from a web browser on the Windows 11 virtual machine. Once the page loads, select your NVIDIA GPU from the Product Type, Product Series, and Product dropdown menus[1]. Then, select Windows 11 from the Operating System dropdown menu[2], select the type of driver (GRD – Game Ready Driver or SD – Studio Driver) you want to download from the Download Type dropdown menu[3], select your language from the Language dropdown menu[4], and click on Search[5]. Click on Download. Click on Download. Your browser should start downloading the NVIDIA GPU drivers installer file. It will take a while to complete. At this point, the NVIDIA GPU drivers installer file should be downloaded. Once the NVIDIA GPU drivers installer file is downloaded, you will find it in the Downloads folder of your Windows 11 virtual machine. To install the NVIDIA GPU drivers on the Windows 11 Proxmox VE virtual machine, double-click (LMB) on the NVIDIA GPU drivers installer file. Click on Yes. Click on OK. NVIDIA Drivers installer is being extracted to your computer. Once the NVIDIA Drivers installer is extracted, NVIDIA drivers installer should window be displayed. To install only the NVIDIA GPU drivers (not the GeForce Experience), select NVIDIA Graphics Driver[1] and click on AGREE AND CONTINUE[2]. Select Custom (Advanced)[1] and click on NEXT[2]. Check the Graphics Driver, HD Audio Driver, and PhysX System Software components from the list[1], check Perform a clean installation[2], and click on NEXT[3]. NVIDIA GPU drivers are being installed on the Windows 11 Proxmox VE virtual machine. It will take a while to complete. Once the NVIDIA GPU drivers installation is complete, click on CLOSE. You can confirm that the NVIDIA GPU (that you’ve added to the Windows 11 Proxmox VE virtual machine) is recognized from the Device Manager app of Windows 11. You can also confirm that your NVIDIA GPU is working correctly (on the Windows 11 Proxmox VE virtual machine) from the Performance section of the Task Manager app of Windows 11. NOTE: The Task Manager app can be opened on Windows 11 using the keyboard shortcut <Ctrl> + <Shift> + <Esc>. You can also right-click (RMB) on the start menu and click on Task Manager to open the Task Manager app on Windows 11. For more information on opening the Task Manager app on Windows 10/11, read this article. Removing the Virtual Graphics Adapter of the Windows 11 Proxmox VE Virtual Machine (VM) Once the NVIDIA GPU is added to the Windows 11 Proxmox VE virtual machine and the NVIDIA GPU drivers is installed on the Windows 11 virtual machine, you can remove the virtual graphics adapter of the Windows 11 virtual machine so that you only get video output on the monitor/monitors directly connected to your NVIDIA GPU and get the best performance from the NVIDIA GPU, just like your real computer. You can use it like you do your real Windows PC, you won’t notice any difference. To remove the virtual graphics adapter from the Windows 11 Proxmox VE virtual machine (VM), first, click on Shutdown from the top-right corner of the Proxmox VE dashboard to shutdown the Windows 11 virtual machine. Click on Yes. Once the Windows 11 virtual machine is shut down, navigate to the Hardware section, select Display, and click on Edit. Select none from the Graphic card dropdown menu[1] and click on OK[2]. The virtual graphics adapter should be removed from the Windows 11 Proxmox VE virtual machine (VM). As you can see, the screen of the Windows 11 Proxmox VE virtual machine (VM) is displayed on the monitor connected to the NVIDIA GPU via HDMI cable, just like a real computer. The virtual graphics adapter is removed from the Windows 11 virtual machine and only the NVIDIA GPU of the virtual machine is used for displaying the screen of the virtual machine. I am running the UNIGINE Heaven benchmark on the Windows 11 Proxmox VE virtual machine and I am getting good framerates as you can see in the screenshot below. Conclusion In this article, I have shown you how to passthrough an NVIDIA GPU, a keyboard, and a mouse to a Windows 11 Proxmox VE 8 virtual machine. I have also shown you how to install the NVIDIA GPU drivers on the Windows 11 Proxmox VE virtual machine and configure it to work just like any other Windows PC. View the full article
 -
 Nvidia has unveiled new GPUs that it says will be able to bring the power of generative AI to a wider audience than ever before. The new Nvidia RTX A400 and A1000 GPUs will give creatives and professionals alike access to some of the most useful AI tools in their fields, without demanding huge amounts of computing power and resources as is currently the case. Built on the company's Ampere architecture, the new GPUs will bring tools such as real-time ray tracing to a wider array of desktops and workstations, allowing generative AI tools to reach a bigger audience. AI for all "AI integration across design and productivity applications is becoming the new standard, fueling demand for advanced computing performance," Nvidia's senior product marketing manager for enterprise platforms Stacy Ozorio noted in a blog post announcing the launch. "This means professionals and creatives will need to tap into increased compute power, regardless of the scale, complexity or scope of their projects." The RTX A400 includes 24 Tensor Cores for AI processing, taking it far beyond traditional CPU-based machines, which Nvidia says allows for running cutting-edge AI services such as chatbots and copilots directly on the desktop. In a first for the RTX 400 series, the A400 also includes four display outputs, making it a good fit in industries such as retail, transportation and financial services, which can benefit from high-density display environments showing off detailed 3D renders. The A1000 is the first in the RTX 1000 series to bring Tensor Cores and RT Cores to users, allowing them to utilize ray-tracing performance and accelerated AI tools, while boasting a sleek, single-slot design that consumes just 50W of power. With the power of 72 Tensor Cores, it offers 3x faster generative AI processing for tools like Stable Diffusion over the previous generation, as well as faster video processing, with its 18 RT Cores speeding up graphics and rendering tasks by up to 3x, making it ideal for tasks such as 4K video editing, CAD and architectural designs. "These new GPUs empower users with cutting-edge AI, graphics and compute capabilities to boost productivity and unlock creative possibilities," Ozorio added. "Advanced workflows involving ray-traced renders and AI are now within reach, allowing professionals to push the boundaries of their work and achieve stunning levels of realism." The A1000 GPU is available now, with the A400 set to go on sale later in the summer of 2024. More from TechRadar Pro Nvidia GTC 2024 — all the updates as it happenedNvidia says its new Blackwell is set to power the next generation of AIWe've also rounded up the best mobile workstations around View the full article
-
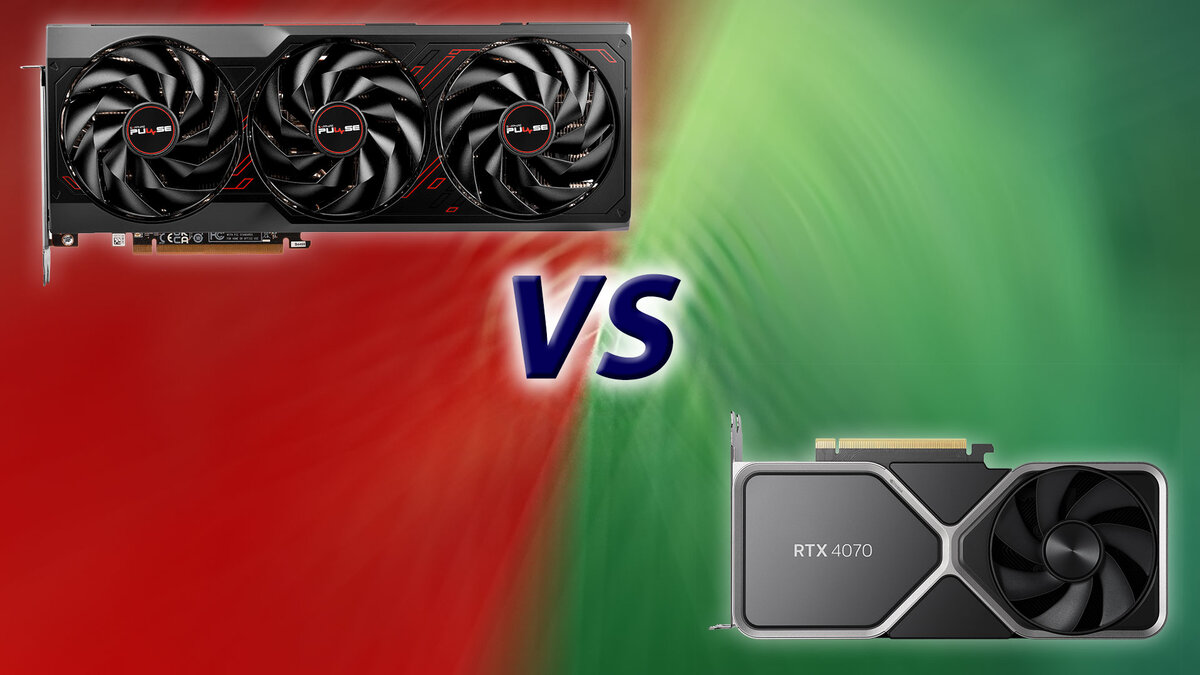
We look at the RTX 4070 and RX 7900 GRE for this GPU faceoff, comparing the newly discounted Nvidia card against AMD's formerly-for-China Golden Rabbit. It's a showdown between two cards that cost right around $550. View the full article
-
Proxmox VE 8 is one of the best open-source and free Type-I hypervisors out there for running QEMU/KVM virtual machines (VMs) and LXC containers. It has a nice web management interface and a lot of features. One of the most amazing features of Proxmox VE is that it can passthrough PCI/PCIE devices (i.e. an NVIDIA GPU) from your computer to Proxmox VE virtual machines (VMs). The PCI/PCIE passthrough is getting better and better with newer Proxmox VE releases. At the time of this writing, the latest version of Proxmox VE is Proxmox VE v8.1 and it has great PCI/PCIE passthrough support. In this article, I am going to show you how to configure your Proxmox VE 8 host/server for PCI/PCIE passthrough and configure your NVIDIA GPU for PCIE passthrough on Proxmox VE 8 virtual machines (VMs). Table of Contents Enabling Virtualization from the BIOS/UEFI Firmware of Your Motherboard Installing Proxmox VE 8 Enabling Proxmox VE 8 Community Repositories Installing Updates on Proxmox VE 8 Enabling IOMMU from the BIOS/UEFI Firmware of Your Motherboard Enabling IOMMU on Proxmox VE 8 Verifying if IOMMU is Enabled on Proxmox VE 8 Loading VFIO Kernel Modules on Proxmox VE 8 Listing IOMMU Groups on Proxmox VE 8 Checking if Your NVIDIA GPU Can Be Passthrough to a Proxmox VE 8 Virtual Machine (VM) Checking for the Kernel Modules to Blacklist for PCI/PCIE Passthrough on Proxmox VE 8 Blacklisting Required Kernel Modules for PCI/PCIE Passthrough on Proxmox VE 8 Configuring Your NVIDIA GPU to Use the VFIO Kernel Module on Proxmox VE 8 Passthrough the NVIDIA GPU to a Proxmox VE 8 Virtual Machine (VM) Still Having Problems with PCI/PCIE Passthrough on Proxmox VE 8 Virtual Machines (VMs)? Conclusion References Enabling Virtualization from the BIOS/UEFI Firmware of Your Motherboard Before you can install Proxmox VE 8 on your computer/server, you must enable the hardware virtualization feature of your processor from the BIOS/UEFI firmware of your motherboard. The process is different for different motherboards. So, if you need any assistance in enabling hardware virtualization on your motherboard, read this article. Installing Proxmox VE 8 Proxmox VE 8 is free to download, install, and use. Before you get started, make sure to install Proxmox VE 8 on your computer. If you need any assistance on that, read this article. Enabling Proxmox VE 8 Community Repositories Once you have Proxmox VE 8 installed on your computer/server, make sure to enable the Proxmox VE 8 community package repositories. By default, Proxmox VE 8 enterprise package repositories are enabled and you won’t be able to get/install updates and bug fixes from the enterprise repositories unless you have bought Proxmox VE 8 enterprise licenses. So, if you want to use Proxmox VE 8 for free, make sure to enable the Proxmox VE 8 community package repositories to get the latest updates and bug fixes from Proxmox for free. Installing Updates on Proxmox VE 8 Once you’ve enabled the Proxmox VE 8 community package repositories, make sure to install all the available updates on your Proxmox VE 8 server. Enabling IOMMU from the BIOS/UEFI Firmware of Your Motherboard The IOMMU configuration is found in different locations in different motherboards. To enable IOMMU on your motherboard, read this article. Enabling IOMMU on Proxmox VE 8 Once the IOMMU is enabled on the hardware side, you also need to enable IOMMU from the software side (from Proxmox VE 8). To enable IOMMU from Proxmox VE 8, you have the add the following kernel boot parameters: Processor Vendor Kernel boot parameters to add Intel intel_iommu=on, iommu=pt AMD iommu=pt To modify the kernel boot parameters of Proxmox VE 8, open the /etc/default/grub file with the nano text editor as follows: $ nano /etc/default/grub At the end of the GRUB_CMDLINE_LINUX_DEFAULT, add the required kernel boot parameters for enabling IOMMU depending on the processor you’re using. As I am using an AMD processor, I have added only the kernel boot parameter iommu=pt at the end of the GRUB_CMDLINE_LINUX_DEFAULT line in the /etc/default/grub file. Once you’re done, press <Ctrl> + X followed by Y and <Enter> to save the /etc/default/grub file. Now, update the GRUB boot configurations with the following command: $ update-grub2 Once the GRUB boot configurations are updated, click on Reboot to restart your Proxmox VE 8 server for the changes to take effect. Verifying if IOMMU is Enabled on Proxmox VE 8 To verify whether IOMMU is enabled on Proxmox VE 8, run the following command: $ dmesg | grep -e DMAR -e IOMMU If IOMMU is enabled, you will see some outputs confirming that IOMMU is enabled. If IOMMU is not enabled, you may not see any outputs. You also need to have the IOMMU Interrupt Remapping enabled for PCI/PCIE passthrough to work. To check if IOMMU Interrupt Remapping is enabled on your Proxmox VE 8 server, run the following command: $ dmesg | grep 'remapping' As you can see, IOMMU Interrupt Remapping is enabled on my Proxmox VE 8 server. NOTE: Most modern AMD and Intel processors will have IOMMU Interrupt Remapping enabled. If for any reason, you don’t have IOMMU Interrupt Remapping enabled, there’s a workaround. You have to enable Unsafe Interrupts for VFIO. Read this article for more information on enabling Unsafe Interrupts on your Proxmox VE 8 server. Loading VFIO Kernel Modules on Proxmox VE 8 The PCI/PCIE passthrough is done mainly by the VFIO (Virtual Function I/O) kernel modules on Proxmox VE 8. The VFIO kernel modules are not loaded at boot time by default on Proxmox VE 8. But, it’s easy to load the VFIO kernel modules at boot time on Proxmox VE 8. First, open the /etc/modules-load.d/vfio.conf file with the nano text editor as follows: $ nano /etc/modules-load.d/vfio.conf Type in the following lines in the /etc/modules-load.d/vfio.conf file. vfio vfio_iommu_type1 vfio_pci Once you’re done, press <Ctrl> + X followed by Y and <Enter> to save the changes. Now, update the initramfs of your Proxmox VE 8 installation with the following command: $ update-initramfs -u -k all Once the initramfs is updated, click on Reboot to restart your Proxmox VE 8 server for the changes to take effect. Once your Proxmox VE 8 server boots, you should see that all the required VFIO kernel modules are loaded. $ lsmod | grep vfio Listing IOMMU Groups on Proxmox VE 8 To passthrough PCI/PCIE devices on Proxmox VE 8 virtual machines (VMs), you will need to check the IOMMU groups of your PCI/PCIE devices quite frequently. To make checking for IOMMU groups easier, I decided to write a shell script (I got it from GitHub, but I can’t remember the name of the original poster) in the path /usr/local/bin/print-iommu-groups so that I can just run print-iommu-groups command and it will print the IOMMU groups on the Proxmox VE 8 shell. First, create a new file print-iommu-groups in the path /usr/local/bin and open it with the nano text editor as follows: $ nano /usr/local/bin/print-iommu-groups Type in the following lines in the print-iommu-groups file: #!/bin/bash shopt -s nullglob for g in `find /sys/kernel/iommu_groups/* -maxdepth 0 -type d | sort -V`; do echo "IOMMU Group ${g##*/}:" for d in $g/devices/*; do echo -e "\t$(lspci -nns ${d##*/})" done; done; Once you’re done, press <Ctrl> + X followed by Y and <Enter> to save the changes to the print-iommu-groups file. Make the print-iommu-groups script file executable with the following command: $ chmod +x /usr/local/bin/print-iommu-groups Now, you can run the print-iommu-groups command as follows to print the IOMMU groups of the PCI/PCIE devices installed on your Proxmox VE 8 server: $ print-iommu-groups As you can see, the IOMMU groups of the PCI/PCIE devices installed on my Proxmox VE 8 server are printed. Checking if Your NVIDIA GPU Can Be Passthrough to a Proxmox VE 8 Virtual Machine (VM) To passthrough a PCI/PCIE device to a Proxmox VE 8 virtual machine (VM), it must be in its own IOMMU group. If 2 or more PCI/PCIE devices share an IOMMU group, you can’t passthrough any of the PCI/PCIE devices of that IOMMU group to any Proxmox VE 8 virtual machines (VMs). So, if your NVIDIA GPU and its audio device are on its own IOMMU group, you can passthrough the NVIDIA GPU to any Proxmox VE 8 virtual machines (VMs). On my Proxmox VE 8 server, I am using an MSI X570 ACE motherboard paired with a Ryzen 3900X processor and Gigabyte RTX 4070 NVIDIA GPU. According to the IOMMU groups of my system, I can passthrough the NVIDIA RTX 4070 GPU (IOMMU Group 21), RTL8125 2.5Gbe Ethernet Controller (IOMMU Group 20), Intel I211 Gigabit Ethernet Controller (IOMMU Group 19), a USB 3.0 controller (IOMMU Group 24), and the Onboard HD Audio Controller (IOMMU Group 25). $ print-iommu-groups As the main focus of this article is configuring Proxmox VE 8 for passing through the NVIDIA GPU to Proxmox VE 8 virtual machines, the NVIDIA GPU and its Audio device must be in its own IOMMU group. Checking for the Kernel Modules to Blacklist for PCI/PCIE Passthrough on Proxmox VE 8 To passthrough a PCI/PCIE device on a Proxmox VE 8 virtual machine (VM), you must make sure that Proxmox VE forces it to use the VFIO kernel module instead of its original kernel module. To find out the kernel module your PCI/PCIE devices are using, you will need to know the vendor ID and device ID of these PCI/PCIE devices. You can find the vendor ID and device ID of the PCI/PCIE devices using the print-iommu-groups command. $ print-iommu-groups For example, the vendor ID and device ID of my NVIDIA RTX 4070 GPU is 10de:2786 and it’s audio device is 10de:22bc. To find the kernel module a PCI/PCIE device 10de:2786 (my NVIDIA RTX 4070 GPU) is using, run the lspci command as follows: $ lspci -v -d 10de:2786 As you can see, my NVIDIA RTX 4070 GPU is using the nvidiafb and nouveau kernel modules by default. So, they can’t be passed to a Proxmox VE 8 virtual machine (VM) at this point. The Audio device of my NVIDIA RTX 4070 GPU is using the snd_hda_intel kernel module. So, it can’t be passed on a Proxmox VE 8 virtual machine at this point either. $ lspci -v -d 10de:22bc So, to passthrough my NVIDIA RTX 4070 GPU and its audio device on a Proxmox VE 8 virtual machine (VM), I must blacklist the nvidiafb, nouveau, and snd_hda_intel kernel modules and configure my NVIDIA RTX 4070 GPU and its audio device to use the vfio-pci kernel module. Blacklisting Required Kernel Modules for PCI/PCIE Passthrough on Proxmox VE 8 To blacklist kernel modules on Proxmox VE 8, open the /etc/modprobe.d/blacklist.conf file with the nano text editor as follows: $ nano /etc/modprobe.d/blacklist.conf To blacklist the kernel modules nouveau, nvidiafb, and snd_hda_intel kernel modules (to passthrough NVIDIA GPU), add the following lines in the /etc/modprobe.d/blacklist.conf file: blacklist nouveau blacklist nvidiafb blacklist snd_hda_intel Once you’re done, press <Ctrl> + X followed by Y and <Enter> to save the /etc/modprobe.d/blacklist.conf file. Configuring Your NVIDIA GPU to Use the VFIO Kernel Module on Proxmox VE 8 To configure the PCI/PCIE device (i.e. your NVIDIA GPU) to use the VFIO kernel module, you need to know their vendor ID and device ID. In this case, the vendor ID and device ID of my NVIDIA RTX 4070 GPU and its audio device are 10de:2786 and 10de:22bc. To configure your NVIDIA GPU to use the VFIO kernel module, open the /etc/modprobe.d/vfio.conf file with the nano text editor as follows: $ nano /etc/modprobe.d/vfio.conf To configure your NVIDIA GPU and its audio device with the <vendor-id>:<device-id> 10de:2786 and 10de:22bc (let’s say) respectively to use the VFIO kernel module, add the following line to the /etc/modprobe.d/vfio.conf file. options vfio-pci ids=10de:2786,10de:22bc Once you’re done, press <Ctrl> + X followed by Y and <Enter> to save the /etc/modprobe.d/vfio.conf file. Now, update the initramfs of Proxmove VE 8 with the following command: $ update-initramfs -u -k all Once initramfs is updated, click on Reboot to restart your Proxmox VE 8 server for the changes to take effect. Once your Proxmox VE 8 server boots, you should see that your NVIDIA GPU and its audio device (10de:2786 and 10de:22bc in my case) are using the vfio-pci kernel module. Now, your NVIDIA GPU is ready to be passed to a Proxmox VE 8 virtual machine. $ lspci -v -d 10de:2786 $ lspci -v -d 10de:22bc Passthrough the NVIDIA GPU to a Proxmox VE 8 Virtual Machine (VM) Now that your NVIDIA GPU is ready for passthrough on Proxmox VE 8 virtual machines (VMs), you can passthrough your NVIDIA GPU on your desired Proxmox VE 8 virtual machine and install the NVIDIA GPU drivers depending on the operating system that you’re using on that virtual machine as usual. For detailed information on how to passthrough your NVIDIA GPU on a Proxmox VE 8 virtual machine (VM) with different operating systems installed, read one of the following articles: How to Passthrough an NVIDIA GPU to a Windows 11 Proxmox VE 8 Virtual Machine (VM) How to Passthrough an NVIDIA GPU to a Ubuntu 24.04 LTS Proxmox VE 8 Virtual Machine (VM) How to Passthrough an NVIDIA GPU to a LinuxMint 21 Proxmox VE 8 Virtual Machine (VM) How to Passthrough an NVIDIA GPU to a Debian 12 Proxmox VE 8 Virtual Machine (VM) How to Passthrough an NVIDIA GPU to an Elementary OS 8 Proxmox VE 8 Virtual Machine (VM) How to Passthrough an NVIDIA GPU to a Fedora 39+ Proxmox VE 8 Virtual Machine (VM) How to Passthrough an NVIDIA GPU on an Arch Linux Proxmox VE 8 Virtual Machine (VM) How to Passthrough an NVIDIA GPU on a Red Hat Enterprise Linux 9 (RHEL 9) Proxmox VE 8 Virtual Machine (VM) Still Having Problems with PCI/PCIE Passthrough on Proxmox VE 8 Virtual Machines (VMs)? Even after trying everything listed in this article correctly, if PCI/PCIE passthrough still does not work for you, be sure to try out some of the Proxmox VE PCI/PCIE passthrough tricks and/or workarounds that you can use to get PCI/PCIE passthrough work on your hardware. Conclusion In this article, I have shown you how to configure your Proxmox VE 8 server for PCI/PCIE passthrough so that you can passthrough PCI/PCIE devices (i.e. your NVIDIA GPU) to your Proxmox VE 8 virtual machines (VMs). I have also shown you how to find out the kernel modules that you need to blacklist and how to blacklist them for a successful passthrough of your desired PCI/PCIE devices (i.e. your NVIDIA GPU) to a Proxmox VE 8 virtual machine. Finally, I have shown you how to configure your desired PCI/PCIE devices (i.e. your NVIDIA GPU) to use the VFIO kernel modules, which is also an essential step for a successful passthrough of your desired PCI/PCIE devices (i.e. your NVIDIA GPU) to a Proxmox VE 8 virtual machine (VM). References PCI(e) Passthrough – Proxmox VE PCI Passthrough – Proxmox VE The ultimate gaming virtual machine on proxmox – YouTube View the full article
-
Huaxia Chip was a rising star among China’s original computer processor intellectual property (IP) designers. However, despite the voracious appetite for all-things IT, the company is now bankrupt and will be liquidated. View the full article
-
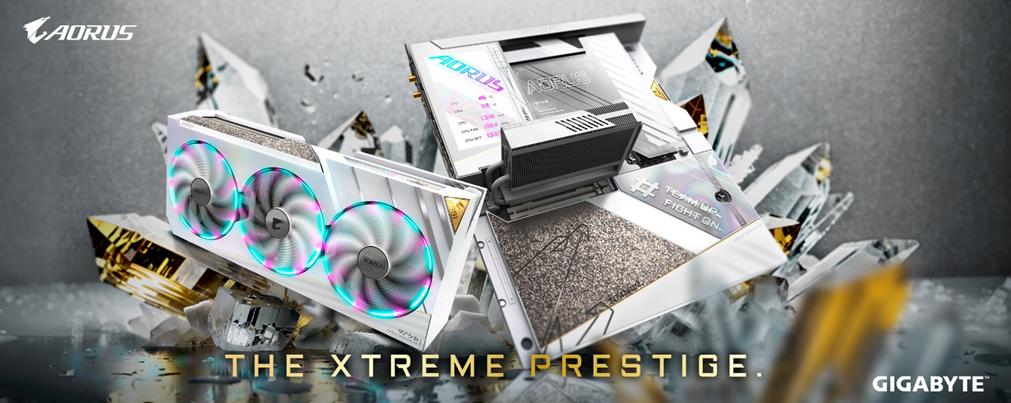
Gigabyte's new XTREME Prestige Limited Edition hardware duo promises exclusivity and luxury, for those who can afford its unknown price tag. View the full article
-
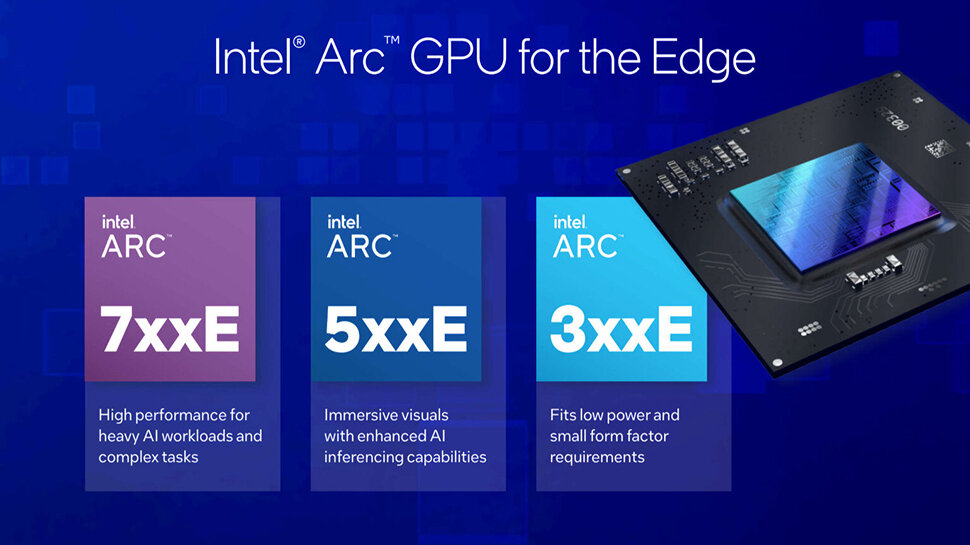
Two years after the debut of its Arc Alchemist GPUs, Intel is launching six new Arc products, but these are designed for edge/embedded systems. These edge systems, which process data near the source to reduce latency and bandwidth use, are becoming increasingly essential in areas such as IoT, autonomous vehicles, and AI applications. As Intel says, “AI at the edge is exploding with new use cases and workloads being developed daily. These AI workloads often require a high degree of parallel processing and memory bandwidth for peak performance, dedicated hardware, optimized architecture for compute efficiency, and reduced latency with faster results for real-time processing. A discrete GPU may be the ideal solution for edge AI use cases requiring high performance and complex model support.” Six SKUs The new Arc on edge GPUs are built on Intel's highly scalable Intel Xe-core architecture and support AI acceleration, visual computing and media processing. Using the OpenVINO toolkit developers can deploy AI models across Intel hardware. The Arc on edge offerings have a number of benefits, including reduced latency, improved bandwidth efficiency and better privacy and security. For high performance and to handle heavy AI workloads and expansive use cases such as facial recognition and generative conversational speech, there’s the 7XXE. For immersive visual experiences and enhanced AI inferencing capabilities, there’s the 5XXE, and for low power and small form factor requirements, Intel has the 3XXE. There are six SKUs available – the A310E and A3503 with 6 Xe-cores, the A370E and A380E with 8 cores, and the A580E and A750E with 28 cores. The A310E, A3503 and A370E have 4GB of GDDDR6 memory with 112GB/s memory bandwidth. The A380E has 6GB with 186GB/s bandwidth, while the A580E and A750E’s memory and memory bandwidth are unknown for now. Intel says only that it is “in planning”. There’s also no launch date for those two either, just TBD. The other four SKUs will be available this month. Intel Arc GPUs are built to be paired with Intel Core processors, from 10th Gen upwards and Intel Xeon W-3400 and W-2400. A number of products featuring the new Arc GPUs are set to be released in the coming months from Intel partners including from ADLINK, Advantech, Asus, Matrox and Sparkle. (Image credit: Intel) More from TechRadar Pro Intel bets on a secret weapon to beat AMD in some AI workloadsEdge computing spending set to skyrocket as AI takes holdIntel could move away from regular CPU releases View the full article
-
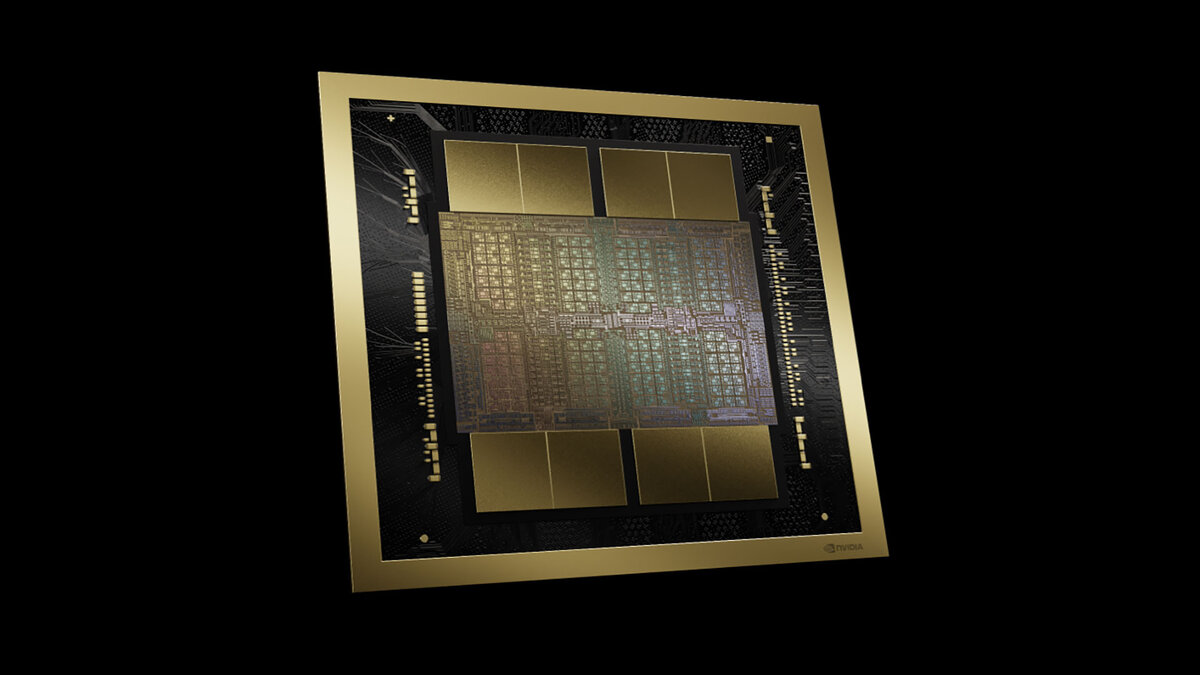
Jim Keller advises Nvidia to use Ethernet to stitch two Blackwell GPUs in GB200. View the full article
-
Nvidia’s next generation of graphics cards, reportedly known as Nvidia Blackwell, has been the subject of plenty of rumors since at least 2023. The most recent one seems to confirm that the RTX 5080 and RTX 5090 will be launching in Q4 2024, according to Twitter leaker Kopite7kimi and reported on by PC Gamer. While finally getting a hold of what could easily be the best graphics cards sounds like great news to some, finally getting a sign of the cards’ imminent release, they’re honestly coming out way too soon. There have been reports that the Nvidia RTX 5080 would have better ray tracing capabilities and pricing than the 4080 and that the RTX 5090 would be up to 70% faster than the 4090, which sounds great on paper. But when you consider how already powerful the 4000 series of cards are, it seems a bit pointless. It’s wonderful that ray tracing, speed, and performance might be improved, but to what benefit? We aren't even taking full advantage of current gen cards, so what's the value of buying a Nvidia 5000-series GPU later this year? PC games haven’t even reached the point that they truly challenge the mid-range and high-end 3000-series of graphics cards (hell, an argument can be made that they can’t fully challenge the RTX 2070 Super in ways that truly matter), let alone the current gen. One could argue that the only reason why the current gen was so necessary was thanks to the crypto mining craze completely ruining the 3000-series market and making it nigh impossible to get your hands on one for a remotely affordable price. And right now, the 4000-series is quite excellent performance-wise, as it’s able to handle ray tracing and other advanced effects and tools like no other. The RTX 4090 in particular is nearly perfect in what it can offer, and the lower cards are still absolute performance beasts. This isn’t even mentioning the Super series refreshes, which added even more oomph to your favorite graphics cards while keeping the prices either the same or lowering them. There’s also the fact that some cards, like the RTX 4070, didn’t sell nearly as well as Nvidia wanted and in fact were rumored to be a “disaster.” While that doesn’t reflect the sales numbers for the rest of the graphics cards, it’s not a good look to see the base versions of your mid-range cards doing poorly. And while the RTX 4080 Super seems to be out of stock in many retailers, that could just as well be due to low stock in the first place. With all these issues cropping up, releasing RTX 5080 and 5090 doesn’t seem to be such a smart move on Nvidia’s part. Though the Q4 2024 launch date is still just a rumor, it would be wise for the tech giant to release these cards in 2025 at the earliest to give its 4000-series some proper breathing room. You might also like Nvidia RTX 5080 leak gets some PC gamers worried that Team Green hasn't learnedThe Nvidia RTX 5090 is rumored to be nearly twice as fast as RTX 4090Nvidia GeForce RTX 5090 could be up to 70% faster than the 4090 View the full article
-
Nanotronics' switch fabrication units start at 1,715 square meters. View the full article
-
NorthridgeFix reveals that RTX 4090 deaths have not gone away. The GPU repair facility says it still gets dead 4090s every single day from across the globe. View the full article
-
Chinese publication HKEPC details how different brands carry out the RMA process for GeForce RTX 4090 graphics cards in China View the full article
-
Nvidia's patch notes for its latest drivers affirm that Intel's latest 13th and 14th Gen CPUs are having instability problems right now affecting gamers. Nvidia steers users to Intel support if they are having instability issues with their Raptor Lake machine. View the full article
-
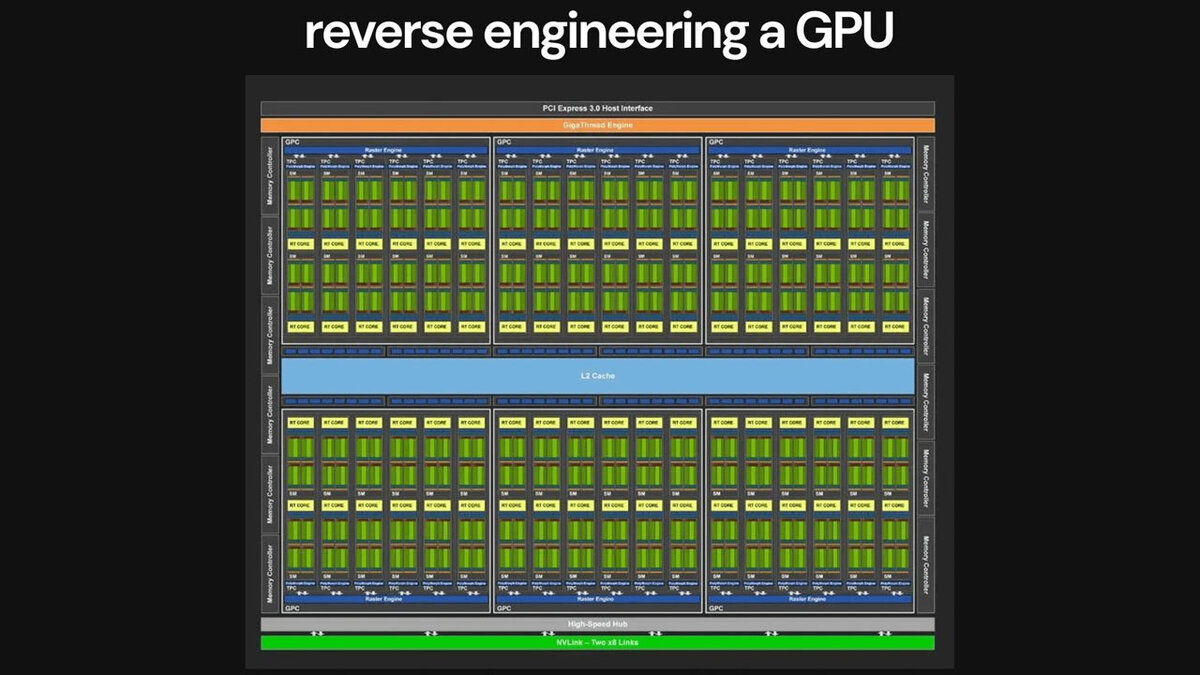
An engineer has shared his experience of designing a CPU from scratch, over two weeks, 'with no prior experience.' He has just started the arduous task of making a GPU from scratch. View the full article
-
Lead times for Nvidia's H100 GPU have dropped enormously from almost a year down to just 12-8 weeks. This will help companies like OpenAI attain more H100 GPUs to train their own LLMs. View the full article
-
Elon Musk says the next-generation Grok 3 model will require 100,000 Nvidia H100 GPUs to train. He also believes that artificial intelligence models will beat the smartest humans within the 2025–2026 time frame. View the full article
-
Intel wants to strategically launch its next-generation Arc 'Battlemage' GPUs ahead of the holiday season this fall. It's a crucial period for sales, and could tie in with new CPUs and platforms as well. View the full article


-
Forum Statistics
43.7k
Total Topics43.3k
Total Posts