.png.6dd3056f38e93712a18d153891e8e0fc.png.1dbd1e5f05de09e66333e631e3342b83.png.933f4dc78ef5a5d2971934bd41ead8a1.png)
Search the Community
Showing results for tags 'nvidia'.
-
 Nvidia's Blackwell architecture is on the horizon, set to power the RTX 50-series graphics cards. We've gathered together what we know as well as rumors of what to expect from the next generation GPUs, including potential specs and release dates. Here's everything we know about Nvidia Blackwell GPUs. View the full article
-
Nvidia has launched two new entry-level GPUs featuring its last-generation Ampere architecture. The A1000 looks like a professional variant of the RTX 3050 8GB, but the A400 is much less powerful. View the full article
-
Beefed-up Nvidia A100 (Ampere) GPUs have emerged in the Chinese second-hand market. These GPUs include more memory and processing cores than the normal retail variants, and would also be subject to U.S. export restrictions if they weren't already in China. View the full article
-
 Once you’ve configured your Proxmox VE 8 server and NVIDIA GPU for PCI/PCIE passthrough and created a Windows 11 virtual machine (VM) on your Proxmox VE 8 server, you need to add your NVIDIA GPU to the Windows 11 Proxmox VE virtual machine. You also need to install the NVIDIA GPU drivers on the Windows 11 virtual machine and connect a monitor, a keyboard, and a mouse to use the Windows 11 Proxmox VE 8 virtual machine as a normal PC. Table of Contents Preparing Proxmox VE 8 for NVIDIA GPU Passthrough Creating a Windows 11 Virtual Machine on Proxmox VE 8 Adding Your NVIDIA GPU to the Windows 11 Proxmox VE 8 Virtual Machine (VM) Adding a Keyboard and Mouse to the Windows 11 Proxmox VE 8 Virtual Machine (VM) Checking if NVIDIA GPU Passthrough is Working on the Windows 11 Proxmox VE Virtual Machine Downloading and Installing NVIDIA GPU Drivers on the Windows 11 Proxmox VE Virtual Machine Removing the Virtual Graphics Adapter of the Windows 11 Proxmox VE Virtual Machine (VM) Conclusion Preparing Proxmox VE 8 for NVIDIA GPU Passthrough Before you can passthrough your NVIDIA GPU on Proxmox VE virtual machines (VMs), you must configure your NVIDIA GPU for PCI/PCIE passthrough on your Proxmox VE 8 server. For detailed information on how to configure NVIDIA GPUs for PCI/PCIE passthrough on Proxmox VE 8, read this article. Creating a Windows 11 Virtual Machine on Proxmox VE 8 To passthrough your NVIDIA GPU to a Windows 11 Proxmox VE 8 virtual machine, you will of course need a Windows 11 virtual machine on your Proxmox VE 8 server. For detailed information on how to create a Windows 11 virtual machine on Proxmox VE 8, read this article. Adding Your NVIDIA GPU to the Windows 11 Proxmox VE 8 Virtual Machine (VM) To add your NVIDIA GPU to a Windows 11 Proxmox VE virtual machine, open the Windows 11 virtual machine in your Proxmox VE dashboard, navigate to the Hardware section of the Windows 11 virtual machine, and click on Add > PCI Device as marked in the screenshot below. From the Add: PCI Device window, select Raw Device[1] and select your NVIDIA GPU (not the NVIDIA Audio Device of the GPU) from the Device dropdown menu[2]. Check All Functions[1], check PCI-Express[2], and click on Add[3]. Your NVIDIA GPU should be added to your selected Windows 11 Proxmox VE virtual machine (VM). Adding a Keyboard and Mouse to the Windows 11 Proxmox VE 8 Virtual Machine (VM) To use the Windows 11 Proxmox VE virtual machine as a normal PC, you need to add a keyboard and mouse to the virtual machine. First, connect a USB keyboard and a USB mouse to the USB ports of your Proxmox VE 8 server. Then, open the Windows 11 virtual machine on Proxmox VE dashboard, navigate to the Hardware section, and click on Add > USB Device. From the Add: USB Device window, select Use USB Vendor/Device ID[1] and select your mouse from the Choose Device dropdown menu[2]. Click on Add. The USB mouse should be added to your Windows 11 Proxmox VE virtual machine. In the same way, add your USB keyboard to the Windows 11 Proxmox VE virtual machine. The USB keyboard should be added to the Windows 11 Proxmox VE virtual machine. Checking if NVIDIA GPU Passthrough is Working on the Windows 11 Proxmox VE Virtual Machine To check if the NVIDIA GPU passthrough is working on the Windows 11 Proxmox VE virtual machine (VM), you need to start the Windows 11 virtual machine and see if it starts without any errors. If the NVIDIA GPU passthrough fails, the Windows 11 virtual machine won’t start. To start the Windows 11 virtual machine, open it on the Proxmox VE dashboard and click on Start. The Windows 11 virtual machine should start without any issues. If the NVIDIA GPU passthrough is successful, you will see two display adapters in the Device Manager of the Windows 11 virtual machine. NOTE: To open Device Manager on Windows 11, right-click (RMB) on the Start Menu and click on Device Manager. Downloading and Installing NVIDIA GPU Drivers on the Windows 11 Proxmox VE Virtual Machine Once you’ve added your NVIDIA GPU to the Windows 11 Proxmox VE virtual machine (VM), you need to install the NVIDIA GPU drivers on the Windows 11 virtual machine for it to work properly. The process of downloading and installing the NVIDIA GPU drivers on the Windows 11 virtual machine is the same as on a real Windows 11 PC. To download the latest version of the NVIDIA GPU drivers, visit the official NVIDIA GPU Drivers downloads page from a web browser on the Windows 11 virtual machine. Once the page loads, select your NVIDIA GPU from the Product Type, Product Series, and Product dropdown menus[1]. Then, select Windows 11 from the Operating System dropdown menu[2], select the type of driver (GRD – Game Ready Driver or SD – Studio Driver) you want to download from the Download Type dropdown menu[3], select your language from the Language dropdown menu[4], and click on Search[5]. Click on Download. Click on Download. Your browser should start downloading the NVIDIA GPU drivers installer file. It will take a while to complete. At this point, the NVIDIA GPU drivers installer file should be downloaded. Once the NVIDIA GPU drivers installer file is downloaded, you will find it in the Downloads folder of your Windows 11 virtual machine. To install the NVIDIA GPU drivers on the Windows 11 Proxmox VE virtual machine, double-click (LMB) on the NVIDIA GPU drivers installer file. Click on Yes. Click on OK. NVIDIA Drivers installer is being extracted to your computer. Once the NVIDIA Drivers installer is extracted, NVIDIA drivers installer should window be displayed. To install only the NVIDIA GPU drivers (not the GeForce Experience), select NVIDIA Graphics Driver[1] and click on AGREE AND CONTINUE[2]. Select Custom (Advanced)[1] and click on NEXT[2]. Check the Graphics Driver, HD Audio Driver, and PhysX System Software components from the list[1], check Perform a clean installation[2], and click on NEXT[3]. NVIDIA GPU drivers are being installed on the Windows 11 Proxmox VE virtual machine. It will take a while to complete. Once the NVIDIA GPU drivers installation is complete, click on CLOSE. You can confirm that the NVIDIA GPU (that you’ve added to the Windows 11 Proxmox VE virtual machine) is recognized from the Device Manager app of Windows 11. You can also confirm that your NVIDIA GPU is working correctly (on the Windows 11 Proxmox VE virtual machine) from the Performance section of the Task Manager app of Windows 11. NOTE: The Task Manager app can be opened on Windows 11 using the keyboard shortcut <Ctrl> + <Shift> + <Esc>. You can also right-click (RMB) on the start menu and click on Task Manager to open the Task Manager app on Windows 11. For more information on opening the Task Manager app on Windows 10/11, read this article. Removing the Virtual Graphics Adapter of the Windows 11 Proxmox VE Virtual Machine (VM) Once the NVIDIA GPU is added to the Windows 11 Proxmox VE virtual machine and the NVIDIA GPU drivers is installed on the Windows 11 virtual machine, you can remove the virtual graphics adapter of the Windows 11 virtual machine so that you only get video output on the monitor/monitors directly connected to your NVIDIA GPU and get the best performance from the NVIDIA GPU, just like your real computer. You can use it like you do your real Windows PC, you won’t notice any difference. To remove the virtual graphics adapter from the Windows 11 Proxmox VE virtual machine (VM), first, click on Shutdown from the top-right corner of the Proxmox VE dashboard to shutdown the Windows 11 virtual machine. Click on Yes. Once the Windows 11 virtual machine is shut down, navigate to the Hardware section, select Display, and click on Edit. Select none from the Graphic card dropdown menu[1] and click on OK[2]. The virtual graphics adapter should be removed from the Windows 11 Proxmox VE virtual machine (VM). As you can see, the screen of the Windows 11 Proxmox VE virtual machine (VM) is displayed on the monitor connected to the NVIDIA GPU via HDMI cable, just like a real computer. The virtual graphics adapter is removed from the Windows 11 virtual machine and only the NVIDIA GPU of the virtual machine is used for displaying the screen of the virtual machine. I am running the UNIGINE Heaven benchmark on the Windows 11 Proxmox VE virtual machine and I am getting good framerates as you can see in the screenshot below. Conclusion In this article, I have shown you how to passthrough an NVIDIA GPU, a keyboard, and a mouse to a Windows 11 Proxmox VE 8 virtual machine. I have also shown you how to install the NVIDIA GPU drivers on the Windows 11 Proxmox VE virtual machine and configure it to work just like any other Windows PC. View the full article
 -
Thanks to a $50 discount the Nvidia RTX 4070 Ti Super GPU is down to its lowest-ever price at computer retailer Dell. View the full article
-
 Nvidia has unveiled new GPUs that it says will be able to bring the power of generative AI to a wider audience than ever before. The new Nvidia RTX A400 and A1000 GPUs will give creatives and professionals alike access to some of the most useful AI tools in their fields, without demanding huge amounts of computing power and resources as is currently the case. Built on the company's Ampere architecture, the new GPUs will bring tools such as real-time ray tracing to a wider array of desktops and workstations, allowing generative AI tools to reach a bigger audience. AI for all "AI integration across design and productivity applications is becoming the new standard, fueling demand for advanced computing performance," Nvidia's senior product marketing manager for enterprise platforms Stacy Ozorio noted in a blog post announcing the launch. "This means professionals and creatives will need to tap into increased compute power, regardless of the scale, complexity or scope of their projects." The RTX A400 includes 24 Tensor Cores for AI processing, taking it far beyond traditional CPU-based machines, which Nvidia says allows for running cutting-edge AI services such as chatbots and copilots directly on the desktop. In a first for the RTX 400 series, the A400 also includes four display outputs, making it a good fit in industries such as retail, transportation and financial services, which can benefit from high-density display environments showing off detailed 3D renders. The A1000 is the first in the RTX 1000 series to bring Tensor Cores and RT Cores to users, allowing them to utilize ray-tracing performance and accelerated AI tools, while boasting a sleek, single-slot design that consumes just 50W of power. With the power of 72 Tensor Cores, it offers 3x faster generative AI processing for tools like Stable Diffusion over the previous generation, as well as faster video processing, with its 18 RT Cores speeding up graphics and rendering tasks by up to 3x, making it ideal for tasks such as 4K video editing, CAD and architectural designs. "These new GPUs empower users with cutting-edge AI, graphics and compute capabilities to boost productivity and unlock creative possibilities," Ozorio added. "Advanced workflows involving ray-traced renders and AI are now within reach, allowing professionals to push the boundaries of their work and achieve stunning levels of realism." The A1000 GPU is available now, with the A400 set to go on sale later in the summer of 2024. More from TechRadar Pro Nvidia GTC 2024 — all the updates as it happenedNvidia says its new Blackwell is set to power the next generation of AIWe've also rounded up the best mobile workstations around View the full article
-
Proxmox VE 8 is one of the best open-source and free Type-I hypervisors out there for running QEMU/KVM virtual machines (VMs) and LXC containers. It has a nice web management interface and a lot of features. One of the most amazing features of Proxmox VE is that it can passthrough PCI/PCIE devices (i.e. an NVIDIA GPU) from your computer to Proxmox VE virtual machines (VMs). The PCI/PCIE passthrough is getting better and better with newer Proxmox VE releases. At the time of this writing, the latest version of Proxmox VE is Proxmox VE v8.1 and it has great PCI/PCIE passthrough support. In this article, I am going to show you how to configure your Proxmox VE 8 host/server for PCI/PCIE passthrough and configure your NVIDIA GPU for PCIE passthrough on Proxmox VE 8 virtual machines (VMs). Table of Contents Enabling Virtualization from the BIOS/UEFI Firmware of Your Motherboard Installing Proxmox VE 8 Enabling Proxmox VE 8 Community Repositories Installing Updates on Proxmox VE 8 Enabling IOMMU from the BIOS/UEFI Firmware of Your Motherboard Enabling IOMMU on Proxmox VE 8 Verifying if IOMMU is Enabled on Proxmox VE 8 Loading VFIO Kernel Modules on Proxmox VE 8 Listing IOMMU Groups on Proxmox VE 8 Checking if Your NVIDIA GPU Can Be Passthrough to a Proxmox VE 8 Virtual Machine (VM) Checking for the Kernel Modules to Blacklist for PCI/PCIE Passthrough on Proxmox VE 8 Blacklisting Required Kernel Modules for PCI/PCIE Passthrough on Proxmox VE 8 Configuring Your NVIDIA GPU to Use the VFIO Kernel Module on Proxmox VE 8 Passthrough the NVIDIA GPU to a Proxmox VE 8 Virtual Machine (VM) Still Having Problems with PCI/PCIE Passthrough on Proxmox VE 8 Virtual Machines (VMs)? Conclusion References Enabling Virtualization from the BIOS/UEFI Firmware of Your Motherboard Before you can install Proxmox VE 8 on your computer/server, you must enable the hardware virtualization feature of your processor from the BIOS/UEFI firmware of your motherboard. The process is different for different motherboards. So, if you need any assistance in enabling hardware virtualization on your motherboard, read this article. Installing Proxmox VE 8 Proxmox VE 8 is free to download, install, and use. Before you get started, make sure to install Proxmox VE 8 on your computer. If you need any assistance on that, read this article. Enabling Proxmox VE 8 Community Repositories Once you have Proxmox VE 8 installed on your computer/server, make sure to enable the Proxmox VE 8 community package repositories. By default, Proxmox VE 8 enterprise package repositories are enabled and you won’t be able to get/install updates and bug fixes from the enterprise repositories unless you have bought Proxmox VE 8 enterprise licenses. So, if you want to use Proxmox VE 8 for free, make sure to enable the Proxmox VE 8 community package repositories to get the latest updates and bug fixes from Proxmox for free. Installing Updates on Proxmox VE 8 Once you’ve enabled the Proxmox VE 8 community package repositories, make sure to install all the available updates on your Proxmox VE 8 server. Enabling IOMMU from the BIOS/UEFI Firmware of Your Motherboard The IOMMU configuration is found in different locations in different motherboards. To enable IOMMU on your motherboard, read this article. Enabling IOMMU on Proxmox VE 8 Once the IOMMU is enabled on the hardware side, you also need to enable IOMMU from the software side (from Proxmox VE 8). To enable IOMMU from Proxmox VE 8, you have the add the following kernel boot parameters: Processor Vendor Kernel boot parameters to add Intel intel_iommu=on, iommu=pt AMD iommu=pt To modify the kernel boot parameters of Proxmox VE 8, open the /etc/default/grub file with the nano text editor as follows: $ nano /etc/default/grub At the end of the GRUB_CMDLINE_LINUX_DEFAULT, add the required kernel boot parameters for enabling IOMMU depending on the processor you’re using. As I am using an AMD processor, I have added only the kernel boot parameter iommu=pt at the end of the GRUB_CMDLINE_LINUX_DEFAULT line in the /etc/default/grub file. Once you’re done, press <Ctrl> + X followed by Y and <Enter> to save the /etc/default/grub file. Now, update the GRUB boot configurations with the following command: $ update-grub2 Once the GRUB boot configurations are updated, click on Reboot to restart your Proxmox VE 8 server for the changes to take effect. Verifying if IOMMU is Enabled on Proxmox VE 8 To verify whether IOMMU is enabled on Proxmox VE 8, run the following command: $ dmesg | grep -e DMAR -e IOMMU If IOMMU is enabled, you will see some outputs confirming that IOMMU is enabled. If IOMMU is not enabled, you may not see any outputs. You also need to have the IOMMU Interrupt Remapping enabled for PCI/PCIE passthrough to work. To check if IOMMU Interrupt Remapping is enabled on your Proxmox VE 8 server, run the following command: $ dmesg | grep 'remapping' As you can see, IOMMU Interrupt Remapping is enabled on my Proxmox VE 8 server. NOTE: Most modern AMD and Intel processors will have IOMMU Interrupt Remapping enabled. If for any reason, you don’t have IOMMU Interrupt Remapping enabled, there’s a workaround. You have to enable Unsafe Interrupts for VFIO. Read this article for more information on enabling Unsafe Interrupts on your Proxmox VE 8 server. Loading VFIO Kernel Modules on Proxmox VE 8 The PCI/PCIE passthrough is done mainly by the VFIO (Virtual Function I/O) kernel modules on Proxmox VE 8. The VFIO kernel modules are not loaded at boot time by default on Proxmox VE 8. But, it’s easy to load the VFIO kernel modules at boot time on Proxmox VE 8. First, open the /etc/modules-load.d/vfio.conf file with the nano text editor as follows: $ nano /etc/modules-load.d/vfio.conf Type in the following lines in the /etc/modules-load.d/vfio.conf file. vfio vfio_iommu_type1 vfio_pci Once you’re done, press <Ctrl> + X followed by Y and <Enter> to save the changes. Now, update the initramfs of your Proxmox VE 8 installation with the following command: $ update-initramfs -u -k all Once the initramfs is updated, click on Reboot to restart your Proxmox VE 8 server for the changes to take effect. Once your Proxmox VE 8 server boots, you should see that all the required VFIO kernel modules are loaded. $ lsmod | grep vfio Listing IOMMU Groups on Proxmox VE 8 To passthrough PCI/PCIE devices on Proxmox VE 8 virtual machines (VMs), you will need to check the IOMMU groups of your PCI/PCIE devices quite frequently. To make checking for IOMMU groups easier, I decided to write a shell script (I got it from GitHub, but I can’t remember the name of the original poster) in the path /usr/local/bin/print-iommu-groups so that I can just run print-iommu-groups command and it will print the IOMMU groups on the Proxmox VE 8 shell. First, create a new file print-iommu-groups in the path /usr/local/bin and open it with the nano text editor as follows: $ nano /usr/local/bin/print-iommu-groups Type in the following lines in the print-iommu-groups file: #!/bin/bash shopt -s nullglob for g in `find /sys/kernel/iommu_groups/* -maxdepth 0 -type d | sort -V`; do echo "IOMMU Group ${g##*/}:" for d in $g/devices/*; do echo -e "\t$(lspci -nns ${d##*/})" done; done; Once you’re done, press <Ctrl> + X followed by Y and <Enter> to save the changes to the print-iommu-groups file. Make the print-iommu-groups script file executable with the following command: $ chmod +x /usr/local/bin/print-iommu-groups Now, you can run the print-iommu-groups command as follows to print the IOMMU groups of the PCI/PCIE devices installed on your Proxmox VE 8 server: $ print-iommu-groups As you can see, the IOMMU groups of the PCI/PCIE devices installed on my Proxmox VE 8 server are printed. Checking if Your NVIDIA GPU Can Be Passthrough to a Proxmox VE 8 Virtual Machine (VM) To passthrough a PCI/PCIE device to a Proxmox VE 8 virtual machine (VM), it must be in its own IOMMU group. If 2 or more PCI/PCIE devices share an IOMMU group, you can’t passthrough any of the PCI/PCIE devices of that IOMMU group to any Proxmox VE 8 virtual machines (VMs). So, if your NVIDIA GPU and its audio device are on its own IOMMU group, you can passthrough the NVIDIA GPU to any Proxmox VE 8 virtual machines (VMs). On my Proxmox VE 8 server, I am using an MSI X570 ACE motherboard paired with a Ryzen 3900X processor and Gigabyte RTX 4070 NVIDIA GPU. According to the IOMMU groups of my system, I can passthrough the NVIDIA RTX 4070 GPU (IOMMU Group 21), RTL8125 2.5Gbe Ethernet Controller (IOMMU Group 20), Intel I211 Gigabit Ethernet Controller (IOMMU Group 19), a USB 3.0 controller (IOMMU Group 24), and the Onboard HD Audio Controller (IOMMU Group 25). $ print-iommu-groups As the main focus of this article is configuring Proxmox VE 8 for passing through the NVIDIA GPU to Proxmox VE 8 virtual machines, the NVIDIA GPU and its Audio device must be in its own IOMMU group. Checking for the Kernel Modules to Blacklist for PCI/PCIE Passthrough on Proxmox VE 8 To passthrough a PCI/PCIE device on a Proxmox VE 8 virtual machine (VM), you must make sure that Proxmox VE forces it to use the VFIO kernel module instead of its original kernel module. To find out the kernel module your PCI/PCIE devices are using, you will need to know the vendor ID and device ID of these PCI/PCIE devices. You can find the vendor ID and device ID of the PCI/PCIE devices using the print-iommu-groups command. $ print-iommu-groups For example, the vendor ID and device ID of my NVIDIA RTX 4070 GPU is 10de:2786 and it’s audio device is 10de:22bc. To find the kernel module a PCI/PCIE device 10de:2786 (my NVIDIA RTX 4070 GPU) is using, run the lspci command as follows: $ lspci -v -d 10de:2786 As you can see, my NVIDIA RTX 4070 GPU is using the nvidiafb and nouveau kernel modules by default. So, they can’t be passed to a Proxmox VE 8 virtual machine (VM) at this point. The Audio device of my NVIDIA RTX 4070 GPU is using the snd_hda_intel kernel module. So, it can’t be passed on a Proxmox VE 8 virtual machine at this point either. $ lspci -v -d 10de:22bc So, to passthrough my NVIDIA RTX 4070 GPU and its audio device on a Proxmox VE 8 virtual machine (VM), I must blacklist the nvidiafb, nouveau, and snd_hda_intel kernel modules and configure my NVIDIA RTX 4070 GPU and its audio device to use the vfio-pci kernel module. Blacklisting Required Kernel Modules for PCI/PCIE Passthrough on Proxmox VE 8 To blacklist kernel modules on Proxmox VE 8, open the /etc/modprobe.d/blacklist.conf file with the nano text editor as follows: $ nano /etc/modprobe.d/blacklist.conf To blacklist the kernel modules nouveau, nvidiafb, and snd_hda_intel kernel modules (to passthrough NVIDIA GPU), add the following lines in the /etc/modprobe.d/blacklist.conf file: blacklist nouveau blacklist nvidiafb blacklist snd_hda_intel Once you’re done, press <Ctrl> + X followed by Y and <Enter> to save the /etc/modprobe.d/blacklist.conf file. Configuring Your NVIDIA GPU to Use the VFIO Kernel Module on Proxmox VE 8 To configure the PCI/PCIE device (i.e. your NVIDIA GPU) to use the VFIO kernel module, you need to know their vendor ID and device ID. In this case, the vendor ID and device ID of my NVIDIA RTX 4070 GPU and its audio device are 10de:2786 and 10de:22bc. To configure your NVIDIA GPU to use the VFIO kernel module, open the /etc/modprobe.d/vfio.conf file with the nano text editor as follows: $ nano /etc/modprobe.d/vfio.conf To configure your NVIDIA GPU and its audio device with the <vendor-id>:<device-id> 10de:2786 and 10de:22bc (let’s say) respectively to use the VFIO kernel module, add the following line to the /etc/modprobe.d/vfio.conf file. options vfio-pci ids=10de:2786,10de:22bc Once you’re done, press <Ctrl> + X followed by Y and <Enter> to save the /etc/modprobe.d/vfio.conf file. Now, update the initramfs of Proxmove VE 8 with the following command: $ update-initramfs -u -k all Once initramfs is updated, click on Reboot to restart your Proxmox VE 8 server for the changes to take effect. Once your Proxmox VE 8 server boots, you should see that your NVIDIA GPU and its audio device (10de:2786 and 10de:22bc in my case) are using the vfio-pci kernel module. Now, your NVIDIA GPU is ready to be passed to a Proxmox VE 8 virtual machine. $ lspci -v -d 10de:2786 $ lspci -v -d 10de:22bc Passthrough the NVIDIA GPU to a Proxmox VE 8 Virtual Machine (VM) Now that your NVIDIA GPU is ready for passthrough on Proxmox VE 8 virtual machines (VMs), you can passthrough your NVIDIA GPU on your desired Proxmox VE 8 virtual machine and install the NVIDIA GPU drivers depending on the operating system that you’re using on that virtual machine as usual. For detailed information on how to passthrough your NVIDIA GPU on a Proxmox VE 8 virtual machine (VM) with different operating systems installed, read one of the following articles: How to Passthrough an NVIDIA GPU to a Windows 11 Proxmox VE 8 Virtual Machine (VM) How to Passthrough an NVIDIA GPU to a Ubuntu 24.04 LTS Proxmox VE 8 Virtual Machine (VM) How to Passthrough an NVIDIA GPU to a LinuxMint 21 Proxmox VE 8 Virtual Machine (VM) How to Passthrough an NVIDIA GPU to a Debian 12 Proxmox VE 8 Virtual Machine (VM) How to Passthrough an NVIDIA GPU to an Elementary OS 8 Proxmox VE 8 Virtual Machine (VM) How to Passthrough an NVIDIA GPU to a Fedora 39+ Proxmox VE 8 Virtual Machine (VM) How to Passthrough an NVIDIA GPU on an Arch Linux Proxmox VE 8 Virtual Machine (VM) How to Passthrough an NVIDIA GPU on a Red Hat Enterprise Linux 9 (RHEL 9) Proxmox VE 8 Virtual Machine (VM) Still Having Problems with PCI/PCIE Passthrough on Proxmox VE 8 Virtual Machines (VMs)? Even after trying everything listed in this article correctly, if PCI/PCIE passthrough still does not work for you, be sure to try out some of the Proxmox VE PCI/PCIE passthrough tricks and/or workarounds that you can use to get PCI/PCIE passthrough work on your hardware. Conclusion In this article, I have shown you how to configure your Proxmox VE 8 server for PCI/PCIE passthrough so that you can passthrough PCI/PCIE devices (i.e. your NVIDIA GPU) to your Proxmox VE 8 virtual machines (VMs). I have also shown you how to find out the kernel modules that you need to blacklist and how to blacklist them for a successful passthrough of your desired PCI/PCIE devices (i.e. your NVIDIA GPU) to a Proxmox VE 8 virtual machine. Finally, I have shown you how to configure your desired PCI/PCIE devices (i.e. your NVIDIA GPU) to use the VFIO kernel modules, which is also an essential step for a successful passthrough of your desired PCI/PCIE devices (i.e. your NVIDIA GPU) to a Proxmox VE 8 virtual machine (VM). References PCI(e) Passthrough – Proxmox VE PCI Passthrough – Proxmox VE The ultimate gaming virtual machine on proxmox – YouTube View the full article
-
The wealth that can be gained from helping to propel a successful company is vividly illustrated by some recent tales of 'mid-level' Nvidia employees, with one claimed to have accrued a fortune of $62 million through the company share scheme. View the full article
-
Microsoft and OpenAI are reportedly in the process of planning a groundbreaking data center project which would include an AI supercomputer named "Stargate”. A report by Anissa Gardizy and Amir Efrati in The Information claims the goal of the project, which would be financed by Microsoft to the tune of over $100 billion, and which reportedly has a launch date set for 2028, is to reduce the two companies' reliance on Nvidia, something that a lot of the tech giants involved in AI are increasingly looking to try to do. Microsoft and OpenAI’s plan reportedly involves five phases, with Stargate being the fifth and most ambitious one. The data center will be the supercomputer The cost of the project is attributed to the age-old “sources familiar with the plans" (The Information says these are “a person who spoke to OpenAI CEO Sam Altman about it and a person who has viewed some of Microsoft’s initial cost estimates”), but neither Microsoft nor OpenAI have yet commented on the specifics of the project. The new data center project is expected to push the boundaries of AI capability and could potentially exceed $115 billion in expenses. This is more than triple the amount Microsoft spent on capital expenditures for servers and equipment last year. Microsoft is currently working on a smaller, fourth-phase supercomputer for OpenAI that is expected to launch around 2026, The Information claims. Shedding more light on the report, The Next Platform says, “The first thing to note about the rumored “Stargate” system that Microsoft is planning to build to support the computational needs of its large language model partner, OpenAI, is that the people doing the talking – reportedly OpenAI chief executive officer Sam Altman – are talking about a data center, not a supercomputer. And that is because the data center – and perhaps multiple data centers within a region with perhaps as many as 1 million XPU computational devices – will be the supercomputer.” The Next Platform also says if Stargate does come to fruition it will be “based on future generations of Cobalt Arm server processors and Maia XPUs, with Ethernet scaling to hundreds of thousands to 1 million XPUs in a single machine,” and it definitely won't be based on Nvidia GPUs and interconnects, which seems like a safe bet if the rumors are to be believed. More from TechRadar Pro OpenAI looking to build an AI chip empire worth more than AMD, Nvidia and intelOpenAI says 2024 is the "year of the enterprise" when it comes to AIMicrosoft announces new AI hub in London View the full article
-
The U.S. government added Sitonholy, one of China's largest solution providers based on Intel and Nvidia processors, to the Entity List. View the full article
-
Jim Keller advises Nvidia to use Ethernet to stitch two Blackwell GPUs in GB200. View the full article
-
At Intel Vision 2024, Intel launched its Gaudi 3 AI accelerator which the company is positioning as a direct competitor to Nvidia's H100, claiming that it offers faster training and inference performance on leading GenAI models. The Gaudi 3 is projected to outperform the H100 by up to 50% in various tasks, including training time, inference throughput, and power efficiency. Building on the performance and efficiency of the Gaudi 2 AI accelerator, Gaudi 3 reportedly boasts 4x AI compute for BF16, a 1.5x increase in memory bandwidth, and 2x networking bandwidth for massive system scale out, compared with its predecessor. Superior performance Manufactured on a 5nm process, Gaudi 3 features 64 AI-custom and programmable TPCs and eight MMEs capable of 64,000 parallel operations. It offers 128GB of memory (HBM2e not HBM3E), 3.7TB of memory bandwidth, and 96MB of on-board SRAM for processing large datasets efficiently. With 24 integrated 200Gb Ethernet ports, it allows for flexible system scaling and open-standard networking. Intel claims Gaudi 3 is superior to H100 across various models, including 50% faster training time on Llama 7B and 13B parameters, as well as GPT-3 175B models. Additionally, there is a 50% increase in inference throughput and 40% greater power efficiency on Llama 7B and 70B parameters, and Falcon 180B models. Intel says Gaudi 3 also outperforms H200 in inferencing speed on Llama 7B and 70B parameters, and Falcon 180B parameter models by 30%. As these are Intel benchmarks, feel free to take them with a pinch of salt. Tom's Hardware notes, "At the end of the day, the key to dominating today’s AI training and inference workloads resides in the ability to scale accelerators out into larger clusters. Intel’s Gaudi takes a different approach than Nvidia’s looming B200 NVL72 systems, using fast 200 Gbps Ethernet connections between the Gaudi 3 accelerators and pairing the servers with leaf and spine switches to create clusters." Justin Hotard, Intel executive vice president and general manager of the Data Center and AI Group, said, “In the ever-evolving landscape of the AI market, a significant gap persists in the current offerings. Feedback from our customers and the broader market underscores a desire for increased choice. Enterprises weigh considerations such as availability, scalability, performance, cost, and energy efficiency. Intel Gaudi 3 stands out as the GenAI alternative presenting a compelling combination of price performance, system scalability, and time-to-value advantage.” Gaudi 3 will be available to OEMs in the second quarter of 2024, with general availability expected in the third quarter. (Image credit: Intel) More from TechRadar Pro Intel bets on a secret weapon to beat AMD in some AI workloadsIntel reveals new spin-off company to bring generative AI learning to businessesNvidia's fastest AI chip ever could cost a rather reasonable $40,000 View the full article
-
There’s no shortage of startups pushing technology that could one day prove pivotal in AI computing and memory infrastructure. Celestial AI, which recently secured $175 million in Series C funding, is looking to commercialize its Photonic Fabric technology which aims to redefine optical interconnects. Celestial AI's foundational technology is designed to disaggregate AI compute from memory to offer a “transformative leap in AI system performance that is ten years more advanced than existing technologies.” Lower energy overhead and latency The company has reportedly been in talks with several hyperscale customers and a major processor manufacturer, about integrating its technology. Though specific details remain under wraps, that manufacturer is quite likely to be AMD since AMD Ventures is one of Photonic Fabric's backers. As reported by The Next Platform, the core of Celestial AI's strategy lies in its chiplets, interposers, and optical interconnect technology. By combining DDR5 and HBM memory, the company aims to significantly reduce power consumption while maintaining high performance levels. The chiplets can be used for additional memory capacity or as interconnects between chips, offering speeds comparable to NVLink or Infinity Fabric. “The surge in demand for our Photonic Fabric is the product of having the right technology, the right team and the right customer engagement model”, said Dave Lazovsky, Co-Founder and CEO of Celestial AI. “We are experiencing broad customer adoption resulting from our full-stack technology offerings, providing electrical-optical-electrical links that deliver data at the bandwidth, latency, bit error rate (BER) and power required, compatible with the logical protocols of our customer’s AI accelerators and GPUs. Deep strategic collaborations with hyperscale data center customers focused on optimizing system-level Accelerated Computing architectures are a prerequisite for these solutions. We’re excited to be working with the giants of our industry to propel commercialization of the Photonic Fabric.” While Celestial AI faces challenges in timing and competition from other startups in the silicon photonics space, the potential impact of its technology on the AI processing landscape makes it a promising contender. As the industry moves towards co-packaged optics and silicon photonic interposers, Celestial AI's Photonic Fabric could play a key role in shaping the future of AI computing. More from TechRadar Pro GPU prices could spike again as rumors indicate AMD wants to prioritize AINvidia's fastest AI chip ever could cost a rather reasonable $40,000Nvidia plans to compete in $30 billion custom chip market View the full article
-
Nvidia’s next generation of graphics cards, reportedly known as Nvidia Blackwell, has been the subject of plenty of rumors since at least 2023. The most recent one seems to confirm that the RTX 5080 and RTX 5090 will be launching in Q4 2024, according to Twitter leaker Kopite7kimi and reported on by PC Gamer. While finally getting a hold of what could easily be the best graphics cards sounds like great news to some, finally getting a sign of the cards’ imminent release, they’re honestly coming out way too soon. There have been reports that the Nvidia RTX 5080 would have better ray tracing capabilities and pricing than the 4080 and that the RTX 5090 would be up to 70% faster than the 4090, which sounds great on paper. But when you consider how already powerful the 4000 series of cards are, it seems a bit pointless. It’s wonderful that ray tracing, speed, and performance might be improved, but to what benefit? We aren't even taking full advantage of current gen cards, so what's the value of buying a Nvidia 5000-series GPU later this year? PC games haven’t even reached the point that they truly challenge the mid-range and high-end 3000-series of graphics cards (hell, an argument can be made that they can’t fully challenge the RTX 2070 Super in ways that truly matter), let alone the current gen. One could argue that the only reason why the current gen was so necessary was thanks to the crypto mining craze completely ruining the 3000-series market and making it nigh impossible to get your hands on one for a remotely affordable price. And right now, the 4000-series is quite excellent performance-wise, as it’s able to handle ray tracing and other advanced effects and tools like no other. The RTX 4090 in particular is nearly perfect in what it can offer, and the lower cards are still absolute performance beasts. This isn’t even mentioning the Super series refreshes, which added even more oomph to your favorite graphics cards while keeping the prices either the same or lowering them. There’s also the fact that some cards, like the RTX 4070, didn’t sell nearly as well as Nvidia wanted and in fact were rumored to be a “disaster.” While that doesn’t reflect the sales numbers for the rest of the graphics cards, it’s not a good look to see the base versions of your mid-range cards doing poorly. And while the RTX 4080 Super seems to be out of stock in many retailers, that could just as well be due to low stock in the first place. With all these issues cropping up, releasing RTX 5080 and 5090 doesn’t seem to be such a smart move on Nvidia’s part. Though the Q4 2024 launch date is still just a rumor, it would be wise for the tech giant to release these cards in 2025 at the earliest to give its 4000-series some proper breathing room. You might also like Nvidia RTX 5080 leak gets some PC gamers worried that Team Green hasn't learnedThe Nvidia RTX 5090 is rumored to be nearly twice as fast as RTX 4090Nvidia GeForce RTX 5090 could be up to 70% faster than the 4090 View the full article
-
Nanotronics' switch fabrication units start at 1,715 square meters. View the full article
-
Nvidia's patch notes for its latest drivers affirm that Intel's latest 13th and 14th Gen CPUs are having instability problems right now affecting gamers. Nvidia steers users to Intel support if they are having instability issues with their Raptor Lake machine. View the full article
-
Lead times for Nvidia's H100 GPU have dropped enormously from almost a year down to just 12-8 weeks. This will help companies like OpenAI attain more H100 GPUs to train their own LLMs. View the full article
-
New figures have claimed Intel CEO Pat Gelsinger saw a significant increase in his earnings in 2023, but it was still only just over half of what Lisa Su, CEO of rival company AMD, made. According to MarketWatch, Gelsinger's total compensation in 2023 was $16.86 million, a 45% increase from his 2022 earnings of $11.61 million, as revealed in Intel's 2024 proxy statement. In contrast, Su's total compensation for 2023 was $30.35 million, barely above her 2022 compensation of $30.22 million. The increase in Gelsinger's pay came despite an 18% drop in his salary to $1.07 million. However, the value of his stock awards increased to $12.43 million, and his non-equity incentive plan compensation jumped to $2.89 million. On the other hand, Su's salary was $1.2 million, and she received $21.85 million in stock awards and $5.84 million in options. What about Nvidia's CEO? Intel's stock soared 90.1% in 2023, while AMD's stock shot up 127.6%. However, as MarketWatch points out, since Gelsinger became CEO, Intel's stock has tumbled 28.5%, while AMD shares have charged up 92.5%. Interestingly, Gelsinger's 2023 compensation was significantly lower than his 2021 total compensation of $178.59 million, which included "new-hire equity awards of a significant magnitude" of $140.43 million. This was done to ensure Intel could hire "the best leader possible." Meanwhile, Nvidia CEO Jensen Huang's total compensation for the fiscal year that ended in January 2023 was $21.36 million, down from $23.74 million the previous year. With Nvidia's stock skyrocketing by 238.9% in 2023, it will be interesting to see his compensation for the latest fiscal year. As Tom's Hardware points out, "Impressive stock gains have already propelled the leader of the green team into becoming the world's 21st richest person." More from TechRadar Pro First reviews of AMD's fastest ever processor reveal a frightening prospectAMD CEO offers to help AI Startup that uses Radeon 7900 XTX GPUsIntel ushers in the enterprise AI PC era View the full article
-
Elon Musk says the next-generation Grok 3 model will require 100,000 Nvidia H100 GPUs to train. He also believes that artificial intelligence models will beat the smartest humans within the 2025–2026 time frame. View the full article
-
MSI has launched the GeForce RTX 4090D 24G Ventus 3X for the Chinese market. View the full article
-
Nvidia's latest driver 552.12 has added new game-ready support for the third season of Call of Duty: Modern Warfare III / Warzone that adds new gameplay to the title. View the full article
-
 Introduction Quora is a leading Q&A platform with a mission to share and grow the world’s knowledge, serving hundreds of millions of users worldwide every month. Quora uses machine learning (ML) to generate a custom feed of questions, answers, and content recommendations based on each user’s activity, interests, and preferences. ML drives targeted advertising on the platform, where advertisers use Quora’s vast user data and sophisticated targeting capabilities to deliver highly personalized ads to the audience. Moreover, ML plays a pivotal role in maintaining high-quality content for users by effectively filtering spam and moderating content. Quora launched Poe, a generative artificial intelligence (AI) based chatbot app by leveraging different Large Language Models (LLMs) and offering fast and accurate responses. Poe aims to simplify the user experience and provide continuous back-and-forth dialogue while integrating with the major LLMs and other generative AI models. Quora successfully modernized its model serving with NVIDIA Triton Inference Server (Triton) on Amazon Elastic Kubernetes Service (Amazon EKS). This move enabled a small team of ML engineers to manage, operate, and enhance model serving efficiently. This post delves into the design decisions, benefits of running NVIDIA Triton Server on Amazon EKS, and how Quora reduced model serving latency by three times and model serving cost by 23%. Previous model serving architecture Quora was running its model serving in hybrid mode where around half of the models were hosted on TensorFlow Serving (TFS), and the other half were hosted on a Custom Python Engine. The Custom Python Engine supported different model frameworks, such as PyTorch, XGBoost, Microsoft LightGBM, sklearn, whereas TFS was used only for the TensorFlow model framework. Figure 1: Previous model serving architecture Challenges with previous model serving architecture Custom Python Engine uses Apache Thrift, whereas TFS uses gRPC framework. Maintaining different frameworks for implementing and managing remote procedure calls (RPC) in model serving architecture added significant complexity. The existing system faced challenges with using GPUs effectively for serving, which led to unnecessary resource waste and increased costs. Furthermore, both had limited support for GPU optimization techniques that restrict model performance and efficiency. There was a pressing need at Quora to serve Recommendation models with large embeddings on GPUs instead of CPU to improve cost. Limitations of Custom Python Engine Performance: Models deployed on Custom Python Engine, which used Apache Thrift for RPC communication, encountered high latency issues that impact model performance. On certain occasions, response time could soar up to 1500 milliseconds (ms), in stark contrast to the anticipated latency of 50 ms. Service Mesh Integration: Quora uses Istio service mesh. gRPC natively supports HTTP2 and integrates seamlessly with service mesh technologies, which provide ease of support for features such as traffic mirroring and rate limiting. Apache Thrift does not support HTTP2 and is not natively integrated with Istio Service mesh. High Traffic management: Custom Python Engine models faced challenges in handling high-traffic scenarios due to limitations in its client-side rate limiting mechanism. gRPC integrates seamlessly with server-side mesh-based rate limiting solutions, providing a much more robust and scalable solution to manage surges in traffic and maintain system stability. This method has been particularly effective for making sure of smooth operation during spikes in queries per second (QPS). The significant disparity in response times across different models underscores the need for an optimized solution to enhance overall model serving performance and to meet specific latency and throughput requirements, particularly in critical use cases such as ads ranking and user feed. Quora was looking for a new model serving solution that resolves the preceding challenges, and also supports multi-ML frameworks such as ONNX, and TensorRT. Solution overview Overview of NVIDIA Triton Inference Server NVIDIA Triton Inference Server is an open-source software solution purpose-built for serving ML models. It optimizes the deployment of models in production by maximizing hardware use, supporting multiple frameworks, and providing a range of flexible serving options. Why did Quora select NVIDIA Triton Inference Server on Amazon EKS? To improve performance and optimize the cost of its model serving, Quora investigated various software and hardware, aiming to reduce latency and increase model throughput. Quora eventually selected NVIDIA Triton Inference Server due to its potential to meet the challenges in its model serving infrastructure. Triton is designed to effectively utilize GPUs for serving a wide variety of models, and flexible deployment options made it an optimal choice for modernizing Quora’s model serving. The reasons for choosing Triton include: Multi-ML frameworks: Triton supports multiple ML frameworks, such as, TensorFlow, PyTorch, ONNX, TensorRT, OpenVINO, HugeCTR, FIL (Forest Inference Library). The broad framework support facilitates the migration of all models from current custom Python engines to Triton. HTTP/GRPC endpoints: Triton provides HTTP/GRPC endpoints for model serving, which simplifies integration with Quora’s existing Istio service mesh. High performance: Triton quickly and efficiently processes requests, making it perfect for applications requiring low latency. It includes essential features such as rate limiting status, health checks, dynamic batching, and concurrent model execution capabilities. Scalability: It can easily scale up to handle large workloads and is designed to handle multiple models and data sources. Additionally, it supports a wide range of hardware (such as GPUs and CPUs), multi-node deployment, model versioning, and ensemble models handling. This makes it easy to deploy models on different hardware configurations. Managed observability: Integration with Prometheus and Grafana for metrics, tools that are already in use at Quora for monitoring ML systems. Recommendation models serving on GPUs: The NVIDIA Merlin HugeCTR (Huge Click-Through-Rate) is a GPU-accelerated deep neural network (DNN) training and inference framework designed for efficiently serving Recommendation models with large embeddings on NVIDIA GPUs. Auto-tuning tools for model optimization: Model Analyzer: Assesses runtime performance and suggests optimized configurations (batch size, instance group, CPU, memory, etc.) Model Navigator: Automates the transition of models from source to optimal format and configuration for Triton deployment Walkthrough The following walkthrough guides you through this solution. Architecture of running NVIDIA Triton server on Amazon EKS Quora chose gRPC as the standard client communication framework and Triton as the model serving for all ML models. There is a separate namespace for training and model serving in the Amazon EKS cluster. Within the model serving, separate node groups are used for the CPU-based models and the GPU-based models. Quora decided to move all new ML models on the following architecture: Figure 2: Modernized model serving Migration to NVIDIA Triton Server on Amazon EKS The existing ML model serving architecture was designed to accommodate multiple ML Serving engines, such as Custom Python Engine and TFS. The following steps are performed to add Triton Server into model serving architecture and migrate GPU models to Triton: Generate stubs for gRPC service: Quora chose to use the gRPC framework with Triton. To generate the stubs necessary for RPC communication between the server and client sides, we followed HTTP/REST and GRPC Protocol and used Triton’s protobuf specification to generate these stubs. Setup NVIDIA Triton on Amazon EKS as the serving server Customize the base image of NVIDIA with ONXX framework: NVIDIA provides pre-built Docker containers for the NVIDIA Triton Inference Server, which are available in their NGC Catalog. However, to tailor the Triton container to our specific environment, we followed the instructions detailed in Triton’s customization guide. This process included selecting the particular framework that our environment needs (for example, ONNX) and installing any additional libraries required by our models. To accommodate a variety of our models based on different frameworks, we built multiple Triton packages. Add Triton-specific model configurations: Triton requires specific configuration details, such as the model’s name, version, and procedures for preprocessing inputs and post-processing outputs. Triton is added as the third engine in the model serving architecture to incorporate Triton specific settings within the existing model configuration. These configurations are serialized into the pbtxt file, which serves as the required model configuration in the model repository for Triton deployment. Prepare the model to deploy on Triton: We took an existing PyTorch model and converted that to the ONNX format and uploaded it to an Amazon Simple Storage Service (Amazon S3) model repository. We used MLFlow model registry for model versioning and incorporated Triton packages into our Continuous Integration/Continuous Deployment (CI/CD) pipeline. With these steps, we successfully integrated the NVIDIA Triton Inference Server into the model serving architecture. Migrate models to NVIDIA Triton Server: In the initial phase, we successfully migrated four PyTorch models, running on Python engine, and two TensorFlow models, running on TFS engine, to the Triton server running with the ONNX framework. This led to substantial improvements in model availability, reducing latency and cost by at least 50%. After the initial success, three new PyTorch GPU models were added directly to the Triton server. Benefits of modernized architecture The modernized model serving platform enables Quora to achieve performance enhancement, cost savings, and substantial feature enrichment. Some significant wins observed after the migration include: Performance enhancement: Latency of the PyTorch GPU model was slashed by seven times (from 230ms to 30ms) and latency for the TensorFlow GPU model was reduced by two times (from 20ms to 8ms). Notably, significant enhancements have been observed in Transformer and BERT-based models, such as DeBERTa, RoBERTa, XLM-RoBERTa, and E5 Text Embedding, with latency reductions exceeding seven times. Improved performance occurs due to conversion to the ONXX format, and model quantization from fp-32 to fp-16. This reduces the model size and memory usage, using ONNX runtime as inference backend engine and using gRPC for the communication framework Cost savings: The GPU model serving cost is reduced by 52%, which leads to 23% overall savings in model serving. The primary contributors to cost savings are conversion to ONNX, and Model Quantization. The model size gets smaller, and Quora could enhance throughput by two times and GPU utilization by three times. Ultimately, this improves the efficiency and cuts down cost. GPU use: The adoption of ONNX frameworks improved GPU use from 40% to 80%, leading to two times serving efficiency. Unified RPC framework: The new setup promotes a unified framework by migrating all models to use gRPC and service mesh functionalities. This unification simplifies client-side RPC support and streamlines the operations. More time to focus on innovation: With Amazon EKS, engineers don’t need to spend time on undifferentiated infrastructure management. It helps reduce operational burden, such as on-call pages. This allows ML engineers to dedicate more time to experimentation, training, and serving new models for an improved customer experience. Lessons learned Adopting new technologies can be a challenging journey, often fraught with unexpected obstacles and setbacks. Here are some of the lessons we learned: ONNX as a Preferred Exchange Format: Quora found ONNX to be an ideal open standard format for model serving. It’s designed for interoperability, making it a perfect choice when working with models trained with various frameworks. After training an ML model in PyTorch or TensorFlow, we could easily convert it to ONNX and apply post-training quantization. This process led to significant improvements in latency and efficiency. gRPC as the communication framework: Quora’s experience has shown gRPC to be a reliable RPC framework offering improved performance and reliability. Remote model repository feature in Triton: Although Triton supports remote model repository in Amazon S3, our testing indicated that this feature did not function as anticipated. We recommend incorporating a step to fetch the model files from Amazon S3 and place them into a predefined local path, such as: /mnt/models/. This method guarantees the availability of model files at a recognized location, a critical need for Triton backends such as the python_backend, which require Python runtime and libraries, or the hugectr_backend, which requires access to embedding files. Support of multi-ML frameworks: NVIDIA Triton Inference Server supports multiple frameworks, such as PyTorch, TensorFlow, TensorRT, or ONNX Runtime with different hardware. Amazon EKS as ML service: Quora needed an extensible, self-serving ML service based on microservice architecture that helps ML Engineers iterate quicker before deploying the model. Ideally, this service should support various training and serving environments, essentially being a truly framework-agnostic training and model serving service. We found Amazon EKS as the most suitable ML service. Conclusion In this post, we showed how Quora modernized its model serving with NVIDIA Triton Inference Server on Amazon EKS, which provided a strong foundation for flexible, reliable, and efficient model serving. This service reduced model serving complexity, which enabled Quora to quickly adapt to changing business requirements. The key factors that drove the modernization decisions were the ability to support multiple ML frameworks, scale the model serving with effective compute resource management, increase system reliability, and reduce the cost of operations. The modernized model serving on Amazon EKS also decreased the ongoing operational support burden for engineers, and the scalability of the design improved customer experience and opened up opportunities for innovation and growth. We’re excited to share our learnings with the wider community through this post, and to support other organizations that are starting their model serving journey or looking to improve the existing model serving pipelines. As part of our experience, we highly recommend modernizing your model serving with NVIDIA Triton on Amazon EKS. View the full article
 -
The latest DLSS and Streamline updates from Nvidia improve support for other upscalers and motion fidelity in the new DLSS Preset E. View the full article
-
The U.S. government updated its semiconductor export restrictions to encompass more computer hardware. Specifically, the ban now encompasses Nvidia's RTX 4090D, which was made to comply with the previous sanctions. View the full article
-
Usually, you don’t need a GPU on your Proxmox VE server to run the virtual machines. But if you want to enable the 3D acceleration (using VirtIO-GL or VirGL) on your Proxmox VE virtual machines, or passthrough a GPU on a Proxmox VE container for AI/CUDA acceleration, you will need a GPU and the required GPU drivers installed on your Proxmox VE server. In this article, we will show you how to install the latest version of the official NVIDIA GPU drivers on Proxmox VE 8 so that you can use it for VirIO-GL/VirGL 3D acceleration on your Proxmox VE virtual machines or passthrough your NVIDIA GPU on Proxmox VE containers for AI/CUDA acceleration. Topic of Contents: Checking If an NVIDIA GPU Is Installed on Your Proxmox VE Server Enabling the Proxmox VE Community Package Repositories (Optional for Enterprise Users) Updating the Proxmox VE Package Database Cache Installing the Proxmox VE Kernel Headers on Proxmox VE Installing the Required Dependencies for NVIDIA GPU Drivers on Proxmox VE Downloading the Latest Version of NVIDIA GPU Drivers for Proxmox VE Installing the NVIDIA GPU Drivers on Proxmox VE Checking If the NVIDIA GPU Drivers Are Installed Correctly on Proxmox VE Conclusion Checking If an NVIDIA GPU Is Installed on Your Proxmox VE Server To install the NVIDIA GPU drivers on your Proxmox VE server, you must have an NVIDIA GPU hardware installed on your server. If you need any assistance in verifying whether you have an NVIDIA GPU hardware available/installed on your server, read this article. Enabling the Proxmox VE Community Package Repositories (Optional for Enterprise Users) If you don’t have a Proxmox VE enterprise subscription, you must enable the Proxmox VE community package repositories to install the required header files to compile the NVIDIA GPU drivers for your Proxmox VE server. Updating the Proxmox VE Package Database Cache Once you have the Proxmox VE community package repositories enabled, navigate to pve > Shell from the Proxmox VE dashboard and run the following command to update the Proxmox VE package database cache: $ apt update Installing Proxmox VE Kernel Headers on Proxmox VE The Proxmox VE kernel headers are required to compile the NVIDIA GPU drivers kernel modules. To install the Proxmox VE kernel headers on your Proxmox VE server, run the following command: $ apt install -y pve-headers-$(uname -r) The Promox VE kernel headers should be installed on your Proxmox VE server. Installing the Required Dependencies for NVIDIA GPU Drivers on Proxmox VE To build the NVIDIA GPU drivers kernel modules, you need to install some dependency packages on your Proxmox VE server as well. To install all the required dependency packages on your Proxmox VE server, run the following command: $ apt install build-essential pkg-config xorg xorg-dev libglvnd0 libglvnd-dev To confirm the installation, press “Y” and then press <Enter>. The required dependency packages are being downloaded from the internet. It takes a while to complete. The required dependency packages are being installed. It takes a while to complete. At this point, the required dependency packages should be installed on your Proxmox VE server. Downloading the Latest Version of NVIDIA GPU Drivers for Proxmox VE To download the latest version of the official NVIDIA GPU drivers installer file for Proxmox VE, visit the NVIDIA Drivers Downloads page from any web browser. Once the page loads, select your GPU from the “Product Type”, “Product Series”, and “Product” dropdown menus[1]. Select “Linux 64-bit” as the “Operating System”[2], “Production Branch” as the “Download Type”[3], and click on “Search”[4]. Click on “Download”. Right-click (RMB) on “Agree & Download” and click on “Copy Link” to copy the download link of the NVIDIA GPU Drivers installer file. Now, go back to the Proxmox VE shell and type in the “wget” command [1], press <Space Bar>, right-click (RMB) on the Proxmox VE shell, and click on “Paste”[2] to paste the NVIDIA GPU drivers download link. Once the download link is pasted on the Proxmox VE shell, press <Enter> to run the NVIDIA GPU drivers download command: $ wget https://us.download.nvidia.com/XFree86/Linux-x86_64/535.146.02/NVIDIA-Linux-x86_64-535.146.02.run The NVIDIA GPU drivers installation file is being downloaded. It takes a while to complete. At this point, the NVIDIA GPU drivers installer file should be downloaded. You can find the NVIDIA GPU drivers installer file (NVIDIA-Linux-x86_64-535.146.02.run in our case) in the home directory of your Proxmox VE server. $ ls -lh Installing the NVIDIA GPU Drivers on Proxmox VE Before you can run the NVIDIA GPU drivers installer file on your Proxmox VE server, add executable permission to the NVIDIA GPU drivers installer file as follows: $ chmod +x NVIDIA-Linux-x86_64-535.146.02.run Now, run the NVIDIA GPU drivers installer file as follows: $ ./NVIDIA-Linux-x86_64-535.146.02.run The NVIDIA GPU drivers are now being installed on your Proxmox VE server. It takes a while to compile all the NVIDIA GPU drivers kernel modules for Proxmox VE server. When you’re asked to install the NVIDIA 32-bit compatibility libraries, select “Yes” and press <Enter>. The NVIDIA GPU drivers installation should continue. Once you see the following prompt, select “Yes” and press <Enter>. Press <Enter>. The NVIDIA GPU drivers should be installed on your Proxmox VE server. For the changes to take effect, restart your Proxmox VE server with the following command: $ reboot Checking If the NVIDIA GPU Drivers Are Installed Correctly on Proxmox VE To check whether the NVIDIA GPU drivers are installed correctly on your Proxmox VE server, run the following command from your Proxmox VE shell: $ lsmod | grep nvidia If the NVIDIA GPU drivers are installed correctly on your Proxmox VE server, the NVIDIA kernel modules should be loaded as you can see in the following screenshot: You can also use the “nvidia-smi” command to verify whether the NVIDIA GPU drivers are working correctly. As you can see, the “nvidia-smi” command shows that we have the NVIDIA GeForce RTX 4070 (12GB)[1][2] version installed on our Proxmox VE server and we are using the NVIDIA GPU drivers version 535.146.02[3]. $ nvidia-smi Conclusion In this article, we showed you how to download and install the latest version of the official NVIDIA GPU drivers on your Proxmox VE server. The NVIDIA GPU drivers must be installed on your Proxmox VE server if you want to use your NVIDIA GPU to enable the VirtIO-GL/VirGL 3D acceleration on Proxmox VE virtual machines or passthrough the NVIDIA GPU to Proxmox VE LXC containers for AI/CUDA acceleration. View the full article
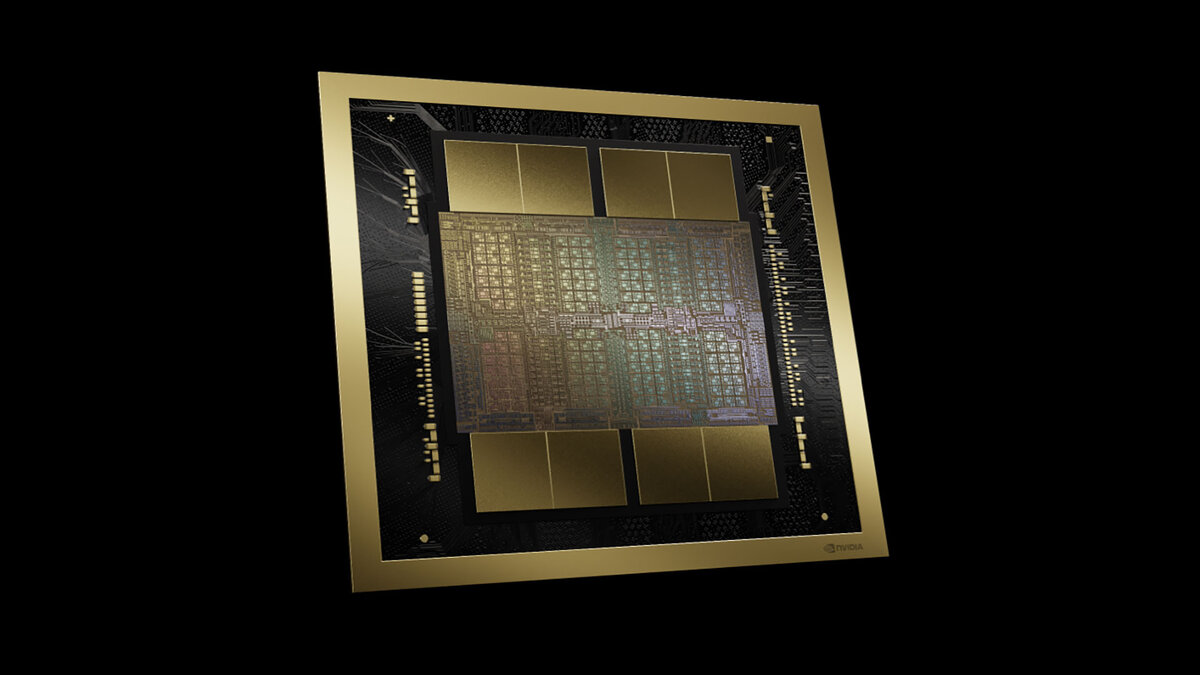
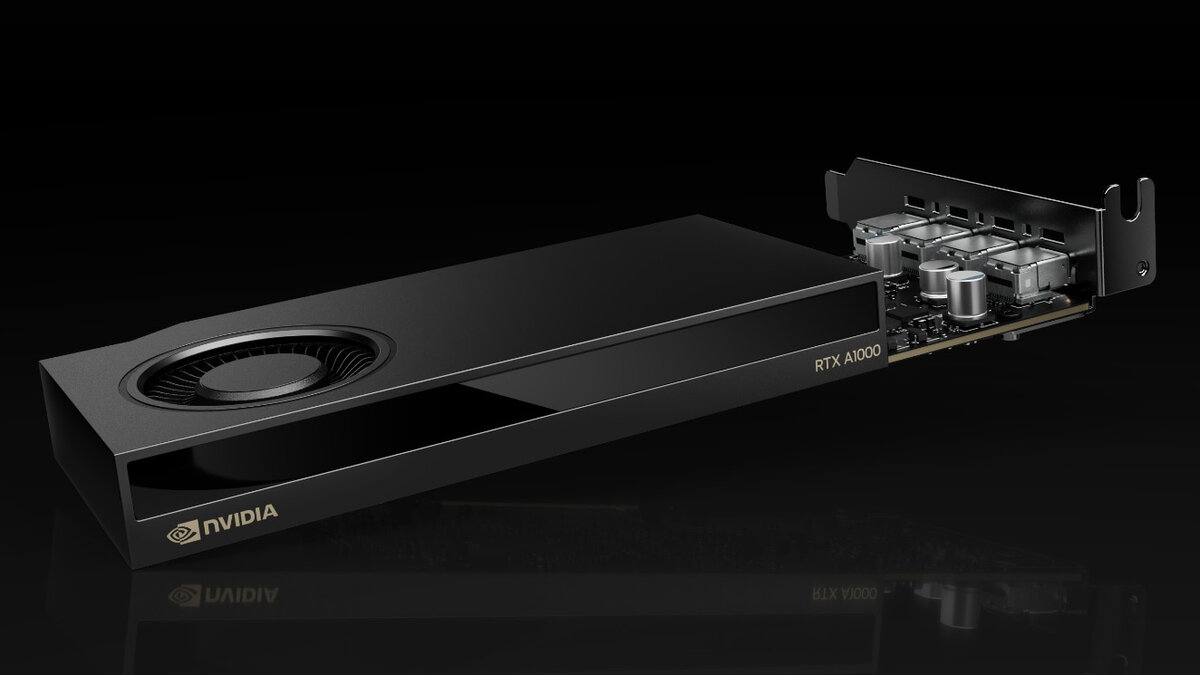


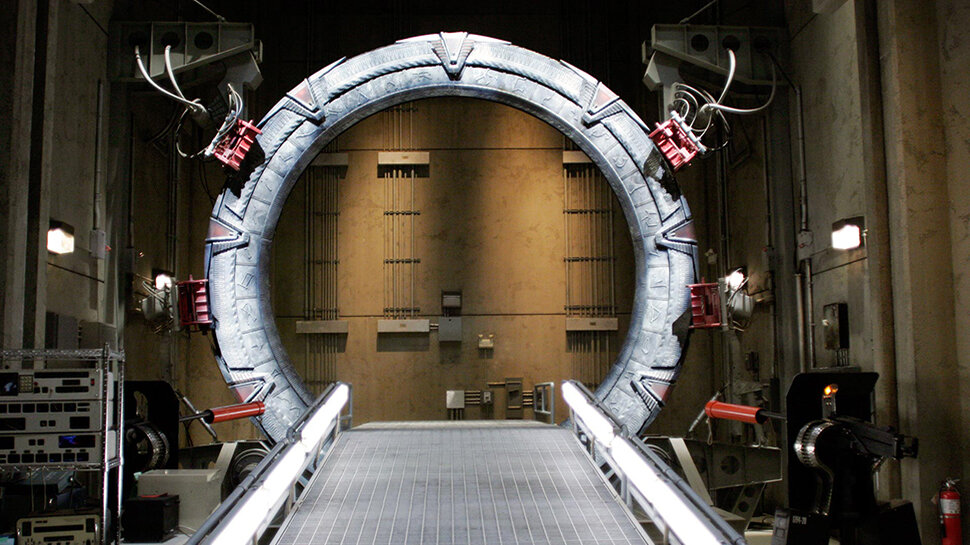
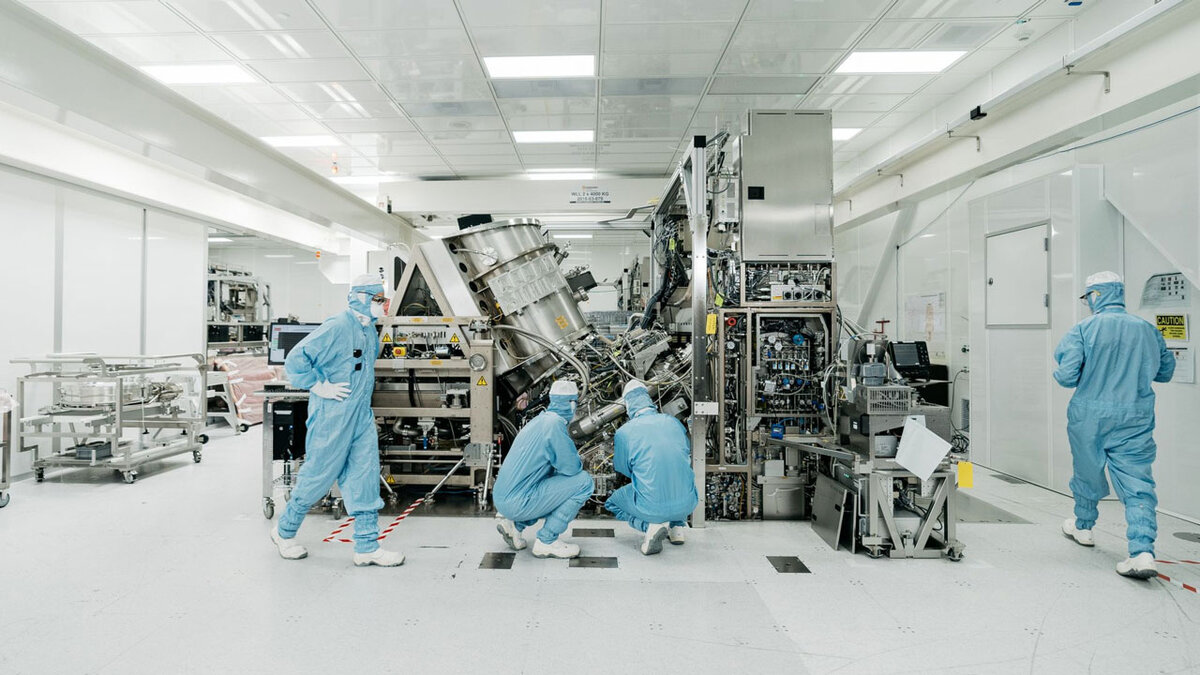

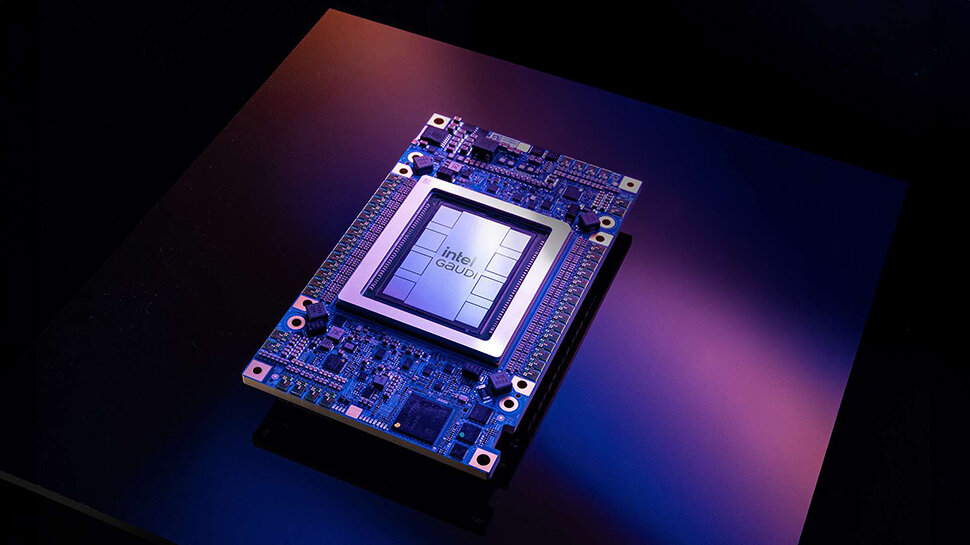
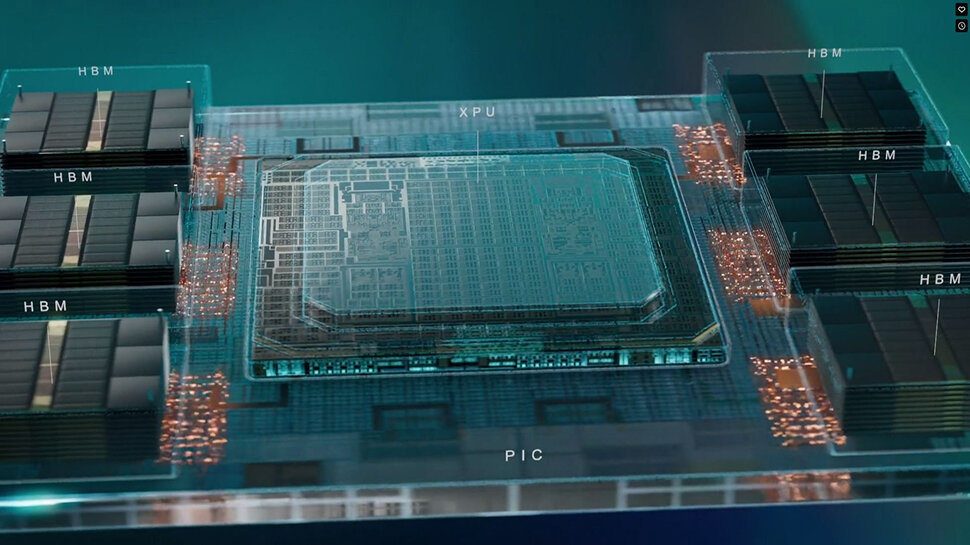

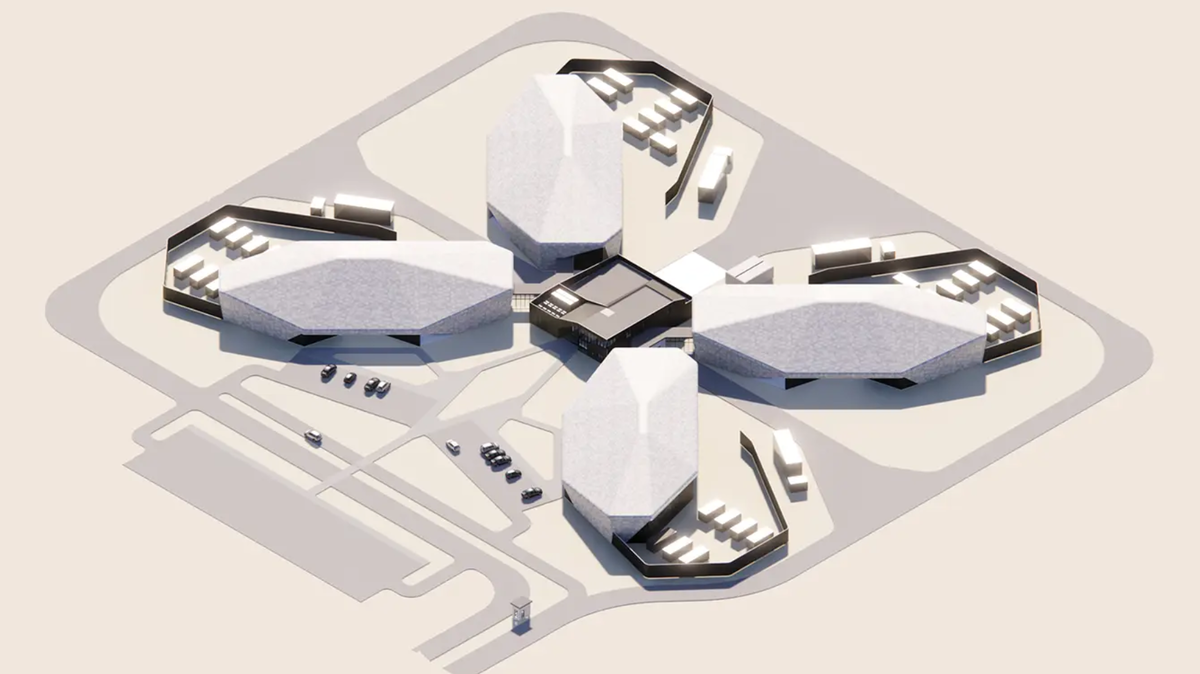


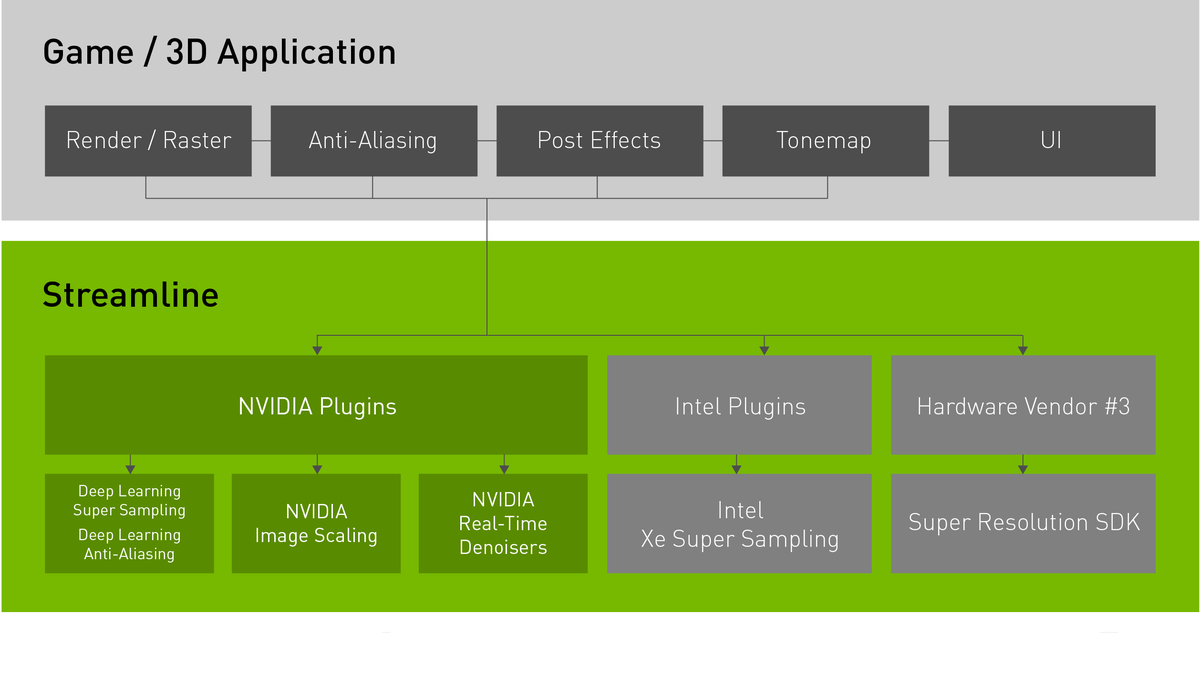
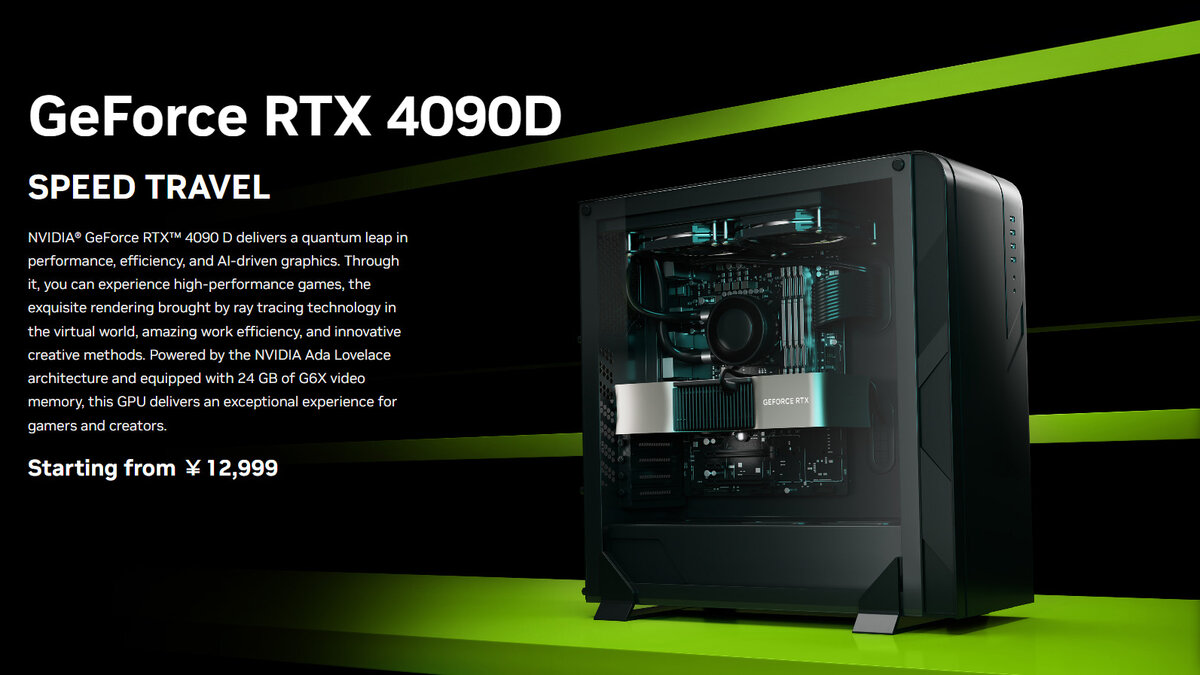
-
Forum Statistics
42.9k
Total Topics42.3k
Total Posts