.png.6dd3056f38e93712a18d153891e8e0fc.png.1dbd1e5f05de09e66333e631e3342b83.png.933f4dc78ef5a5d2971934bd41ead8a1.png)
Search the Community
Showing results for tags 'windows 11'.
Found 13 results
-
 Of all the biggest missed opportunities in Microsoft’s rather long history of squandered chances, Windows on Arm is the one I’m saddest about – but that could soon change. When Windows 10 on Arm was first being touted (the less said about the earlier Windows RT the better), the promise of a fully-fledged version of Windows running on Arm-based hardware usually found in smartphones and tablets (rather than the more common Intel and AMD hardware) was incredibly exciting. We were told that Windows 10 on Arm would combine the power and flexibility of the best laptops with some of the best features of smartphones and tablets – particularly speedy boot times, fast resume, always-connected internet, and day-long battery life. Unfortunately, the reality was quite different from those lofty promises. While battery lives of Windows 10 on Arm devices were certainly impressive for the time, performance was poor, especially considering that Windows 10 on Arm devices were also very expensive. Worst of all, these devices could only run apps downloaded from the Windows Store (now known as the Microsoft Store), and those apps had to have Arm-compatible versions. (Image credit: Microsoft / Dell) Unfortunately, most Windows apps are designed for Intel and AMD hardware (also known as x64 architecture). This makes sense as the vast majority of Windows devices – especially during the Windows 10 years – was built on x64 hardware. So, many app developers didn’t see the point of making Arm-compatible versions, and this meant that not only were Windows 10 on Arm devices more expensive and less powerful than standard Windows 10 laptops, but they also couldn't run a lot of the most popular applications – a fatal combination. Poor sales of Windows on Arm devices inevitably followed, and that, in turn, meant app developers were less likely to port their products to Arm. (Image credit: Yaaaaayy / Shutterstock) Breaking the vicious cycle Unfortunately, the lack of both apps and customers set off a vicious cycle that impacted the success of later Windows 11 on Arm devices. However, there have been some exciting breakthroughs that could positively affect the fortunes of Windows 11 on Arm devices, and might finally allow them to reach their full potential. The most important development has been the launch of the Qualcomm Snapdragon X Plus and Elite chips. Qualcomm is one of the biggest companies in the world, and while it might not have the kind of brand recognition that the likes of Intel and AMD have, its Arm-based chips have been powering millions of mobile devices around the world. The company has been a key partner of Microsoft’s when it comes to Windows on Arm devices and has applied its experience of making Arm chips for mobile devices to create more powerful chips for computing devices. While these haven’t always been successful, the latest generation promises some very exciting things. Qualcomm’s Snapdragon X Elite is the most powerful variant, and it’s shaping up to be an Arm chip that could finally live up to expectations. My colleague, UK Computing Editor Christian Guyton, was particularly impressed when he tested out some prototype laptops earlier this month that were powered by the X Elite. He was able to play Baldur’s Gate 3, a rather complex game, at a decent framerate and resolution. This struck me as evidence that Qualcomm might have cracked two of the biggest issues with Windows on Arm devices. First, there’s the performance. While Baldur’s Gate 3 on the Snapdragon X Elite-powered device was playable, it won’t trouble the best gaming laptops – but the fact that it even ran at all is impressive. This bodes well for the day-to-day performance of Snapdragon X Elite-powered laptops. There’s also the important fact that there’s no Arm version of Baldur’s Gate 3 for Windows devices. This means that the game is using emulation to allow it to work on Arm hardware. This comes at a performance cost, which makes the playable state of the game on the Snapdragon X Elite even more impressive. It also shows that even demanding non-Arm applications can be made to work on Arm hardware without needing a native Arm version. This could pave the way for more programs coming to Windows on Arm – and it isn’t dependent on the developers making dedicated versions. This could address the issue of a lack of apps on Windows on Arm. Alongside the Snapdragon X Elite, Qualcomm also has Snapdragon X Plus, a more affordable chip that lowers the CPU core count (10 cores compared to the Elite’s 12) and lower speed (3.4GHz vs 3.8GHz). If the performance remains competitive (and early benchmark leaks suggest that it does), and the price is low enough, we could see Windows on Arm devices that aren’t overpriced and offer much better value for money – addressing yet another common criticism of Windows on Arm devices. (Image credit: Apple) The Apple effect Before the launch of the Snapdragon X series, Windows on Arm was in a bad place. Things looked particularly grim as Microsoft’s old rival, Apple, was enjoying huge success and critical acclaim with its lineup of Macs powered by its M1 (and later M2 and M3) chips – which are built on Arm architecture. While Windows on Arm struggled, the MacBook Air (M1, 2020) and co were proving that Arm-powered laptops weren’t just viable, they could be the future of computing. Offering the long battery lives and quick startups we’d been promised, Apple’s first generation of Mac and MacBooks that ran on the company’s Arm-based chips, rather than the Intel hardware of older models, were a hit. And, while the MacBook Air’s launch price of $999 / £999 / AU$1,599 wasn’t exactly cheap, it was a competitive price point. And with the M1 providing an excellent level of performance, the high price tag is far more justified. The best thing about the M1 Apple Macs was a tool by Apple called Rosetta 2. This was an emulation layer that allowed almost all existing Mac apps to run on the new M1 hardware. This meant Mac users switching to an M1 device would be able to use pretty much all of their important apps and programs, even if M1 native apps were thin on the ground. This was a canny move by Apple, as it meant that M1 products were a big success, and because of that, app developers started making versions of their products that could run on M1 hardware without the need for emulation – and could take full advantage of Apple’s chip. When the M2 series of Macs and MacBooks came out, Rosetta 2 was still in use – but the number of times I’ve had to use it when using an M2 MacBook dropped significantly, as there was a growing library of M2 apps. By the time the M3 chips rolled around late last year, the number of times I (and other users) had to rely on Rosetta 2 was even rarer. Very few bits of software can be considered a success if fewer people need to use it, but that’s exactly what happened here. Rosetta 2 allowed Mac owners to switch to Arm-based Macs with ease, while also giving app developers the time to develop native apps. And the more people that switched to Arm Macs, the more attractive it became for app developers to port their apps to the platform. (Image credit: Accogliente Design / Shutterstock) It’s now up to Microsoft So, Apple proved that Arm-based laptops can be successful, and Qualcomm looks like it could have addressed many of the hardware issues. Does this mean the next generation of Windows on Arm devices will be a slam dunk? Sadly, that’s not a guarantee just yet as there’s one company that needs to pull its weight to give Windows on Arm devices their best chance of success: Microsoft. While it’s obvious that Microsoft would want Windows on Arm to succeed, the way it’s handled previous generations has been frustrating. The fact that there’s never been a tool similar to Rosetta 2 that would make running non-Arm apps run easily is particularly annoying. Now, I’m sure this is due to it being a very complex job. After all, Windows devices are made by various manufacturers that use components from different companies, which leads to a potentially limitless range of Windows PC configurations. Macs, on the other hand, have much more limited configurations, with the hardware mainly being built by Apple. However, the lack of apps is perhaps the biggest hurdle still standing for Windows on Arm, especially when there are Macs out there that can run a much wider range of apps. And, this is a problem that should be in Microsoft’s powers to do something about. Microsoft does have tools for getting non-Arm software running on Arm hardware using emulation, but it hasn’t taken off in the same way, mainly because it’s not as easy to use and doesn’t work quite as well, with some apps still refusing to run. If Microsoft can’t come up with a Rosetta 2-beating solution, then it needs to do more work convincing app developers to port their software to Arm. This might be a difficult feat, especially when the user base is so low, but Microsoft is a very successful company with plenty of resources. It could provide financial incentives, or offer developers and tools to help port the biggest apps. Microsoft is also a hardware company, and its past attempts to create Windows on Arm devices suffered from the problems that have become all too familiar. The Surface Pro X, for example, came with Microsoft’s SQ1 Arm-based chip, made in conjunction with Qualcomm. It was also overpriced and didn’t perform well. However, rumors are swirling that Microsoft could be releasing Surface Pro and Surface Laptop devices soon that will feature Snapdragon X chips. If Microsoft can nail both the software and hardware sides, we could see a new era of Windows on Arm devices that are actually worth buying. And Microsoft could give Apple’s rumored M4-powered Macs a run for their money. However, if these devices come out with unappealing price tags, poor performance, and a continued lack of app support, then it could be the end of the Windows on Arm dream. After all, if Microsoft itself can’t make a success of it, what hope do other companies have? You might also like Forget Apple’s M4 MacBooks – Lenovo’s Snapdragon X Elite laptops have been spottedSnapdragon X Elite hype builds as Qualcomm shows off Apple M3-beating CPU that can handle laptop gaming nicelyApple just saved Arm-based Windows laptops, and it’s a wakeup call Intel needs View the full article
-
 In an attempt to make its users aware, Microsoft will be overlaying a watermark on PCs with Windows 11 24H2 which will not have compatible CPUs using SSE 4.2 instructions as its native apps use it for AI. View the full article
-
Microsoft has deployed a new preview build of Windows 11 to the Canary channel (which is the earliest testing outlet) and it does some work on the widgets panel that could be divisive. This is build 26200 and there’s only a handful of changes applied here, two of which pertain to widgets. The main thrust of innovation here is Microsoft’s new idea to allow developers to send notifications from their widgets to the taskbar button. In other words, when something happens with a widget that you might want to see, it’ll be waving at you from the taskbar to let you know. Of course, not everyone will want their widget button in the taskbar to act in this way, and fortunately, Microsoft has included an option to turn off this behavior. It’s also worth noting that this is a limited rollout to begin with, and indeed, most people won’t see these widget notifications yet – only those in the European Economic Area (EEA) are getting this feature in testing. Of course, that rollout could be made broader down the line, depending on feedback. Another tweak related to this in build 26200 is that Microsoft is changing said widgets button to make the icons on the taskbar clearer. Elsewhere on the taskbar, another icon is changing, this time the energy saver icon which resides in the system tray (on the far right). A few months back this was changed in testing to look different for desktop PCs plugged into a power socket, but now Microsoft has decided to revert it to the old look (a leaf icon). Finally, Microsoft notes that there is an odd known issue with this preview build – and others, in the Dev and Beta channels, too – whereby Copilot is auto-launching itself after the PC is rebooted. The software giant explains this is not related to the automatic launch on boot behavior that has been tested in preview builds before, the rollout of which has now stopped, apparently, since March (though we heard it has been restarted elsewhere). This is a separate glitch, then, and Microsoft says it hopes to have a fix implemented soon. Meanwhile, greater visibility for Copilot is something the company is certainly driving forward with, to no one’s surprise. Analysis: A livelier taskbar won’t be everyone’s preferred beverage Are notifications for widgets intrusive? Well, yes they could certainly be regarded in that way, but as noted, as long as the option is provided to turn them off, it’s not too big a deal. If you want them, you can have them – if not, hit that off switch. Fair enough. Many people likely won’t want their widgets effectively waving their hands at them from the taskbar, whenever something new pops up with a widget in the panel. This taskbar-based hand-waving appears to be a direction Microsoft is exploring in more depth, though. We’ve also recently seen an idea where the Copilot button runs an animation with its icon to draw your attention to the fact that the AI can help with something you’re doing on the desktop. This only relates to copying text or image files currently – again, in testing – but in this case, there’s no way to turn it off. All this could possibly point to a taskbar which is considerably livelier and more animated in the future, perhaps – and again, that’s not something everyone will appreciate. If this is the path we’re going down for the taskbar as we head towards next-gen Windows (which might be Windows 12), hopefully Microsoft will also give Windows users enough granular control over the bar’s highlighting features and animations so they can be dialed back suitably. You might also like... Watch out: soon some older PCs will lose Windows 11 supportWindows 11 is getting a voice-powered ability many users have been longing forDon’t make these 5 big mistakes when using Windows 11 View the full article
-
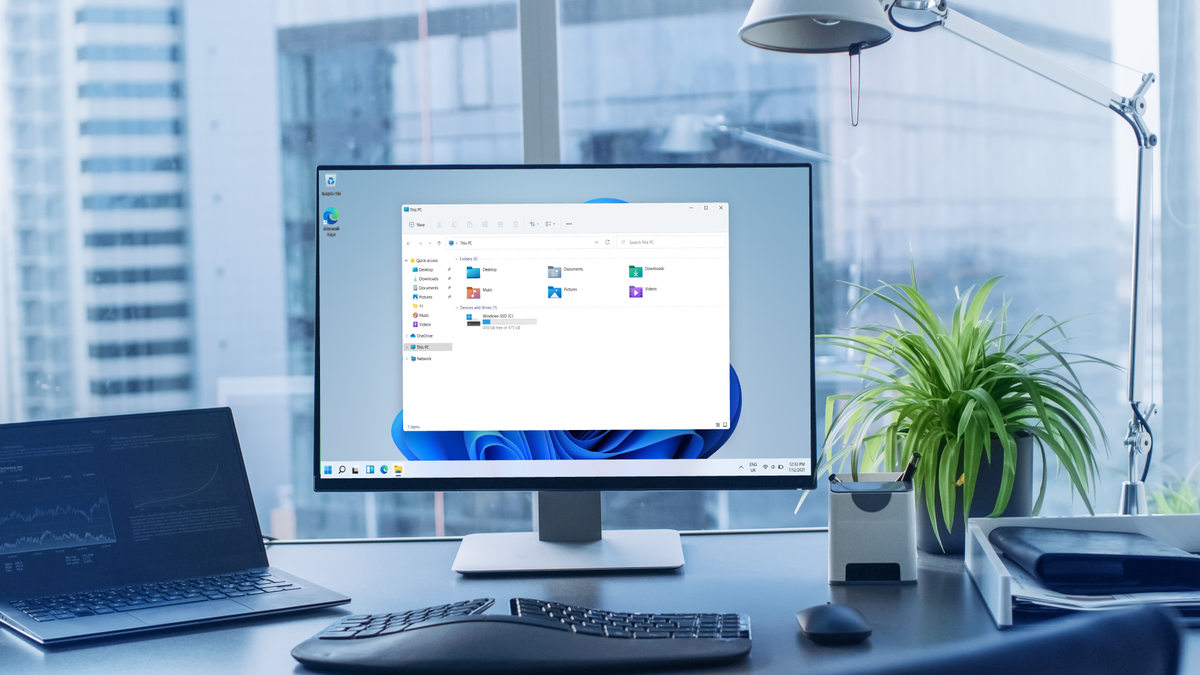
 In this article, I am going to show you how to download the ISO image of Windows 11 and VirtIO Windows drivers on Proxmox VE 8, create a Windows 11 virtual machine (VM) on Proxmox VE 8, install Windows 11 on the Proxmox VE 8 virtual machine (VM), and install VirtIO drivers and QEMU guest agent on the Windows 11 Proxmox VE 8 virtual machine (VM). Table of Contents How to Download/Upload the Windows 11 ISO Image on Proxmox VE 8 Downloading the Latest VirtIO Drivers ISO File for Windows 11 on Proxmox VE 8 Creating a Windows 11 Proxmox VE 8 Virtual Machine (VM) Installing Windows 11 on the Proxmox VE 8 Virtual Machine (VM) Installing VirtIO Drivers and QEMU Guest Agent on the Windows 11 Proxmox VE 8 Virtual Machine (VM) Removing the Windows 11 and VirtIO Drivers ISO Images from the Windows 11 Proxmox VE 8 Virtual Machine (VM) Conclusion References How to Download/Upload the Windows 11 ISO Image on Proxmox VE 8 There are two ways to get the Windows 11 ISO image on your Proxmox VE 8 server. Download the Windows 11 ISO image on your computer and upload it to Proxmox VE from your computer. Download the Windows 11 ISO image directly on Proxmox VE. To download the Windows 11 ISO image, visit the official download page of Windows 11 from your favorite web browser. Once the page loads, select Windows 11 (multi-edition ISO for x64 devices)[1] from the dropdown menu and click on Download Now[2]. Select your language from the dropdown menu[1] and click on Confirm[2]. The download link for the Windows 11 ISO image should be generated. To download the Windows 11 ISO image on your computer (so that you can upload it to Proxmox VE), click on the 64-bit Download button. To download the Windows 11 ISO image on your Proxmox VE 8 server directly, right-click (RMB) on the 64-bit Download button and click on Copy Link (or similar option depending on your web browser) to copy the download link of the Windows 11 ISO image. Now, navigate to the ISO Images section of your desired Proxmox VE datastore (that supports ISO image) from the resource tree of your Proxmox VE server[1]. If you’ve downloaded the Windows 11 ISO image on your computer, click on Upload and select the Windows 11 ISO image file from your computer to upload it to your Proxmox VE server[2]. If you want to download the Windows 11 ISO image directly on your Proxmox VE server, click on Download from URL on your Proxmox VE server[3]. I will demonstrate this method in this article. Once you’ve clicked on the Download from URL button, you will see the following window. Paste the Windows 11 ISO download link (that you’ve copied recently) in the URL section and click on Query URL. The correct File name[1] and File size[2] of the Windows 11 ISO image should be displayed. Click on Download[3]. Proxmox VE should start downloading the Windows 11 ISO image. It will take a while to complete as it’s a big download. Just wait till it finishes. Once the Windows 11 ISO image is downloaded on your Proxmox VE 8 server, it will be listed in the ISO Images section of your selected Proxmox VE datastore. Downloading the Latest VirtIO Drivers ISO File for Windows 11 on Proxmox VE 8 To get the best performance, you need to install the required VirtIO drivers on the Windows 11 operating system after it’s installed on the Proxmox VE virtual machine. To download the latest version of the VirtIO drivers ISO image file on Proxmox VE 8, visit the official VirtIO drivers download page from your favorite web browser. Once the page loads, right-click on the virtio-win.iso image file or virtio-win-<version>.iso image file and click on Copy Link (or similar option dependiing on the web browser you’re using). Then, navigate to the ISO Images section of your desired Proxmox VE datastore (that supports ISO images) and click on Download from URL. Type in the VirtIO ISO image download link (that you’ve copied recently) in the URL section and click on Query URL[1]. The file name[2] and file size[3] of the VirtIO ISO image should be displayed. Then, click on Download[4]. Proxmox VE should start downloading the VirtIO ISO image. It will take a while to complete. Once the VirtIO ISO image is downloaded, it will be displayed in the ISO Images section of the Proxmox VE datastore (where you’ve downloaded it). Creating a Windows 11 Proxmox VE 8 Virtual Machine (VM) To create a new virtual machine on Proxmox VE 8, click on Create VM from the top-right corner of the Proxmox VE dashboard. The Proxmox VE 8 virtual machine creation wizard should be displayed. In the General tab, type in a name for your Windows 11 virtual machine[1] and click on Next[2]. In the OS tab, select USE CD/DVD disk image file (iso)[1], select the datastore where you’ve uploaded/downloaded the Windows 11 ISO image from the Storage dropdown menu, and select the Windows 11 ISO image from the ISO image dropdown menu[2]. Then, select Microsoft Windows from the Guest OS Type dropdown menu[3], select 11/2022 from the Version dropdown menu[4], tick Add additional drive for VirtIO drivers[5], and select the VirtIO drivers ISO image file from the Storage and ISO image dropdown menus[6]. Once you’re done with all the steps, click on Next[7]. In the System tab, select a datastore for the EFI disk from the EFI Storage dropdown menu[1], tick the Qemu Agent checkbox[2], and select a datastore for the TPM from the TPM Storage dropdown menu[3]. Once you’re done, click on Next[4]. In the Disks tab, select VirtIO Block from the Bus/Device dropdown menu[1], select a datastore for the virtual machine’s disk from the Storage dropdown menu[2], and type in your desired disk size in the Disk size (GiB) section[3]. Once you’re done, click on Next[4]. In the CPU tab, select the number of CPU cores you want to allocate for the virtual machine from the Cores section[1], select host from the Type dropdown menu[2], and click on Next[3]. In the Memory tab, type in the amount of memory you want to allocate to the Proxmox VE virtual machine (VM) in the Memory (MiB) section[1]. If you want to overprovision the memory of your Proxmox VE server (allocate more memory to virtual machines than you have available on your Proxmox VE server), tick Ballooning Device[2] and type in the minimum amount of memory that you want to allocate to the virtual machine in the Minimum memory (MiB) section[3]. If you enable Ballooning Device for this virtual machine, the virtual machine will release unused memory to the Proxmox VE server so that it can allocate it to other virtual machines. For more information on this, read the Proxmox VE Dynamic Memory Management documentation. Once you’re done, click on Next[4]. In the Network tab, select VirtIO (paravirtualized)[1] from the Model dropdown menu and click on Next[2]. Click on Finish. A Windows 11 Proxmox VE 8 virtual machine should be created[1]. To start the Windows 11 virtual machine, click on Start[2]. Press any key and the Windows 11 installer should be displayed on the virtual machine. From here, you can install Windows 11 on the Proxmox VE virtual machine as usual. Installing Windows 11 on the Proxmox VE 8 Virtual Machine (VM) To install Windows 11, select your language, time and currency format, and keyboard/input method from the respective dropdown menus[1] and click on Next[2]. Click on Install now. If you have a Windows 11 license key, type it in and click on Next. If you don’t have a Windows 11 license key or want to activate Windows 11 later, click on I don’t have a product key. Select the Windows 11 version that you want to install on the Proxmox VE virtual machine and click on Next. Tick the I accept the Microsoft Software License Terms… checkbox[1] and click on Next[2]. Click on Custom: Install Windows only (advanced). Now, you have to install the VirtIO SCSI driver and VirtIO Ethernet driver to successfully install Windows 11 on the Proxmox VE 8 virtual machine. To install the VirtIO SCSI driver from the VirtIO drivers ISO file, click on Load driver. Click on Browse. Select CD Drive: virtio-win > amd64 > w11 folder and click on OK as marked in the screenshot below. The VirIO SCSI driver should be listed. Select the Red Hat VirtIO SCSI controller driver[1] and click on Next[2]. The VirtIO SCSI driver is being installed. It will take a few seconds to complete. Once the VirtIO SCSI driver is installed, you will see a free disk in your Proxmox VE 8 virtual machine[1]. To install the VirtIO Ethernet driver, click on Load driver again[2]. Click on Browse. Select CD Drive: virtio-win > NetKVM > w11 > amd64 folder and click on OK as marked in the screenshot below. The VirtIO Ethernet driver should be listed. Select the Red Hat VirtIO Ethernet Adapter driver[1] and click on Next[2]. The VirtIO Ethernet driver is being installed. It will take a few seconds to complete. The VirtIO Ethernet driver should be installed. Once the VirtIO SCSI and VirtIO Ethernet drivers are installed, select the free disk[1] and click on Next[2]. Windows installer should start installing Windows 11 on the disk of the Proxmox VE 8 virtual machine. It will take a few minutes to complete. Once the required Windows 11 files are installed on the Proxmox VE 8 virtual machine, the virtual machine will reboot. On the next boot, the Windows installer will ask you a few questions to configure Windows 11 for you. First, select your country/region from the list and click on Yes. Select a keyboard layout or input method from the list and click on Yes. If you want to add another keyboard layout or input method on your Windows 11 installation, click on Add layout and follow the instructions. If you don’t want to add another keyboard layout or input method, click on Skip. You will need to wait a few minutes for the Windows 11 installer to get ready and show you the next steps. Type in a name for your Windows 11 virtual machine[1] and click on Next[2]. Select how you want this Windows 11 virtual machine set up[1] and click on Next[2]. Depending on what you select from this section, you will see different options later. I am setting up this Windows 11 virtual machine for personal use. Click on Sign in. You must have a Microsoft account to install and use Windows 11. If you don’t have a Microsoft account, you can create one from here. Once you have a Microsoft account, log in to your Microsoft account to continue the Windows 11 installation. If you’ve used the same Microsoft account on different Windows 10/11 devices, you will be asked to restore data on this virtual machine from the latest backup. To do that, click on Restore from this PC[1]. If the device you want to restore from is not listed or you want to set this virtual machine as a new Windows 11 device, click on More options[2]. All the Windows 10/11 devices that you’ve connected to this Microsoft account should be listed. You can restore data from any of these devices. Just select your desired Windows 10/11 device from the list and click on Restore from this PC[1]. If you want to set this virtual machine as a new Windows 11 device, click on Set up as a new PC[2]. Click on Create PIN. Type in your PIN and click on OK. Click on Next. Click on Accept. You can select the type of work you want to do in this virtual machine from the list and click on Accept so that Windows 11 can customize it for you. If you don’t want to answer it now, click on Skip. You will be asked to connect your Android phone to Windows 11. You can do that later. So, click on Skip to simplify the Windows 11 installation. You will be asked to import the browsing data from your Microsoft account. If you’re a Microsoft Edge user, this will be helpful. So, click on Accept and follow the procedures. If you don’t want to import the browsing data from your Microsoft account, click on Not now. To simplify the Windows 11 installation, I have selected this option. Click on Decline to simplify the Windows 11 installation. Click on Decline. Windows 11 should be ready to use in a few minutes. Windows 11 should be installed on the Proxmox VE 8 virtual machine. Installing VirtIO Drivers and QEMU Guest Agent on the Windows 11 Proxmox VE 8 Virtual Machine (VM) To install all the VirtIO drivers and QEMU quest agent on the Windows 11 Proxmox VE 8 virtual machine, double-click (LMB) on the VirtIO driver CD (CD Drive virtio-win-<version>) from the File Explorer of Windows 11. Double-click (LMB) on the virtio-win-guest-tools installer file as marked in the screenshot below. The VirtIO Guest Tools installer window should be displayed. Check I agree to the license terms and conditions[1] and click on Install[2]. Click on Yes. Click on Next. Check I accept the terms in the License Agreement[1] and click on Next[2]. Click on Next. Click on Install. The VirtIO drivers are being installed. It will take a few seconds to complete. Once the VirtIO drivers are installed on the Windows 11 Proxmox VE virtual machine, click on Finish. After the VirtIO drivers are installed, the QEMU Guest Agent should start installing. It will take a few seconds to complete. Once the QEMU Guest Agent is installed, click on Close. Removing the Windows 11 and VirtIO Drivers ISO Images from the Windows 11 Proxmox VE 8 Virtual Machine (VM) Once you’ve installed Windows 11 on the Proxmox VE 8 virtual machine, you can remove the Windows 11 and VirtIO drivers ISO images from the Windows 11 virtual machine. To remove the Windows 11 ISO image from the Windows 11 Proxmox VE virtual machine, navigate to the Hardware section of the Windows 11 virtual machine, select the CD/DVD Drive that has the Windows 11 ISO image file mounted, and click on Edit. Select Do not use any media and click on OK. The Windows 11 ISO image should be removed from the CD/DVD Drive of the Windows 11 Proxmox VE virtual machine[1]. In the same way, you can remove the VirtIO drivers ISO image from the CD/DVD Drive of the Windows 11 Proxmox VE virtual machine[2]. Conclusion In this article, I have shown you how to download/upload the latest Windows 11 ISO image on your Proxmox VE 8 server directly from Microsoft. I have also shown you how to download the latest VirtIO drivers ISO image for Windows 11 Proxmox VE 8 virtual machine. I have shown you how to create a Windows 11 Proxmox VE 8 virtual machine, install Windows 11 on it, and install VirtIO drivers and QEMU guest agent on the Windows 11 virtual machine as well. After Windows 11 and the VirtIO drivers and QEMU guest agent are installed on the Proxmox VE virtual machine, I have shown you how to remove the Windows 11 and VirtIO drivers ISO images from the Windows 11 Proxmox VE virtual machine. References Download Windows 11 Windows VirtIO Drivers – Proxmox VE View the full article
 -
Microsoft fixes a bug preventing PCs with specific Intel drivers from using Windows 11 without crashes and allows affected PCs to upgrade from Windows 10. View the full article
-
A new report has revealed that Microsoft has a pretty substantial hardware ID, software, and driver block list in place that will block users from upgrading to Windows 11 24H2 if necessary. View the full article
-
As the release date for Windows 11 24H2 nears, the RTM version of Windows has blocked customization options, citing security and stability concerns. View the full article
-
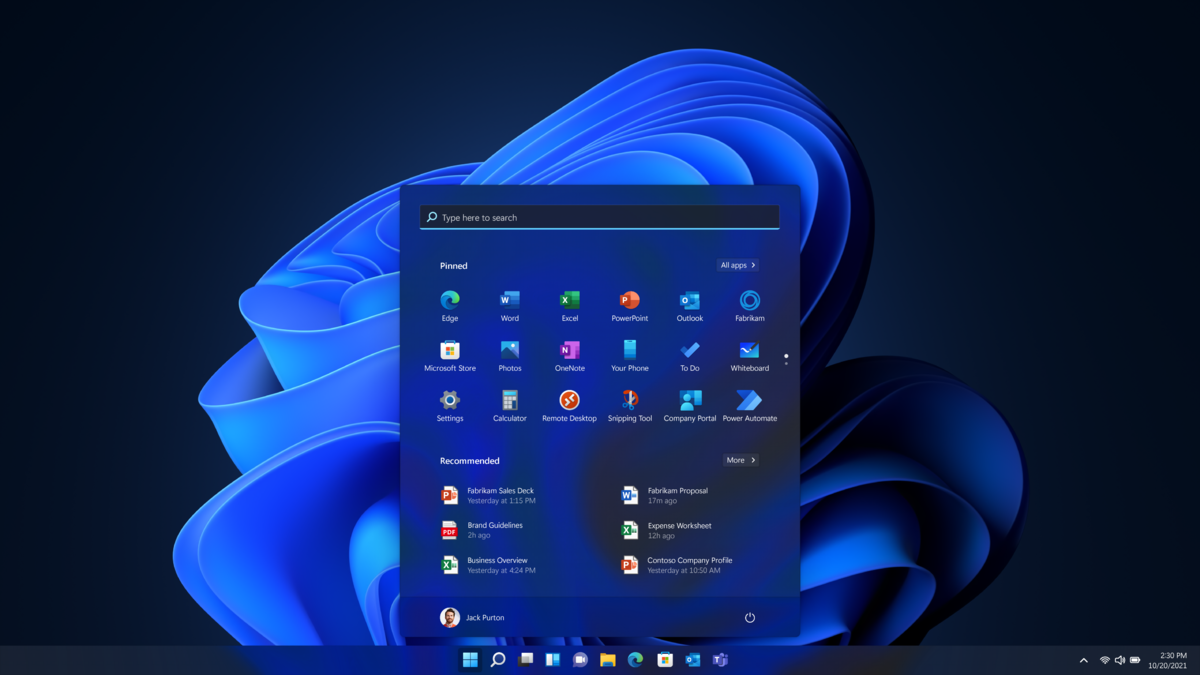
Microsoft has made a relatively minor but pretty useful tweak for Copilot in testing, as part of the ongoing effort to bring the AI assistant into play more often with Windows 11. This is part of the new Windows 11 preview build 22635 deployed in the Beta channel, and the change to Copilot is rolling out gradually, so not all testers in that channel will have it just yet. The idea is a ‘new experience’ for Copilot that aims to boost your productivity in Windows 11. How exactly? Well, when you copy a text or image file, the AI’s icon in the taskbar has an animation that’s triggered to let you know the assistant can help with that file. If you hover the mouse over the Copilot icon, you’ll then get some new options – for example with an image file, you’ll be presented with choices including creating an image like the current one, or getting Copilot to analyze the picture. (Image credit: Microsoft) Build 22635 doesn’t do an awful lot more than these Copilot tweaks, but there is another change here for Windows Share. Microsoft is making it so you can use this functionality to share directly to a specific Microsoft Teams channel or group chat. (This is an ability that had been in testing previously, but was temporarily removed due to bugs – and it’s now reinstated). As ever check out Microsoft’s blog post for the build to find out the full details and known issues in this preview release. Analysis: Treading a fine line The fresh tweaks for Copilot are simple but quick ways of interacting with files using the AI. Microsoft is putting these various abilities at the fingertips of the user, and highlighting that the AI can help with said animation on the icon. Clearly, the hope is that having brought Copilot to the attention of the person sat at the Windows 11 PC, this will result in more usage of the AI. With this change being in the Beta testing channel – the step before Release Preview, where things are finalized for the stable builds of Windows 11 for everyday users – we’ll likely see this introduced with the 24H2 update later this year. As to the overall concept of having Copilot pointed out actively, if Microsoft is planning to do more along these lines, it’ll have to tread a thin line between helping the user, and perhaps getting on the annoying side with too many little calls for attention. There’s a fine balance with some aspects of OS development – such as, for example, when recommendations or suggestions in menus become more like adverts – and sometimes Microsoft has strayed beyond the acceptable boundaries, at least in our humble opinion. We’re hopeful this won’t be the case here, and there’s certainly nothing wrong with the current Copilot rejigging in testing. You might also like... Watch out: soon some older PCs will lose Windows 11 supportWindows 11 is getting a voice-powered ability many users have been longing forDon’t make these 5 big mistakes when using Windows 11 View the full article
-
Microsoft just announced that Copilot is rolling out to more Windows 11 users right now, and also it’ll be inbound to more Windows 10 users soon enough. Neowin spotted the revelation in the Windows message center where Microsoft let us know that Copilot is coming to a wider audience – so, if you haven’t seen the AI assistant yet, you may well do soon enough. Microsoft also let us know that from this week, it’s possible to use up to 10 queries with Copilot before you have to sign in to your Microsoft account. So, you can give the AI a bit of a try even if you don’t have an active Microsoft account on your Windows installation. The ‘new wave’ of Copilot additions is happening now with Windows 11 (23H2 and 22H2), at least for consumers (with businesses, it will depend on admin policies). And eligible Windows 10 devices on Home or Pro versions (22H2) will start to get Copilot in this broader rollout later in March – so within the next week. Microsoft tells us: “This current rollout phase will reach most of its targeted Windows 11 and 10 devices by the end of May.” Meanwhile, Microsoft is also busy expanding Copilot’s repertoire of tricks regarding changing Windows settings, though it’s very slow going on that front thus far. Analysis: AI for everyone It sounds like most folks will have Copilot by the end of May, then. We’ve already seen it arrive on our Windows 10 PC, so that rollout is definitely already underway – it’s just about to step up to another level. How will you know if you get Copilot? You can’t miss the colorful icon which will appear in the taskbar, on the far right (in the system tray). It’s marked with a ‘Pre’ on the icon to denote that the AI is still in preview, so it’s still possible to experience wonky or odd behavior when running queries with Copilot. While you can turn off the Copilot icon if you don’t want to see it, you can’t actually remove the AI from Windows as such (not yet) – it’ll still be lurking in the background, even if you never access it. That said, there are ways to extract Copilot from your Windows installation, such as using third-party apps (though we wouldn’t recommend doing so, as previously discussed). You might also like... Watch out: soon some older PCs will lose Windows 11 supportWindows 11 is getting a voice-powered ability many users have been longing forDon’t make these 5 big mistakes when using Windows 11 View the full article
-
Windows 11 has never been more compact, with NTDEV's ‘tiny11 core’ shrinking the ISO to 2GB and the install footprint to 3.3GB. View the full article
-
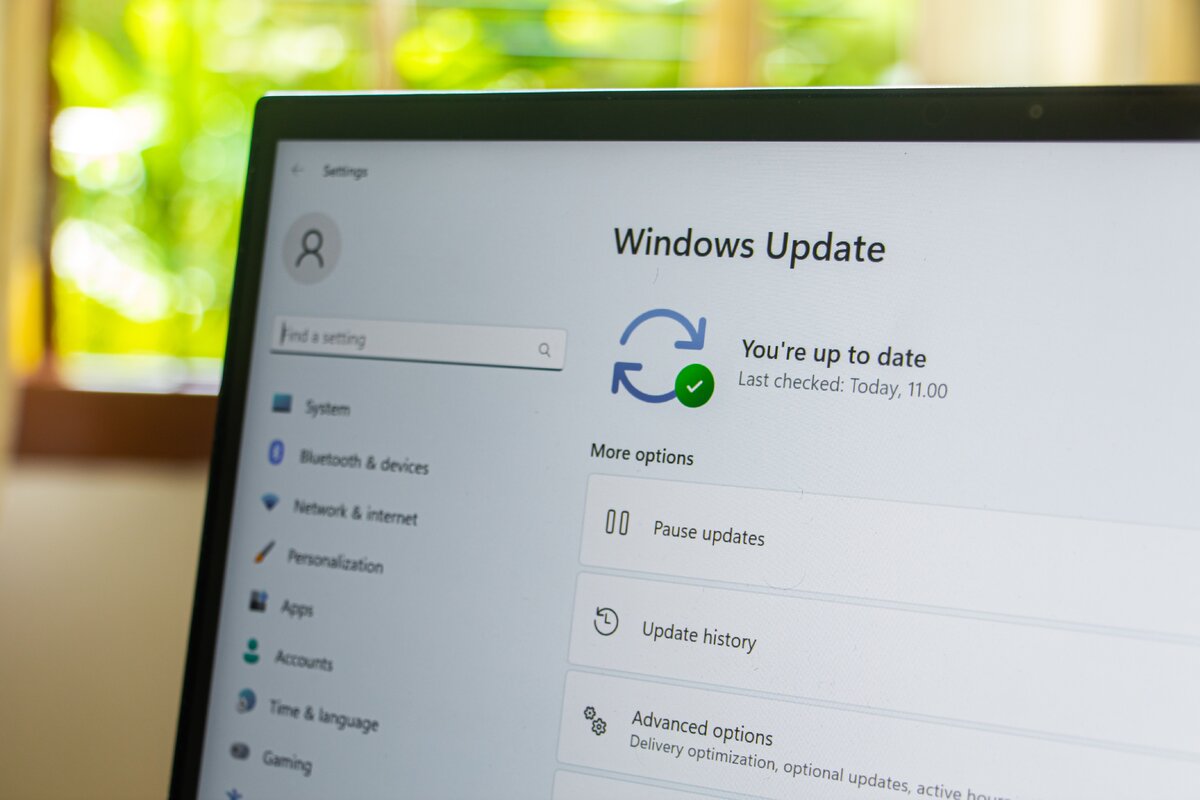
 Windows 11 23H2 is now available but it may take Microsoft a month or more to roll the update out to your computer. Get the update now and on your schedule.View the full article
 -
Anaconda is a Python distribution just like Ubuntu as a Linux distribution. Anaconda comes pre-installed with all the data science and machine learning tools. So, you don’t have to waste time on installing those tools separately on your computer. It’s great for data scientists and ML beginners and experts. In this article, we will show you how to install Anaconda Python on Windows 10 and Windows 11 operating systems. We will also show you how to access the Anaconda Python shell/terminal on Windows 10 and Windows 11 so that you can run the Anaconda commands. Topic of Contents: Downloading Anaconda Python on Windows 10/11 Installing Anaconda Python on Windows 10/11 Accessing the Anaconda Python Shell/Terminal on Windows 10/11 Conclusion Downloading Anaconda Python on Windows 10/11 To download the Anaconda Python installer, visit the official website of Anaconda with your favorite web browser. Once the page loads, click on “Download”. Your browser should start downloading the Anaconda installer. It takes a while to complete. At this point, the Anaconda installer should be installed. Installing Anaconda Python on Windows 10/11 Once the Anaconda installer is downloaded, you can find it in the “Downloads” folder. To install Anaconda on Windows 10/11, double-click on the Anaconda installer file. The Anaconda installer should start. To continue, click on “Next”. Click on “I Agree”. Click on “Next”. Click on “Next”. Click on “Install”. Anaconda is being installed on your Windows 10/11 computer. It takes a while to complete. Anaconda is now being installed. Once Anaconda is installed, click on “Next”. Click on “Next”. Click on “Finish”. Your browser will open the following page which welcomes you to Anaconda. You can close it. Accessing the Anaconda Python Shell/Terminal on Windows 10/11 Once Anaconda is installed on your Windows 10/11 operating system, you can access the Anaconda shell/terminal from the start menu of Windows 10/11. Just search for the “anaconda” keyword and click on the “Anaconda Prompt” app from the search results. The Anaconda shell/terminal app should be opened. You can run any Anaconda command that you want in here. To test whether you can access Anaconda, run the following command: $ conda --version If Anaconda is working, the command should print the version number of the conda package manager. Conda is an alternative to Python PIP for Anaconda. It is used to manage the Anaconda environments and packages. Conclusion We showed you how to install the Anaconda Python distribution on Windows 10 and Windows 11 operating systems. We also showed you how to access the Anaconda Python shell/terminal on Windows 10 and Windows 11 so that you can run the Anaconda commands. View the full article
-
ssh keys How to Generate SSH Key in Windows 11
Linux Hint posted a topic in Development & Programming
The “SSH” is an abbreviation of “secure shell”. It is a tool, which is referred to as “nifty” that is for the admins of the network. It is used because it is a secure method of connecting with the automotive systems and it also provides encryption way better. We can generate keys in various ways through the access of the command line. But that does not mean that Linux cannot be used in the Windows system for SSH. The authentication was for Linux before but now Windows is out with the authentication for SSH to appear. The SSH is a “cryptographic network protocol” that is helpful for the transferring of the data along the network also which is encrypted. In this article, we will be discussing all of the possible methods for the knowledge of generating the SSH key in Windows 11. Ways to generate the Windows 11 “SSH key”: The following are the methods which we will be covering for the generation of SSH keys in Windows 11. Both of the methods are convenient for the generation of the SSH key. Choose the method to generate the key which is more comprehensible to you. The command line SSH key generation in Windows 11. The puTTY SSH key generation in Windows 11. Let’s discuss step by step the ways with a detailed description for a better understanding of the generating SSH key in Windows 11: Method # 01: The command line SSH key generation in Windows 11 Let’s generate the SSH key in Windows 11 with the help of the command line. Windows has come up with the built-in feature of the open SSH client. The Windows terminal is also, by default, installed in Windows 11 for using the command line on and off anytime which runs the Powershell, cmd, and Windows subsystem performance better than ever. Let us follow the steps for the command line SSH generation of the key. Step # 01: Open the command prompt first by searching in the start menu or the search bar icon right next to the start menu. Select cmd and click it. Step # 02: In the command prompt write “SSH – Keygen” and press the “enter” key. Step # 03: The command above will generate the key already. Now, we have to name the key and also have to select a specific location to save the key. If we don’t save the key in a specific area in our system then, the key by default will be saved in the “c” drive on the desktop as “C: User[ enter user name] . ssh”. And if the user account is stored in some other folder so it will be assuming that instead of “c”. Step # 04: Then, we will be asked to set and enter some passphrase that is a password. Or if we don’t want that, just press enter. Now, we have our key generated and saved. We can use it now. We will have the files as “.ssh” in the folder “id name” without any extension file and another file will be as “id_rsa.pub”. If we have a private key, do not ever share it with anyone. We can similarly generate various keys for every site we want to. Follow the same process individually as many times as we want a new key to generate. The one-time process will take time to proceed and also clarity will be done by generating the other times. Method # 02: The puTTY SSH key generation in Windows 11 Here is another method of generating the SSH key in Windows 11 by using the puTTY. It is an old popular way which is a complete method. This works as a program that was supposed to be a specific method in Windows to communicate with the server. If we have it in your system, it will allow us to build SSH keys. It comes with a maximum count of programs that are helpers. From those helpers, one is termed the puTTY key generator. Step # 01: Search for the “puttygen” in Windows 11. Click on the magnifier search icon or just click on the start menu and search there once it shows select and opens it. If we don’t have the puTTY download, simply download it from the browser or the Microsoft app. The installation in the Microsoft app will look like this: Step # 02: As we open the Puttygen, we will see various keys on the window at the bottom. If we are confused or do not know which key to use with the “RSA”, select and click it. A box will appear giving the message: type “4060” with the number of bits in the generated key. There is another option that is “ EdDSA”. By clicking it, a drop-down will pop up for making sure that we have selected the “Ed25519” which is 255 bits. Step # 03: We have to press the generate key now and the method of puTTY will appear to start working. The time should depend on our system speed; otherwise, it does not take a long time and then it will send a message to move the mouse from its place so that the cursor moves on the Windows screen. This will create a random generation of the key. Step # 04: Now, save the key as a “public key” for the public key saving and we can name it and locate it on the positions in the system wherever we want them to store. Also, we can store the name and id depending on the selected keys in step 2 above in the same method. Step # 05: If we want a private key, a question will be appearing in some minds. So, for the private key generation saving, we have to go a little further to proceed with that. The puTTYgenerates the PPK keys as default to use. We have to select conversation at the top of the window which should be greater than open SSH key exporting. Then, we have to save it as by our choice or by the same “id _ user name” or the “id _ ed25519” ending with the null file. Conclusion The SSH is an “access credential”. They are the modern world that developed the foundation for the platform of “infrastructure as a service” examples are “google cloud”, azure” and so on. The generation of the SSH keys is not as difficult as it seems; just follow the steps of any of the methods we want to implement for generating the key in SSH and then follow. It is super easy to do so. We have performed the two methods of the generation of the SSH key in Windows 11 the one with the command prompt and the other one with the help of puTTY which is an old technical method. View the full article


-
Forum Statistics
43.3k
Total Topics42.7k
Total Posts