.png.6dd3056f38e93712a18d153891e8e0fc.png.1dbd1e5f05de09e66333e631e3342b83.png.933f4dc78ef5a5d2971934bd41ead8a1.png)
Search the Community
Showing results for tags 'stable diffusion'.
-
 In our previous post, we discussed how to generate Images using Stable Diffusion on AWS. In this post, we will guide you through running LLMs for text generation in your own environment with a GPU-based instance in simple steps, empowering you to create your own solutions. Text generation, a trending focus in generative AI, facilitates a broad spectrum of language tasks beyond simple question answering. These tasks include content extraction, summary generation, sentiment analysis, text enhancement (including spelling and grammar correction), code generation, and the creation of intelligent applications like chatbots and assistants. In this tutorial, we will demonstrate how to deploy two prominent large language models (LLM) on a GPU-based EC2 instance on AWS (G4dn) using Ollama, an open source tool for downloading, managing, and serving LLM models. Before getting started, ensure you have completed our technical guide for installing NVIDIA drivers with CUDA on a G4DN instance. We will utilize Llama2 and Mistral, both strong contenders in the LLM space with open source licenses suitable for this demo. While we won’t explore the technical details of these models, it is worth noting that Mistral has shown impressive results despite its relatively small size (7 billion parameters fitting into an 8GB VRAM GPU). Conversely, Llama2 provides a range of models for various tasks, all available under open source licenses, making it well-suited for this tutorial. To experiment with question-answer models similar to ChatGPT, we will utilize the fine-tuned versions optimized for chat or instruction (Mistral-instruct and Llama2-chat), as the base models are primarily designed for text completion. Let’s get started! Step 1: Installing Ollama To begin, open an SSH session to your G4DN server and verify the presence of NVIDIA drivers and CUDA by running: nvidia-smi Keep in mind that you need to have the SSH port open, the key-pair created or assigned to the machine during creation, the external IP of the machine, and software like ssh for Linux or PuTTY for Windows to connect to the server. If the drivers are not installed, refer to our technical guide on installing NVIDIA drivers with CUDA on a G4DN instance. Once you have confirmed the GPU drivers and CUDA are set up, proceed to install Ollama. You can opt for a quick installation using their binary, or choose to clone the repository for a manual installation. To install Ollama quickly, run the following command curl -fsSL https://ollama.com/install.sh | sh Step 2: Running LLMs on Ollama Let’s start with Mistral models and view the results by running: ollama run mistral This instruction will download the Mistral model (4.1GB) and serve it, providing a prompt for immediate interaction with the model. Not a bad response for a prompt written in Spanish!. Now let’s experiment with a prompt to write code: Impressive indeed. The response is not only generated rapidly, but the code also runs flawlessly, with basic error handling and explanations. (Here’s a pro tip: consider asking for code comments, docstrings, and even test functions to be incorporated into the code). Exit with the /bye command. Now, let’s enter the same prompt with Llama2. We can see that there are immediate, notable differences. This may be due to the training data it has encountered, as it defaulted to a playful and informal chat-style response. Let’s try Llama2 using the same code prompt from above: The results of this prompt are quite interesting. Following four separate tests, it was clear that the generated responses had not only broken code but also inconsistencies within the responses themselves. It appears that writing code is not one of the out-of-the-box capabilities of Llama2 in this variant (7b parameters, although there are also versions specialized in code like Code-Llama2), but results may vary. Let’s run a final test with Code-Llama, a Llama model fine-tuned to create and explain code: We will use the same prompt from above to write the code: This time, the response is improved, with the code functioning properly and a satisfactory explanation provided. You now have the option to either continue exploring directly through this interface or start developing apps using the API. Final test: A chat-like web interface We now have something ready for immediate use. However, for some added fun, let’s install a chat-like web interface to mimic the experience of ChatGPT. For this test, we are going to use ollama-ui (https://github.com/ollama-ui/ollama-ui). ⚠︎ Please note that this project is no longer being maintained and users should transition to Open WebUI, but for the sake of simplicity, we are going to still use the Ollama-ui front-end. In your terminal window, clone the ollama-ui repository by entering the following command: git clone https://github.com/ollama-ui/ollama-ui Here’s a cool trick: when you run Ollama, it creates an API endpoint on port 11434. However, Ollama-ui will run and be accessible on port 8000, thus, we’ll need to ensure both ports are securely accessible from our machine. Since we are currently running as a development service (without the security features and performance of a production web server), we will establish an SSH tunnel for both ports. This setup will enable us to access these ports exclusively from our local computer with encrypted communication (SSL). To create the tunnel for both the web-ui and the model’s API, close your current SSH session and open a new one with the following command: ssh -L 8000:localhost:8000 -L 11434:127.0.0.1:11434 -i myKeyPair.pem ubuntu@<Machine_IP> Once the tunnel is set up, navigate to the ollama-ui directory in a new terminal and run the following command: cd ollama-ui make Next, open your local browser and go to 127.0.0.1:8000 to enjoy the chat web inRunning an LLM model for text generation on Ubuntu on AWS with a GPU instanceterface! While the interface is simple, it enables dynamic model switching, supports multiple chat sessions, and facilitates interaction beyond reliance on the terminal (aside from tunneling). This offers an alternative method for testing the models and your prompts. Final thoughts Thanks to Ollama and how simple it is to install the NVIDIA drivers on a GPU-based instance, we got a very straightforward process for running LLMs for text generation in your own environment. Additionally, Ollama facilitates the creation of custom model versions and fine-tuning, which is invaluable for developing and testing LLM-based solutions. When selecting the appropriate model for your specific use case, it is crucial to evaluate their capabilities based on architectures and the data they have been trained on. Be sure to explore fine-tuned variants such as Llama2 for code, as well as specialized versions tailored for generating Python code. Lastly, for those aiming to develop production-ready applications, remember to review the model license and plan for scalability, as a single GPU server may not suffice for multiple concurrent users. You may want to explore Amazon Bedrock, which offers easy access to various versions of these models through a simple API call or Canonical MLOps, an end-to-end solution for training and running your own ML models. Quick note regarding the model size The size of the model significantly impacts the production of better results. A larger model is more capable of reproducing better content (since it has a greater capacity to “learn”). Additionally, larger models offer a larger attention window (for “understanding” the context of the question), and allow more tokens as input (your instructions) and output (the response) As an example, Llama2 offers three main model sizes regarding the parameter number: 7, 13, or 70 billion parameters. The first model requires a GPU with a minimum of 8GB of GPU RAM, whereas the second requires a minimum of 16GB of VRAM. Let me share a final example: I will request the 7B parameters version of Llama2 to proofread an incorrect version of this simple Spanish phrase, “¿Hola, cómo estás?”, which translates to “Hi, how are you?” in English. I conducted numerous tests, all yielding incorrect results like the one displayed in the screenshot (where “óle” is not a valid word, and it erroneously suggests it means “hello”). Now, let’s test the same example with Llama2 with 13 billion parameters: While it failed to recognize that I intended to write “hola,” this outcome is significantly better as it added accents, question marks and detected that “ola” wasn’t the right word to use (if you are curious, it means “wave”) . View the full article
 -
 UL Solutions is introducing a Stable Diffusion benchmark to its Procyon software next week. View the full article
-
 Qualcomm has unveiled its AI Hub, an all-inclusive library of pre-optimized AI models ready for use on devices running on Snapdragon and Qualcomm platforms. These models support a wide range of applications including natural language processing, computer vision, and anomaly detection, and are designed to deliver high performance with minimal power consumption, a critical factor for mobile and edge devices. The AI Hub library currently includes more than 75 popular AI and generative AI models including Whisper, ControlNet, Stable Diffusion, and Baichuan 7B. All models are bundled in various runtimes and are optimized to leverage the Qualcomm AI Engine's hardware acceleration across all cores (NPU, CPU, and GPU). According to Qualcomm, they’ll deliver four times faster inferencing times. Documentation and tutorials provided The AI Hub also handles model translation from the source framework to popular runtimes automatically. It works directly with the Qualcomm AI Engine direct SDK and applies hardware-aware optimizations. Developers can search for models based on their needs, download them, and integrate them into their applications, saving time and resources. The AI Hub also provides tools and resources for developers to customize these models, and they can fine-tune them using the Qualcomm Neural Processing SDK and the AI Model Efficiency Toolkit, both available on the platform. To use the AI Hub, developers need a trained model in PyTorch, TorchScript, ONNX, or TensorFlow Lite format, and a good understanding of the deployment target, which can be a specific device (like Samsung Galaxy S23 Ultra) or a range of devices. The AI Hub is not exclusively for experienced developers however. It also serves as a learning platform, providing comprehensive documentation and tutorials for those venturing into the world of AI. Qualcomm plans to regularly update the AI Hub with new models and support for additional platforms and operating systems. Developers can sign up to access these models on cloud-hosted devices based on Qualcomm platforms and get early access to new features and AI models. More from TechRadar Pro These are the best AI tools around todayQualcomm is now one step closer to an Arm-free ecosystemMillions of GPUs from Apple, AMD and Qualcomm have a serious security flaw View the full article
-
As generative AI and hybrid working environments become increasingly common, professionals across all industries need powerful, AI-accelerated business laptops to keep up. AI is being rapidly integrated into professional design, content creation workflows, and everyday productivity applications, highlighting the need for robust local AI acceleration and ample processing power. Nvidia wants to make AI more accessible to everyone with the launch of its new RTX 500 and RTX 1000 Ada Generation Laptop GPUs. These GPUs, tailored for professionals on the go, will be offered in portable mobile workstations, broadening the Ada Lovelace architecture-based selection. The next-gen mobile workstations, equipped with Ada Generation GPUs, will feature both an NPU and an Nvidia RTX GPU, including Tensor Cores for AI processing. This combination allows for light AI tasks to be handled by the NPU, while the GPU provides up to an additional 682 TOPS of AI performance for more demanding workflows. Optimized for AI workloads The new RTX 500 GPU reportedly offers up to 14x the generative AI performance for models like Stable Diffusion, up to 3x faster photo editing with AI, and up to 10x the graphics performance for 3D rendering compared to a CPU-only configuration. The RTX 500 and 1000 GPUs are designed to enhance professional workflows across industries. Nvidia suggests they will allow video editors to streamline tasks such as background noise removal with AI, graphic designers to revive blurry images with AI upscaling, and professionals to enjoy higher-quality video conferencing and streaming experiences on the go. The new Nvidia RTX 500 and 1000 Ada Generation Laptop GPUs will be available this spring in laptops from the likes of Dell, HP, Lenovo, and MSI. While there’s no doubting the appeal of the new RTX 500 and RTX 1000 laptop GPUs, it's worth considering whether the Nvidia RTX 4000 GPUs might be a better choice. They're likely to be cheaper and more powerful in a standard laptop, offering an alternative option for those looking to build an LLM. More from TechRadar Pro These are the best laptops for gaming and workUK government and others are keeping a very close eye on NvidiaNvidia's entry level GPU can handle 66 million pixels, enough to feed two 8K monitors View the full article
-
Massively popular audio editing tool Audacity is getting a major upgrade thanks to Intel. The tech giant has developed a suite of OpenVINO plugins for Audacity, bringing a number of AI-powered editing features to the software. These AI plugins, which run entirely on your PC, include noise suppression and transcription for spoken word content, and generation and separation plugins for music. Windows only... for now The noise suppression feature functions similarly to Audacity's own built-in Noise Removal effect, suppressing background noise for a clearer sound. The transcription tool, powered by Whisper.cpp, can transcribe and translate words, outputting to a label track. Users can export these transcriptions through the software's export feature. For music, the AI tools offer music generation and remixing capabilities using Stable Diffusion. The music separation feature can split a song into its vocal and instrumental parts, or into vocals, drums, bass, and a combined "anything else" part. This is ideal for creating covers and playalongs. These OpenVINO plugins are available for download now, but currently only for Windows. It's possible Linux and macOS users will get access to the plugins in a future release. In addition to these enhancements, Audio.com is eyeing the next step in its development. The company is building a creator-first platform and plans to include a cloud-saving feature that allows creators to work on Audacity projects saved directly to the cloud. This feature provides a convenient way to share projects, get instant feedback, and collaborate with others. Audio.com expects to launch a beta release of this feature very soon. While many Audio.com features will remain free, the new cloud storage feature will come at a small cost after the first five projects, to cover additional expenses incurred by the team. Audacity itself will remain 100% free and open source. More from TechRadar Pro We've rounded up the best audio editors around todayThese are the best open source programsThe future of audio data management in the digital workplace View the full article
-
 Generative AI has become the number one technology of interest across many industries over the past year. Here at Google Cloud for Games, we think that online game use cases have some of the highest potential for generative AI, giving creators the power to build more dynamic games, monetize their games better, and get to market faster. As part of this, we’ve explored ways that games companies can train, deploy, and maintain GenAI utilizing Google Cloud. We'd like to walk you through what we’ve been working on, and how you can start using it in your game today. While we’ll focus on gen AI applications, the framework we’ll be discussing has been developed with all machine learning in mind, not just the generative varieties. Long term, the possibilities of gen AI in Games are endless, but in the near term, we believe the following are the most realistic and valuable to the industry over the next 1-2 years. Game productionAdaptive gameplayIn-game advertisingEach of these helps with a core part of the game development and publishing process. Generative AI in game production, mainly in the development of 2D textures, 3D assets, and code, can help decrease the effort to create a new game, decrease the time to market, and help make game developers more effective overall. Thinking towards sustaining player engagement and monetizing existing titles, ideas like adaptive dialogue and gameplay can keep players engaged, and custom in-game objects can keep them enticed. In-game advertising opens a new realm of monetization, and allows us not only the ability to hyper-personalize ads to views, but to personalize their placement and integration into the game, creating seamless ad experiences that optimize views and engagement. If you think about the time to produce a small game, never mind a AAA blockbuster, development of individual game assets consumes an immense amount of time. If generative models can help reduce developer toil and increase the productivity of studio development teams by even a fraction, it could represent a faster time to market and better games for us all. As part of this post, we introduce our Generative AI Framework for Games, which provides templates for running gen AI for games on Google Cloud, as well as a framework for data ingest and storage to support these live models. We walk you through a demo of this framework below, where we specifically show two cases around image generation and code generation in a sample game environment. But before we jump into what we’re doing here at Google Cloud, let’s first tackle a common misconception about machine learning in games. Cloud-based ML plus live services games are a goIt’s a common refrain that running machine learning in the cloud for live game services is either cost prohibitive or prohibitive in terms of the induced latency that the end user experiences. Live games have always run on a client-server paradigm, and it’s often preferable that compute-intensive processes that don’t need to be authoritative run on the client. While this is a great deployment pattern for some models and processes, it’s not the only one. Cloud-based gen AI, or really any form of AI/ML, is not only possible, but can result in significantly decreased toil for developers, and reduced maintenance costs for publishers, all while supporting the latencies needed for today’s live games. It’s also safer — cloud-based AI safeguards your models from attacks, manipulation, and fraud. Depending on your studio’s setup, Google Cloud can support complete in-cloud or hybrid deployments of generative models for adaptive game worlds. Generally, we recommend two approaches depending on your technology stack and needs; If starting from scratch, we recommend utilizing Vertex AI’s Private Endpoints for low latency serving, which can work whether you are looking for a low ops solution, or are running a service that does not interact with a live game environment.If running game servers on Google Cloud, especially if they are on Google Kubernetes Engine (GKE), and are looking to utilize that environment for ultra-low latency serving, we recommend deploying your models on GKE alongside your game server.Let’s start with Vertex AI. Vertex AI supports both public and private endpoints, although for games, we generally recommend utilizing Private Endpoints to achieve the appropriate latencies. Vertex AI models utilize what we call an adaptor layer, which has two advantages: you don’t need to call the entire model when making a prediction, and any fine tuning conducted by you, the developer, is contained in your tenant. Compared to running a model yourself, whether in the cloud or on prem, this negates the need to handle enormous base models and the relevant serving and storage infrastructure to support them. As mentioned, we’ll show both of these in the demo below. If you’re already running game servers on GKE, you can gain a lot of benefit from running both proprietary and open-source machine learning models on GKE as well as taking advantage of GKE’s native networking. With GKE Autopilot, our tests indicate that you can achieve prediction performance in the sub-ms range when deployed alongside your game servers. Over the public internet, we’ve achieved low millisecond latencies that are consistent, if not better, with what we have seen in classic client side deployments. If you’re afraid of the potential cost implications of running on GKE, think again — the vast majority of gaming customers see cost savings from deploying on GKE, alongside a roughly 30% increase in developer productivity. If you manage both your machine learning deployments and your game servers with GKE Autopilot, there’s also a significant reduction in operational burden. In our testing, we’ve found that whether you are deploying models on Vertex or GKE, the cost is roughly comparable. Unified data platforms enable real-time AIAI/ML driven personalization thrives on large amounts of data regarding player preferences, gameplay, and the game’s world and lore. As part of our efforts in gen AI in games, we’ve developed a data pipeline and database template that utilizes the best of Google Cloud to ensure consistency and availability. Live games require strong consistency, and models,whether generative or not, require the most up-to-date information about a player and their habits. Periodic retraining is necessary to keep models fresh and safe, and globally available databases like Spanner and BigQuery ensure that the data being fed into models, generative or otherwise, is kept fresh and secure. In many current games, users are fragmented by maps/realms, with hard lines between them, keeping experiences bounded by firm decisions and actions. As games move towards models where users inhabit singular realms, these games will require a single, globally available data store. In-game personalization also requires the live status of player activity. A strong data pipeline and data footprint is just as important for running machine learning models in a liveops environment as the models themselves. Considering the complexity of frequent model updates across a self-managed data center footprint, we maintain it’s a lighter lift to manage the training, deployment, and overall maintenance of models in the cloud. By combining a real-time data pipeline with generative models, we can also inform model prompts about player preferences, or combine them with other models that track where, when, and why to personalize the game state. In terms of what is available today, this could be anything from pre-generated 3D meshes that are relevant to the user, retexturing meshes to different colors, patterns or lighting to match player preferences or mood, or even the giving the player the ability to fully customize the game environment based natural language. All of this is in service of keeping our players happy and engaged with the game. Demoing capabilitiesLet’s jump into the framework. For the demo, we’ll be focusing on how Google Cloud’s data, AI, and compute technology can come together to provide real-time personalization of the game state. The framework includes: Unity for the client and serverOpen source: TerraformAgonesGoogle Cloud: GKEVertex AIPub/SubDataflowSpannerBigQueryAs part of this framework, we created an open-world demo game in Unity that uses assets from the Unity store. We designed this to be an open world game — one where the player needs to interact with NPCs and is guided through dynamic billboards that assist the player in achieving the game objective.. This game is running on GKE with Agones, and is designed to support multiple players. For simplicity, we focus on one player and their actions. Generative AI in Games - Demo Game Now, back to the framework. Our back-end Spanner database contains information on the player and their past actions. We also have data on their purchasing habits across this make-believe game universe, with a connection to the Google Marketing Platform. This allows us in our demo game to start collecting universal player data across platforms. Spanner is our transactional database, and BigQuery is our analytical database, and data flows freely between them. As part of this framework, we trained recommendation models in Vertex AI utilizing everything we know about the player, so that we can personalize in-game offers and advertising. For the sake of this demo, we’ll forget about those models for a moment, and focus on two generative AI use cases: image generation, NPC chat, and code generation for our adaptive gameplay use case. To show you both deployment patterns that we recommend for games, deploying on GKE alongside the game server, and utilizing Vertex AI. For image generation, we host an open-source Stable Diffusion model on GKE, and for code generation and NPC chat we’re using the gemini-pro model within Vertex AI. In cases where textures need to be modified or game objects are repositioned, we are using the Gemini LLM to generate code that can render, position, and configure prefabs within the game environment. As the character walks through the game, we adaptively show images to suggest potential next moves and paths for the player. In practice, these could be game-themed images or even advertisements. In our case, we display images that suggest what the player should be looking for to progress game play. Generative AI in Games - Demo Game In the example above, the player is shown a man surrounded by books, which provides a hint to the player that maybe they need to find a library as their next objective. That hint also aligns with the riddle that the NPC shared earlier in the game. If a player interacts with one of these billboards, which may mean moving closer to it or even viewing the billboard for a preset time, then the storyline of our game adapts to that context. We can also load and configure prefabs on the fly with code generation. Below, you’ll see our environment as is, and we ask the NPC to change the bus color to yellow, which dynamically updates the bus color and texture. Generative AI in Games - Demo Game Once we make the request, either by text or speech, Google Cloud GenAI models generate the exact code needed to update the prefab in the environment, and then renders it live in the game. While this example shows how code generation can be used in-game, game developers can also use a similar process to place and configure game objects within their game environment to speed up game development. If you would like to take the next step and check out the technology, then we encourage you to explore the Github link and resources below. Additionally, we understand that not everyone will be interested in every facet of the framework. That's why we've made it flexible – whether you want to dive into the entire project or just work with specific parts of the code to understand how we implemented a certain feature, the choice is yours. If you're looking to deepen your understanding of Google Cloud generative AI, check out this curated set of resources that can help: Generative AI on Google CloudGetting started with generative AI on VertexLast but not least, if you’re interested in working with the project or would like to contribute to it, feel free to explore the code on Github, which focuses on the GenAI services used as part of this demo: Generative AI Quickstart for GamingView the full article
 -
 Stable Diffusion models are revolutionizing digital artistry, transforming mere text into stunning, lifelike images. Explore further here.View the full article
 -
It was only a matter of time before someone added generative AI to an AR headset and taking the plunge is start-up company Brilliant Labs with their recently revealed Frame smart glasses. Looking like a pair of Where’s Waldo glasses (or Where’s Wally to our UK readers), the Frame houses a multimodal digital assistant called Noa. It consists of multiple AI models from other brands working together in unison to help users learn about the world around them. These lessons can be done just by looking at something and then issuing a command. Let’s say you want to know more about the nutritional value of a raspberry. Thanks to OpenAI tech, you can command Noa to perform a “visual analysis” of the subject. The read-out appears on the outer AR lens. Additionally, it can offer real-time language translation via Whisper AI. The Frame can also search the internet via its Perplexity AI model. Search results will even provide price tags for potential purchases. In a recent VentureBeat article, Brilliant Labs claims Noa can provide instantaneous price checks for clothes just by scanning the piece, or fish out home listings for new houses on the market. All you have to do is look at the house in question. It can even generate images on the fly through Stable Diffusion, according to ZDNET. Evolving assistant Going back to VentureBeat, their report offers a deeper insight into how Noa works. The digital assistant is always on, constantly taking in information from its environment. And it’ll apparently “adopt a unique personality” over time. The publication explains that upon activating for the first time, Noa appears as an “egg” on the display. Owners will have to answer a series of questions, and upon finishing, the egg hatches into a character avatar whose personality reflects the user. As the Frame is used, Noa analyzes the interactions between it and the user, evolving to become better at tackling tasks. (Image credit: Brilliant Labs) An exploded view of the Frame can be found on Brilliant Labs’ official website providing interesting insight into how the tech works. On-screen content is projected by a micro-OLED onto a “geometric prism” in the lens. 9To5Google points out this is reminiscent of how Google Glass worked. On the nose bridge is the Frame’s camera sitting on a PCBA (printed circuit board assembly). At the end of the stems, you have the batteries inside two big hubs. Brilliant Labs states the frames can last a whole day, and to charge them, you’ll have to plug in the Mister Power dongle, inadvertently turning the glasses into a high-tech Groucho Marx impersonation. (Image credit: Brilliant Labs) Availability Currently open for pre-order, the Frame will run you $350 a pair. It’ll be available in three colors: Smokey Black, Cool Gray, and the transparent H20. You can opt for prescription lenses. Doing so will bump the price tag to $448.There's a chance Brilliant Labs won’t have your exact prescription. They recommend to instead select the option that closely matches your actual prescription. Shipping is free and the first batch rolls out April 15. It appears all of the AI features are subject to a daily usage cap. Brilliant Labs has plans to launch a subscription service lifting the limit. We reached out to the company for clarification and asked several other questions like exactly how does the Frame receive input? This story will be updated at a later time. Until then, check out TechRadar's list of the best VR headsets for 2024. You might also like Ray-Ban Meta Smart Glasses review: the wearable AI future isn't here yetThe Ray-Ban Meta Smart Glasses are getting a welcome camera and audio updateI tried the smart glasses that could replace your phone – here's what I learned View the full article
-

genai Build Multimodal GenAI Apps with OctoAI and Docker
Docker posted a topic in Artificial Intelligence
This post was contributed by Thierry Moreau, co-founder and head of DevRel at OctoAI. Generative AI models have shown immense potential over the past year with breakthrough models like GPT3.5, DALL-E, and more. In particular, open source foundational models have gained traction among developers and enterprise users who appreciate how customizable, cost-effective, and transparent these models are compared to closed-source alternatives. In this article, we’ll explore how you can compose an open source foundational model into a streamlined image transformation pipeline that lets you manipulate images with nothing but text to achieve surprisingly good results. With this approach, you can create fun versions of corporate logos, bring your kids’ drawings to life, enrich your product photography, or even remodel your living room (Figure 1). Figure 1: Examples of image transformation including, from left to right: Generating creative corporate logo, bringing children’s drawings to life, enriching commercial photography, remodeling your living room Pretty cool, right? Behind the scenes, a lot needs to happen, and we’ll walk step by step through how to reproduce these results yourself. We call the multimodal GenAI pipeline OctoShop as a nod to the popular image editing software. Feeling inspired to string together some foundational GenAI models? Let’s dive into the technology that makes this possible. Architecture overview Let’s look more closely at the open source foundational GenAI models that compose the multimodal pipeline we’re about to build. Going forward, we’ll use the term “model cocktail” instead of “multimodal GenAI model pipeline,” as it flows a bit better (and sounds tastier, too). A model cocktail is a mix of GenAI models that can process and generate data across multiple modalities: text and images are examples of data modalities across which GenAI models consume and produce data, but the concept can also extend to audio and video (Figure 2). To build on the analogy of crafting a cocktail (or mocktail, if you prefer), you’ll need to mix ingredients, which, when assembled, are greater than the sum of their individual parts. Figure 2: The multimodal GenAI workflow — by taking an image and text, this pipeline transforms the input image according to the text prompt. Let’s use a Negroni, for example — my favorite cocktail. It’s easy to prepare; you need equal parts of gin, vermouth, and Campari. Similarly, our OctoShop model cocktail will use three ingredients: an equal mix of image-generation (SDXL), text-generation (Mistral-7B), and a custom image-to-text generation (CLIP Interrogator) model. The process is as follows: CLIP Interrogator takes in an image and generates a textual description (e.g., “a whale with a container on its back”). An LLM model, Mistral-7B, will generate a richer textual description based on a user prompt (e.g., “set the image into space”). The LLM will consequently transform the description into a richer one that meets the user prompt (e.g., “in the vast expanse of space, a majestic whale carries a container on its back”). Finally, an SDXL model will be used to generate a final AI-generated image based on the textual description transformed by the LLM model. We also take advantage of SDXL styles and a ControlNet to better control the output of the image in terms of style and framing/perspective. Prerequisites Let’s go over the prerequisites for crafting our cocktail. Here’s what you’ll need: Sign up for an OctoAI account to use OctoAI’s image generation (SDXL), text generation (Mistral-7B), and compute solutions (CLIP Interrogator) — OctoAI serves as the bar from which to get all of the ingredients you’ll need to craft your model cocktail. If you’re already using a different compute service, feel free to bring that instead. Run a Jupyter notebook to craft the right mix of GenAI models. This is your place for experimenting and mixing, so this will be your cocktail shaker. To make it easy to run and distribute the notebook, we’ll use Google Colab. Finally, we’ll deploy our model cocktail as a Streamlit app. Think of building your app and embellishing the frontend as the presentation of your cocktail (e.g., glass, ice, and choice of garnish) to enhance your senses. Getting started with OctoAI Head to octoai.cloud and create an account if you haven’t done so already. You’ll receive $10 in credits upon signing up for the first time, which should be sufficient for you to experiment with your own workflow here. Follow the instructions on the Getting Started page to obtain an OctoAI API token — this will help you get authenticated whenever you use the OctoAI APIs. Notebook walkthrough We’ve built a Jupyter notebook in Colab to help you learn how to use the different models that will constitute your model cocktail. Here are the steps to follow: 1. Launch the notebook Get started by launching the following Colab notebook. There’s no need to change the runtime type or rely on a GPU or TPU accelerator — all we need is a CPU here, given that all of the AI heavy-lifting is done on OctoAI endpoints. 2. OctoAI SDK setup Let’s get started by installing the OctoAI SDK. You’ll use the SDK to invoke the different open source foundational models we’re using, like SDXL and Mistral-7B. You can install through pip: # Install the OctoAI SDK !pip install octoai-sdk In some cases, you may get a message about pip packages being previously imported in the runtime, causing an error. If that’s the case, selecting the Restart Session button at the bottom should take care of the package versioning issues. After this, you should be able to re-run the cell that pip-installs the OctoAI SDK without any issues. 3. Generate images with SDXL You’ll first learn to generate an image with SDXL using the Image Generation solution API. To learn more about what each parameter does in the code below, check out OctoAI’s ImageGenerator client. In particular, the ImageGenerator API takes several arguments to generate an image: Engine: Lets you choose between versions of Stable Diffusion models, such as SDXL, SD1.5, and SSD. Prompt: Describes the image you want to generate. Negative prompt: Describes the traits you want to avoid in the final image. Width, height: The resolution of the output image. Num images: The number of images to generate at once. Sampler: Determines the sampling method used to denoise your image. If you’re not familiar with this process, this article provides a comprehensive overview. Number of steps: Number of denoising steps — the more steps, the higher the quality, but generally going past 30 will lead to diminishing returns. Cfg scale: How closely to adhere to the image description — generally stays around 7-12. Use refiner: Whether to apply the SDXL refiner model, which improves the output quality of the image. Seed: A parameter that lets you control the reproducibility of image generation (set to a positive value to always get the same image given stable input parameters). Note that tweaking the image generation parameters — like number of steps, number of images, sampler used, etc. — affects the amount of GPU compute needed to generate an image. Increasing GPU cycles will affect the pricing of generating the image. Here’s an example using simple parameters: # To use OctoAI, we'll need to set up OctoAI to use it from octoai.clients.image_gen import Engine, ImageGenerator # Now let's use the OctoAI Image Generation API to generate # an image of a whale with a container on its back to recreate # the moby logo image_gen = ImageGenerator(token=OCTOAI_API_TOKEN) image_gen_response = image_gen.generate( engine=Engine.SDXL, prompt="a whale with a container on its back", negative_prompt="blurry photo, distortion, low-res, poor quality", width=1024, height=1024, num_images=1, sampler="DPM_PLUS_PLUS_2M_KARRAS", steps=20, cfg_scale=7.5, use_refiner=True, seed=1 ) images = image_gen_response.images # Display generated image from OctoAI for i, image in enumerate(images): pil_image = image.to_pil() display(pil_image) Feel free to experiment with the parameters to see what happens to the resulting image. In this case, I’ve put in a simple prompt meant to describe the Docker logo: “a whale with a container on its back.” I also added standard negative prompts to help generate the style of image I’m looking for. Figure 3 shows the output: Figure 3: An SDXL-generated image of a whale with a container on its back. 4. Control your image output with ControlNet One thing you may want to do with SDXL is control the composition of your AI-generated image. For example, you can specify a specific human pose or control the composition and perspective of a given photograph, etc. For our experiment using Moby (the Docker mascot), we’d like to get an AI-generated image that can be easily superimposed onto the original logo — same shape of whale and container, orientation of the subject, size, and so forth. This is where ControlNet can come in handy: they let you constrain the generation of images by feeding a control image as input. In our example we’ll feed the image of the Moby logo as our control input. By tweaking the following parameters used by the ImageGenerator API, we are constraining the SDXL image generation with a control image of Moby. That control image will be converted into a depth map using a depth estimation model, then fed into the ControlNet, which will constrain SDXL image generation. # Set the engine to controlnet SDXL engine="controlnet-sdxl", # Select depth controlnet which uses a depth map to apply # constraints to SDXL controlnet="depth_sdxl", # Set the conditioning scale anywhere between 0 and 1, try different # values to see what they do! controlnet_conditioning_scale=0.3, # Pass in the base64 encoded string of the moby logo image controlnet_image=image_to_base64(moby_image), Now the result looks like it matches the Moby outline a lot more closely (Figure 4). This is the power of ControlNet. You can adjust the strength by varying the controlnet_conditioning_scale parameter. This way, you can make the output image more or less faithfully match the control image of Moby. Figure 4: Left: The Moby logo is used as a control image to a ControlNet. Right: the SDXL-generated image resembles the control image more closely than in the previous example. 5. Control your image output with SDXL style presets Let’s add a layer of customization with SDXL styles. We’ll use the 3D Model style preset (Figure 5). Behind the scenes, these style presets are adding additional keywords to the positive and negative prompts that the SDXL model ingests. Figure 5: You can try various styles on the OctoAI Image Generation solution UI — there are more than 100 to choose from, each delivering a unique feel and aesthetic. Figure 6 shows how setting this one parameter in the ImageGenerator API transforms our AI-generated image of Moby. Go ahead and try out more styles; we’ve generated a gallery for you to get inspiration from. Figure 6: SDXL-generated image of Moby with the “3D Model” style preset applied. 6. Manipulate images with Mistral-7B LLM So far we’ve relied on SDXL, which does text-to-image generation. We’ve added ControlNet in the mix to apply a control image as a compositional constraint. Next, we’re going to layer an LLM into the mix to transform our original image prompt into a creative and rich textual description based on a “transformation prompt.” Basically, we’re going to use an LLM to make our prompt better automatically. This will allow us to perform image manipulation using text in our OctoShop model cocktail pipeline: Take a logo of Moby: Set it into an ultra-realistic photo in space. Take a child’s drawing: Bring it to life in a fantasy world. Take a photo of a cocktail: Set it on a beach in Italy. Take a photo of a living room: Transform it into a staged living room in a designer house. To achieve this text-to-text transformation, we will use the LLM user prompt as follows. This sets the original textual description of Moby into a new setting: the vast expanse of space. ''' Human: set the image description into space: “a whale with a container on its back” AI: ''' We’ve configured the LLM system prompt so that LLM responses are concise and at most one sentence long. We could make them longer, but be aware that the prompt consumed by SDXL has a 77-token context limit. You can read more on the text generation Python SDK and its Chat Completions API used to generate text: Model: Lets you choose out of selection of foundational open source models like Mixtral, Mistral, Llama2, Code Llama (the selection will grow with more open source models being released). Messages: Contains a list of messages (system and user) to use as context for the completion. Max tokens: Enforces a hard limit on output tokens (this could cut a completion response in the middle of a sentence). Temperature: Lets you control the creativity of your answer: with a higher temperature, less likely tokens can be selected. The choice of model, input, and output tokens will influence pricing on OctoAI. In this example, we’re using the Mistral-7B LLM, which is a great open source LLM model that really packs a punch given its small parameter size. Let’s look at the code used to invoke our Mistral-7B LLM: # Let's go ahead and start with the original prompt that we used in our # image generation examples. image_desc = "a whale with a container on its back" # Let's then prepare our LLM prompt to manipulate our image llm_prompt = ''' Human: set the image description into space: {} AI: '''.format(image_desc) # Now let's use an LLM to transform this craft clay rendition # of Moby into a fun scify universe from octoai.client import Client client = Client(OCTOAI_API_TOKEN) completion = client.chat.completions.create( messages=[ { "role": "system", "content": "You are a helpful assistant. Keep your responses short and limited to one sentence." }, { "role": "user", "content": llm_prompt } ], model="mistral-7b-instruct-fp16", max_tokens=128, temperature=0.01 ) # Print the message we get back from the LLM llm_image_desc = completion.choices[0].message.content print(llm_image_desc) Here’s the output: Our LLM has created a short yet imaginative description of Moby traveling through space. Figure 7 shows the result when we feed this LLM-generated textual description into SDXL. Figure 7: SDXL-generated image of Moby where we used an LLM to set the scene in space and enrich the text prompt. This image is great. We can feel the immensity of space. With the power of LLMs and the flexibility of SDXL, we can take image creation and manipulation to new heights. And the great thing is, all we need to manipulate those images is text; the GenAI models do the rest of the work. 7. Automate the workflow with AI-based image labeling So far in our image transformation pipeline, we’ve had to manually label the input image to our OctoShop model cocktail. Instead of just passing in the image of Moby, we had to provide a textual description of that image. Thankfully, we can rely on a GenAI model to perform text labeling tasks: CLIP Interrogator. Think of this task as the reverse of what SDXL does: It takes in an image and produces text as the output. To get started, we’ll need a CLIP Interrogator model running behind an endpoint somewhere. There are two ways to get a CLIP Interrogator model endpoint on OctoAI. If you’re just getting started, we recommend the simple approach, and if you feel inspired to customize your model endpoint, you can use the more advanced approach. For instance, you may be interested in trying out the more recent version of CLIP Interrogator. You can now invoke the CLIP Interrogator model in a few lines of code. We’ll use the fast interrogator mode here to get a label generated as quickly as possible. # Let's go ahead and invoke the CLIP interrogator model # Note that under a cold start scenario, you may need to wait a minute or two # to get the result of this inference... Be patient! output = client.infer( endpoint_url=CLIP_ENDPOINT_URL+'/predict', inputs={ "image": image_to_base64(moby_image), "mode": "fast" } ) # All labels clip_labels = output["completion"]["labels"] print(clip_labels) # Let's get just the top label top_label = clip_labels.split(',')[0] print(top_label) The top label described our Moby logo as: That’s pretty on point. Now that we’ve tested all ingredients individually, let’s assemble our model cocktail and test it on interesting use cases. 8. Assembling the model cocktail Now that we have tested our three models (CLIP interrogator, Mistral-7B, SDXL), we can package them into one convenient function, which takes the following inputs: An input image that will be used to control the output image and also be automatically labeled by our CLIP interrogator model. A transformation string that describes the transformation we want to apply to the input image (e.g., “set the image description in space”). A style string which lets us better control the artistic output of the image independently of the transformation we apply to it (e.g., painterly style vs. cinematic). The function below is a rehash of all of the code we’ve introduced above, packed into one function. def genai_transform(image: Image, transformation: str, style: str) -> Image: # Step 1: CLIP captioning output = client.infer( endpoint_url=CLIP_ENDPOINT_URL+'/predict', inputs={ "image": image_to_base64(image), "mode": "fast" } ) clip_labels = output["completion"]["labels"] top_label = clip_labels.split(',')[0] # Step 2: LLM transformation llm_prompt = ''' Human: {}: {} AI: '''.format(transformation, top_label) completion = client.chat.completions.create( messages=[ { "role": "system", "content": "You are a helpful assistant. Keep your responses short and limited to one sentence." }, { "role": "user", "content": llm_prompt } ], model="mistral-7b-instruct-fp16", max_tokens=128, presence_penalty=0, temperature=0.1, top_p=0.9, ) llm_image_desc = completion.choices[0].message.content # Step 3: SDXL+controlnet transformation image_gen_response = image_gen.generate( engine="controlnet-sdxl", controlnet="depth_sdxl", controlnet_conditioning_scale=0.4, controlnet_image=image_to_base64(image), prompt=llm_image_desc, negative_prompt="blurry photo, distortion, low-res, poor quality", width=1024, height=1024, num_images=1, sampler="DPM_PLUS_PLUS_2M_KARRAS", steps=20, cfg_scale=7.5, use_refiner=True, seed=1, style_preset=style ) images = image_gen_response.images # Display generated image from OctoAI pil_image = images[0].to_pil() return top_label, llm_image_desc, pil_image Now you can try this out on several images, prompts, and styles. Package your model cocktail into a web app Now that you’ve mixed your unique GenAI cocktail, it’s time to pour it into a glass and garnish it, figuratively speaking. We built a simple Streamlit frontend that lets you deploy your unique OctoShop GenAI model cocktail and share the results with your friends and colleagues (Figure 8). You can check it on GitHub. Follow the README instructions to deploy your app locally or get it hosted on Streamlit’s web hosting services. Figure 8: The Streamlit app transforms images into realistic renderings in space — all thanks to the magic of GenAI. We look forward to seeing what great image-processing apps you come up with. Go ahead and share your creations on OctoAI’s Discord server in the #built_with_octo channel! If you want to learn how you can put OctoShop behind a Discord Bot or build your own model containers with Docker, we also have instructions on how to do that from an AI/ML workshop organized by OctoAI at DockerCon 2023. About OctoAI OctoAI provides infrastructure to run GenAI at scale, efficiently, and robustly. The model endpoints that OctoAI delivers to serve models like Mixtral, Stable Diffusion XL, etc. all rely on Docker to containerize models and make them easier to serve at scale. If you go to octoai.cloud, you’ll find three complementary solutions that developers can build on to bring their GenAI-powered apps and pipelines into production. Image Generation solution exposes endpoints and APIs to perform text to image, image to image tasks built around open source foundational models such as Stable Diffusion XL or SSD. Text Generation solution exposes endpoints and APIs to perform text generation tasks built around open source foundational models, such as Mixtral/Mistral, Llama2, or CodeLlama. Compute solution lets you deploy and manage any dockerized model container on capable OctoAI cloud endpoints to power your demanding GenAI needs. This compute service complements the image generation and text generation solutions by exposing infinite programmability and customizability for AI tasks that are not currently readily available on either the image generation or text generation solutions. Disclaimer OctoShop is built on the foundation of CLIP Interrogator and SDXL, and Mistral-7B and is therefore likely to carry forward the potential dangers inherent in these base models. It’s capable of generating unintended, unsuitable, offensive, and/or incorrect outputs. We therefore strongly recommend exercising caution and conducting comprehensive assessments before deploying this model into any practical applications. This GenAI model workflow doesn’t work on people as it won’t preserve their likeness; the pipeline works best on scenes, objects, or animals. Solutions are available to address this problem, such as face mapping techniques (also known as face swapping), which we can containerize with Docker and deploy on OctoAI Compute solution, but that’s something to cover in another blog post. Conclusion This article covered the fundamentals of building a GenAI model cocktail by relying on a combination of text generation, image generation, and compute solutions powered by the portability and scalability enabled by Docker containerization. If you’re interested in learning more about building these kinds of GenAI model cocktails, check out the OctoAI demo page or join OctoAI on Discord to see what people have been building. Acknowledgements The authors acknowledge Justin Gage for his thorough review, as well as Luis Vega, Sameer Farooqui, and Pedro Toruella for their contributions to the DockerCon AI/ML Workshop 2023, which inspired this article. The authors also thank Cia Bodin and her daughter Ada for the drawing used in this blog post. Learn more Watch the DockerCon 2023 Docker for ML, AI, and Data Science workshop. Get the latest release of Docker Desktop. Vote on what’s next! Check out our public roadmap. Have questions? The Docker community is here to help. New to Docker? Get started. View the full article -
We recently published a technical document showing how to install NVIDIA drivers on a G4DN instance on AWS, where we covered not only how to install the NVIDIA GPU drivers but also how to make sure to get CUDA working for any ML work. In this document we are going to run one of the most used generative AI models, Stable Diffusion, on Ubuntu on AWS for research and development purposes. According to AWS, “G4dn instances, powered by NVIDIA T4 GPUs, are the lowest cost GPU-based instances in the cloud for machine learning inference and small scale training. (…) optimized for applications using NVIDIA libraries such as CUDA, CuDNN, and NVENC.” G4DN instances come in different configurations: Instance typevCPUsRAMGPUsg4dn.xlarge4161g4dn.2xlarge8321g4dn.4xlarge16641g4dn.8xlarge321281g4dn.12xlarge481924g4dn.16xlarge642561g4dn.metal963848 For this exercise, we will be using the g4dn.xlarge instance, since we need only 1 GPU, and with 4 vCPUs and 16GB of RAM, it will provide sufficient resources for our needs, as the GPU will handle most of the workload. Image generation with Stable Diffusion Stable Diffusion is a deep learning model released in 2022 that has been trained to transform text into images using latent diffusion techniques. Developed by Stability.AI, this groundbreaking technology not only provides open-source access to its trained weights but also has the ability to run on any GPU with just 4GB of RAM, making it one of the most used Generative AI models for image generation. In addition to its primary function of text-to-image generation, Stable Diffusion can also be used for tasks such as image retouching and video generation. The license for Stable Diffusion permits both commercial and non-commercial use, making it a versatile tool for various applications. Requirements You’ll need SSH access. If running on Ubuntu or any other Linux distribution, opening a terminal and typing ssh will get you there. If running windows, you will need either WSL (to run a Linux shell inside windows) or PuTTY to connect to the machine using an external software. Make sure you have NVIDIA Drivers and CUDA installed on your G4DN machine. Test with the following command: nvidia-smi You should be able to see the driver and CUDA versions as shown here: Let’s get started! Step 1: Create a python virtual environment: First, we need to download some libraries and dependencies as shown below: sudo apt-get install -y python3.10-venv sudo apt-get install ffmpeg libsm6 libxext6 -y Now we can create the Python environment. python3 -m venv myvirtualenv And finally, we need to activate it. Please note that every time we log in into the machine, we will need to reactivate it with the following line: source myvirtualenv/bin/activate Step 2: Download the web GUI and get a model. To interact with the model easily, we are going to clone the Stable Diffusion WebUI from AUTOMATIC1111. git clone https://github.com/AUTOMATIC1111/stable-diffusion-webui.git After cloning the repository, we can move on to the interesting part: choosing and downloading a Stable Diffusion model from the web. There are many versions and variants that can make the journey more complicated but more interesting as a learning experience. As you delve deeper, you will find that sometimes you need specific versions, fine-tuned or specialized releases for your purpose. This is where HuggingFace is great, as they host a plethora of models and checkpoint versions that you can download. Please be mindful of the license model of each model you will be using. Go to Hugging Face, click on models, and start searching for “Stable Diffusion”. For this exercise, we will use version 1.5 from runwayml. Go to the “Files and versions” tab and scroll down to the actual checkpoint files. Copy the link and go back to your SSH session. We will download the model using wget: cd ~/stable-diffusion-webui/models/Stable-diffusion wget https://huggingface.co/runwayml/stable-diffusion-v1-5/resolve/main/v1-5-pruned.safetensors Now that the model is installed, we can run the script that will bootstrap everything and run the Web GUI. Step 3: Run the WebUI securely and serve the model Now that we have everything in place, we will run the WebUI and serve the model. Just as a side note, since we are not installing this on a local desktop, we cannot just open the browser and enter the URL. This URL will only respond locally because of security constraints (in other words, it is not wise to open development environments to the public). Therefore, we are going to create an SSH tunnel. Exit the SSH session. If you are running on Linux (or Linux under WSL on Windows), you can create the tunnel using SSH by running the following command: ssh -L 7860:localhost:7860 -i myKeyPair.pem ubuntu@<the_machine's_external_IP> In case you are running on Windows and can’t use WSL, follow these instructions to connect via PuTTY. If everything went well, we can now access the previous URL in our local desktop browser. The entire connection will be tunneled and encrypted via SSH. In your new SSH session, enter the following commands to run the WebUI. cd ~/stable-diffusion-webui ./webui.sh The first time will take a while as it will install PyTorch and all the required dependencies. After it finishes, it will give you the following local URL: http://127.0.0.1:7860 So open your local browser and go to the following URL: http://127.0.0.1:7860 We are ready to start playing. We tested our first prompt with all the default values, and this is what we got. Quite impressive, right? Now you are ready to start generating! Final thoughts I hope this guide has been helpful in deploying the Stable Diffusion model on your own instance and has also provided you with a better understanding of how these models work and what can be achieved with generative AI. It is clear that generative AI is a powerful tool for businesses today. In our next post, we will explore how to deploy and self-host a Large Language Model, another groundbreaking AI tool. Remember, if you are looking to create a production-ready solution, there are several options available to assist you. From a security perspective, Ubuntu Pro offers support for your open source supply chain, while Charmed Kubeflow provides a comprehensive stack of services for all your machine learning needs. Additionally, AWS offers Amazon Bedrock, which simplifies the complexities involved and allows you to access these services through an API. Thank you for reading and stay tuned for more exciting AI content! View the full article
-
At CES 2024, Lenovo took the wraps off its new, impressively powerful external GPU, the ThinkBook Graphics Extension. However, it comes with a fairly major caveat - namely that it is currently only compatible with one laptop model, Lenovo’s own ThinkBook 14 i Gen 6+. Introduced at the same time, the ThinkBook 14 i Gen 6+ is a sleek, smart looking business laptop powered by an Intel Core Ultra processor. It utilizes AI PC features to optimize user experiences across various workflows including office tools, photo, video, and audio editing, and meeting collaboration. It comes with up to 32GB dual channel LPDDR5X memory, built-in Intel Arc graphics, and a large 85Wh battery. The ThinkBook Graphics Extension, or TGX as it's known for short, is an intelligent graphics solution that connects to the ThinkBook 14 via the laptop's TGX port. This port was created by Lenovo specifically to enable a high-speed connection to a desktop GPU. A powerful boost for AI tasks A product of Lenovo's collaboration with NVIDIA, the TGX supports NVIDIA GeForce RTX desktop GPUs, which can greatly boost AI computing power when paired with the laptop’s Intel Core Ultra processor. Lenovo says the combined intelligence provided by itself, NVIDIA, and Intel will offer "the perfect solution for users requiring extra power for graphics-intensive or AI-based tasks." NVIDIA RTX GPUs are known for their ability to excel at parallelized work, which makes them ideal for running generative AI models, such as Stable Diffusion accelerated by NVIDIA TensorRTTM. The TGX also serves as a convenient shared solution for hot desk settings in offices. Users can simply connect their ThinkBook laptop and utilize the extra power as and when required. While the launch of the ThinkBook Graphics Extension is great news, its current limitation to just one laptop model may disappoint a lot of potential users. Hopefully Lenovo will expand its compatibility to other devices in the future. The ThinkBook 14 i Gen 6+ and ThinkBook Graphics Extension will be available in select markets from Q2 2024, with the starting bundle price expected to be $2199. More from TechRadar Pro You will need an Nvidia GPU to achieve some of the fastest SSD speeds everLenovo and Nvidia have big plans for the future of AI for all of usLenovo quietly launched the world’s lightest laptop but it won’t sell it outside Asia View the full article
-
You learned how to generate images using the base model, how to upgrade to the Stable Diffusion XL model to improve image quality, and how to use a custom model to generate high quality portraits.View the full article
-
 Stability AI’s Stable Diffusion XL 1.0 (SDXL 1.0) foundation model is now generally available on-demand in Amazon Bedrock. SDXL 1.0 is the most advanced development in the Stable Diffusion text-to-image suite of models launched by Stability AI. The model generates images of high quality in virtually any art style and it excels at photorealism. Amazon Bedrock is a fully managed service that offers a choice of high-performing foundation models from leading AI companies, like Stability AI, along with a broad set of capabilities that provide you with the easiest way to build and scale generative AI applications with foundation models. View the full article
 -
When OpenAI released ChatGPT on November 30, 2022, no one could have anticipated that the following 6 months would usher in a dizzying transformation for human society with the arrival of a new generation of artificial intelligence. Since the emergence of deep learning in the early 2010s, artificial intelligence has entered its third wave of development. The introduction of the Transformer algorithm in 2017 propelled deep learning into the era of large models. OpenAI established the GPT family based on the Decoder part of the Transformer. ChatGPT quickly gained global popularity, astonishing people with its ability to engage in coherent and deep conversations, while also revealing capabilities such as reasoning and logical thinking that reflect intelligence. Alongside the continuous development of AI pre-training with large models, ongoing innovation in Artificial Intelligence Generated Content (Generative AI) algorithms, and the increasing mainstream adoption of multimodal AI, Generative AI technologies represented by ChatGPT accelerated as the latest direction in AI development. This acceleration is driving the next era of significant growth and prosperity in AI, poised to have a profound impact on economic and social development. CEOs may find detailed advice for adopting Gen AI in my recently published article in Harvard Business Review – What CEOs Need to Know About the Costs of Adopting GenAI. Definition and Background of Generative AI Technology Generative AI refers to the production of content through artificial intelligence technology. It involves training models to generate new content that resembles the training data. In contrast to traditional AI, which mainly focuses on recognizing and predicting patterns in existing data, Generative AI emphasizes creating new, creative data. Its key principle lies in learning and understanding the distribution of data, leading to the generation of new data with similar features. This technology finds applications in various domains such as images, text, audio, and video. Among these applications, ChatGPT stands out as a notable example. ChatGPT, a chatbot application developed by OpenAI based on the GPT-3.5 model, gained massive popularity. Within just two months of its release, it garnered over 100 million monthly active users, surpassing the growth rates of all historical consumer internet applications. Generative AI technologies, represented by large language models and image generation models, have become platform-level technologies for the new generation of artificial intelligence, contributing to a leap in value across different industries. The explosion of Generative AI owes much to developments in three AI technology domains: generative algorithms, pre-training models, and multimodal technologies. Generative Algorithms: With the constant innovation in generative algorithms, AI is now capable of generating various types of content, including text, code, images, speech, and more. Generative AI marks a transition from Analytical AI, which focuses on analyzing, judging, and predicting existing data patterns, to Generative AI, which deduces and creates entirely new content based on learned data. Pre-training Models: Pre-training models, or large models, have significantly transformed the capabilities of Generative AI technology. Unlike the past where researchers had to train AI models separately for each task, pre-training large models have generalized Generative AI models and elevated their industrial applications. These large models have strong language understanding and content generation capabilities. Multimodal AI Technology: Multimodal technology enables Generative AI models to generate content across various modalities, such as converting text into images or videos. This enhances the versatility of Generative AI models. Foundational technologies of Generative AI Generative Adversarial Networks (GANs): GANs, introduced in 2014 by Ian Goodfellow and his team, are a form of generative model. They consist of two components: the Generator and the Discriminator. The Generator creates new data, while the Discriminator assesses the similarity between the generated data and real data. Through iterative training, the Generator becomes adept at producing increasingly realistic data. Variational Autoencoders (VAEs): VAEs are a probabilistic generative method. They leverage an Encoder and a Decoder to generate data. The Encoder maps input data to a distribution in a latent space, while the Decoder samples data from this distribution and generates new data. Recurrent Neural Networks (RNNs): RNNs are neural network architectures designed for sequential data processing. They possess memory capabilities to capture temporal information within sequences. In generative AI, RNNs find utility in generating sequences such as text and music. Transformer Models: The Transformer architecture relies on a Self-Attention mechanism and has achieved significant breakthroughs in natural language processing. It’s applicable in generative tasks, such as text generation and machine translation. Applications and Use Cases of Generative AI Text Generation Natural language generation is a key application of Generative AI, capable of producing lifelike natural language text. Generative AI can compose articles, stories, poetry, and more, offering new creative avenues for writers and content creators. Moreover, it can enhance intelligent conversation systems, elevating the interaction experience between users and AI. ChatGPT (short for Chat Generative Pre-trained Transformer) is an AI chatbot developed by OpenAI, introduced in November 2022. It employs a large-scale language model based on the GPT-3.5 architecture and has been trained using reinforcement learning. Currently, ChatGPT engages in text-based interactions and can perform various tasks, including automated text generation, question answering, and summarization. Image Generation Image generation stands as one of the most prevalent applications within Generative AI. Stability AI has unveiled the Stable Diffusion model, significantly reducing the technical barriers for AI-generated art through open-source rapid iteration. Consumers can subscribe to their product DreamStudio to input text prompts and generate artworks. This product has attracted over a million users across 50+ countries worldwide. Audio-Visual Creation and Generation Generative AI finds use in speech synthesis, generating realistic speech. For instance, generative models can create lifelike speech by learning human speech characteristics, suitable for virtual assistants, voice translation, and more. AIGC is also applicable to music generation. Generative AI can compose new music pieces based on given styles and melodies, inspiring musicians with fresh creative ideas. This technology aids musicians in effectively exploring combinations of music styles and elements, suitable for music composition and advertising music. Film and Gaming Generative AI can produce virtual characters, scenes, and animations, enriching creative possibilities in film and game production. Additionally, AI can generate personalized storylines and gaming experiences based on user preferences and behaviors. Scientific Research and Innovation Generative AI can explore new theories and experimental methods in fields like chemistry, biology, and physics, aiding scientists in discovering new knowledge. Additionally, it can accelerate technological innovation and development in domains like drug design and materials science. Code Generation Domain Having been trained on natural language and billions of lines of code, certain generative AI models are proficient in multiple programming languages, including Python, JavaScript, Go, Perl, PHP, Ruby, and more. They can generate corresponding code based on natural language instructions. GitHub Copilot, a collaboration between GitHub and OpenAI, is an AI code generation tool. It provides code suggestions based on naming or contextual code editing. It has been trained on billions of lines of code from publicly available repositories on GitHub, supporting most programming languages. Content Understanding and Analysis Bloomberg recently released a large language model (LLM) named BloombergGPT tailored for the financial sector. Similar to ChatGPT, it employs Transformer models and large-scale pre-training techniques for natural language processing, boasting 500 billion parameters. BloombergGPT’s pre-training dataset mainly comprises news and financial data from Bloomberg, constructing a dataset with 363 billion labels, supporting various financial industry tasks. BloombergGPT aims to enhance users’ understanding and analysis of financial data and news. It generates finance-related natural language text based on user inputs, such as news summaries, market analyses, and investment recommendations. Its applications span financial analysis, investment consulting, asset management, and more. For instance, in asset management, it can predict future stock prices and trading volumes based on historical data and market conditions, providing investment recommendations and decision support for fund managers. In financial news, BloombergGPT automatically generates news summaries and analytical reports based on market data and events, delivering timely and accurate financial information. AI Agents In April 2023, an open-source project named AutoGPT was released on GitHub. As of April 16, 2023, the project has garnered over 70K stars. AutoGPT is powered by GPT-4 and is capable of autonomously achieving any user-defined goals. When presented with a task, AutoGPT autonomously analyzes the problem, proposes an execution plan, and carries it out until the user’s requirements are met. Apart from standalone AI Agents, there’s the possibility of a ‘Virtual AI Society’ composed of multiple AI agents. GenerativeAgents, as explored in a paper titled “GenerativeAgents: Interactive Simulacra of Human Behavior” by Stanford University and Google, successfully constructed a ‘virtual town’ where 25 intelligent agents coexist. Leading business consulting firms predict that by 2030, the generative AI market size will reach $110 billion USD. Operations of Gen AI Operating GenAI involves a comprehensive approach that encompasses the entire lifecycle of GenAI models, from development to deployment and ongoing maintenance. It encompasses various aspects, including data management, model training and optimization, model deployment and monitoring, and continuous improvement. GenAI MLOps is an essential practice for ensuring the success of GenAI projects. By adopting MLOps practices, organizations can improve the reliability, scalability, maintainability, and time-to-market of their GenAI models. Canonical’s MLOps presents a comprehensive open-source solution, seamlessly integrating tools like Charmed Kubeflow, Charmed MLFlow, and Charmed Spark. This approach liberates professionals from grappling with tool compatibility issues, allowing them to concentrate on modeling. Charmed Kubeflow serves as the core of an expanding ecosystem, collaborating with other tools tailored to individual user requirements and validated across diverse platforms, including any CNCF-compliant K8s distribution and various cloud environments. Orchestrated through Juju, an open-source software operator, Charmed Kubeflow facilitates deployment, integration, and lifecycle management of applications at any scale and on any infrastructure. Professionals can selectively deploy necessary components from the bundle, reflecting the composability of Canonical’s MLOps tooling—an essential aspect when implementing machine learning in diverse environments. For instance, while Kubeflow comprises approximately 30 components, deploying just three— Isto, Seldon, and MicroK8s—suffices when operating at the edge due to distinct requirements for edge and scalable operations. View the full article
-
Stability AI, the developer behind the Stable Diffusion, is previewing a new generative AI that can create short-form videos with a text prompt. Aptly called Stable Video Diffusion, it consists of two AI models (known as SVD and SVD-XT) and is capable of creating clips at a 576 x 1,024 pixel resolution. Users will be able to customize the frame rate speed to run between three and 30 FPS. The length of the videos depends on which of the twin models is chosen. If you select SVD, the content will play for 14 frames while SVD-XT extends that a bit to 25 frames. The length doesn’t matter too much as rendered clips will only play for about four seconds before ending, according to the official listing on Hugging Face. The company posted a video on its YouTube channel showing off what Stable Video Diffusion is capable of and the content is surprisingly high quality. They're certainly not the nightmare fuel you see on other AI like Meta’s Make-A-Video. The most impressive, in our opinion, has to be the Ice Dragon demo. You can see a high amount of detail in the dragon’s scales plus the mountains in the back look like something out of a painting. Animation, as you can imagine, is rather limited as the subject can only slowly bob its head. The same can be seen in other demos. It’s either a stiff walking cycle or a slow panning shot. In the early stages Limitations don’t stop there. Stable Video Diffusion reportedly cannot “achieve perfect photorealism”, it can’t generate “legible text”, plus it has a tough time with faces. Another demonstration on Stability AI’s website does show its model is able to render a man’s face without any weird flaws so it could be on a case-by-case basis. Keep in mind that this project is still in the early stages. It’s obvious the model is not ready for a wide release nor are there any plans to do so. Stability AI emphasizes that Stable Video Diffusion is not meant “for real-world or commercial applications” at this time. In fact, it is currently “intended for research purposes only.” We’re not surprised the developer is being very cautious with its tech. There was an incident last year where Stability Diffusion’s model leaked online, leading to bad actors using it to create deep fake images. Availability If you’re interested in trying out Stable Video Diffusion, you can enter a waitlist by filling out a form on the company website. It’s unknown when people will be allowed in, but the preview will include a Text-To-Video interface. In the meantime, you can check out the AI’s white paper and read up on all the nitty gritty behind the project. One thing we found interesting after digging through the document is it mentions using “publicly accessible video datasets” as some of the training material. Again, it's not surprising to hear this considering that Getty Images sued Stability AI over data scraping allegations earlier this year. It looks like the team is striving to be more careful so it doesn't make any more enemies. No word on when Stable Video Diffusion will launch. Luckily, there are other options. Be sure to check out TechRadar's list of the best AI video makers for 2023. You might also like Stable Doodle AI can turn doodlers into artistsYou can now talk to ChatGPT like Siri for free, but it won't reveal OpenAI's secretsStability AI's new text-to-audio tool is like a Midjourney for music samples View the full article
-
Introduction The rise in popularity of Generative AI (GenAI) reflects a broader shift toward intelligent automation in the business landscape, which enables enterprises to innovate at an unprecedented scale, while adhering to dynamic market demands. While the promise of GenAI is exciting, the initial steps toward its adoption can be overwhelming. This post aims to demystify the complexities and offer guidance for getting started. Amazon SageMaker Jumpstart provides you a convenient option to start your GenAI journey on AWS. It offers foundation models such as Stable Diffusion, FLAN-T5, and LLaMa-2, which are pretrained on massive amounts of data. Foundation models can be adapted to a wide variety of workloads across different domains such as content creation, text summarization etc. Amazon SageMaker Studio provides managed Jupyter notebooks, an interactive web-based interface to running live code and data analysis. Furthermore, you can fine-tune and deploy foundation models to Amazon SageMaker Endpoints for inference from SageMaker Studio. However, business users who are responsible for verifying the effectiveness of foundation models may not be familiar with Jupyter or writing code. It is easier for business users to access foundation models in the context of an application. This is where Streamlit shines. Streamlit is an open-source Python library that allows data scientists and engineers to easily build and deploy web applications for machine learning and data science projects with minimal coding. The web-based user interface makes it ideal for business users to interact with. With Streamlit applications, business users can easily explore or verify the foundation models and collaborate effectively with data science teams. Amazon Elastic Container Service (Amazon ECS) is a fully managed container orchestrator, which makes it easy to run containerized applications in a scalable and secure manner. AWS Fargate is a serverless compute engine for containers. It can simplify the management and scaling of cloud applications by shifting undifferentiated operational tasks to AWS. With Amazon ECS and AWS Fargate, you can alleviate operational burdens, empowering you to concentrate on innovation and swiftly develop GenAI applications with Streamlit. Additionally, by setting up a Continuous Integration/Continuous Delivery (CI/CD) mechanism through AWS CodePipeline, you can efficiently iterate on the feedback. In this post, we’ll discuss how you can build a GenAI application with Amazon ECS, AWS Fargate, Amazon SageMaker JumpStart, and AWS CodePipeline. Solution overview Figure 1. Architectural diagram showing Amazon ECS task with Streamlit app accessing Amazon SageMaker endpoint for a Foundation Model Figure 1 shows the architecture of an Amazon ECS cluster with tasks for a GenAI application with Streamlit. The application can be accessed using the AWS Application Load Balancer, which is associated with an Amazon ECS Service. The Amazon ECS services ensures that a required number of tasks are always running. You can additionally configure the Amazon ECS Service to auto scale your tasks as the load increases. You can share the Domain Name System (DNS) address of the Load Balancer with your business users as is for utilizing the model. Alternately, you may use a custom DNS name for the application using Amazon Route 53 or your preferred DNS service. Normally, your Amazon SageMaker endpoints and your Amazon ECS cluster with the Streamlit application, live in the same AWS account. This allows you to have a setup that is self-contained for your GenAI model access, fine tuning, and inference testing. However, if your Amazon SageMaker endpoint must be in a different AWS account, then you can leverage Amazon API Gateway to allow external access to the Amazon SageMaker inference endpoint from a client outside your AWS account. You may refer to this linked post for more information. This example assumes your Amazon SageMaker endpoints will be in the same AWS account as your Amazon ECS cluster. Your Amazon ECS task must have access required to invoke the Amazon SageMaker endpoints for inference. You can further restrict the AWS Identity and Access Management (AWS IAM) policies in the Amazon ECS task IAM role to specific Amazon Resource Names (ARNs) for your Amazon SageMaker endpoints. By linking the AWS IAM policy to a specific ARN, you can ensure that the policy only allows access when the request is made to that specific endpoint. This helps you follow the principle of the least privilege for security. Your AWS Fargate task also needs access to read the Amazon SageMaker endpoints from AWS Systems Manager Parameter Store. Using Parameter Store allows your Amazon SageMaker endpoint addresses to be decoupled from your application. The solution also includes a continuous deployment setup. AWS CodePipeline can detect any changes to your application, triggering AWS CodeBuild to build a new container image, which is pushed to Amazon Elastic Container Registry (Amazon ECR). The pipeline modifies the Amazon ECS task definition with the new container image version and updates the Amazon ECS service to replace the tasks with the new version of your application. Walkthrough You can follow these steps to configure a GenAI serving application with Amazon SageMaker Jumpstart and AWS Fargate: Configure the prerequisites Clone and set up the AWS Cloud Deployment Kit (CDK) application Deploy the Amazon SageMaker environment Deploy the CI/CD environment Explore the image generation AI model Explore the text generation AI model Prerequisites AWS Command Line Interface (AWS CLI) version 2 AWS CDK Toolkit (version 2.93.0+) Working with the AWS CDK in Python Python ≥ 3.6+ Git Docker Command Line Clone and set up the GitHub repository for GenAI application Configure the AWS credentials in the host you are using for your setup. To start, fork the Amazon ECS Blueprints GitHub Repository and clone it to your local Git repository. git clone https://github.com/<repository_owner>/ecs-blueprints.git cd ecs-blueprints/cdk/examples/generative_ai_service/ Setup AWS Account and AWS Region environment variables to match your environment. This post uses the Oregon Region (us-west-2) for the example. You’ll generate a .env file to be used by the AWS CDK template. You’ll fetch variables in the environment file during deploying backend service. export AWS_ACCOUNT=$(aws sts get-caller-identity --query 'Account' --output text) export AWS_REGION=${AWS_REGION:=us-west-2} sed -e "s/<ACCOUNT_NUMBER>/$AWS_ACCOUNT/g" \ -e "s/<REGION>/$AWS_REGION/g" sample.env > .env You can create a Python virtual environment to isolate Python installs and associated pip packages from your local environment. After this, you’ll install the required packages: # manually create a virtualenv: python3 -m venv .venv # activate your virtualenv: source .venv/bin/activate # install the required dependencies: python -m pip install -r requirements.txt If you have previously not used CDK in your AWS environment, which is a combination of an AWS Account and AWS Region, you must run the bootstrap command: cdk bootstrap aws://${AWS_ACCOUNT}/${AWS_REGION} List the stacks in the application. In this Amazon ECS Blueprint, you’ll see four stacks. cdk ls Deploy the Amazon SageMaker environment After you have the above setup in place, you are now ready to create the solution components. First, you’ll create the Amazon SageMaker environment and SageMaker inference endpoint with the GenAITxt2ImgSageMakerStack AWS CDK stack. cdk deploy GenAITxt2ImgSageMakerStack --require-approval never Once the stack deployment is complete, deploy the Amazon SageMaker environment for the text to text generation model with the GenAITxt2TxtSageMakerStack AWS CDK stack. cdk deploy GenAITxt2TxtSageMakerStack --require-approval never The text to image example makes use of Stability AI’s Stable Diffusion v2.1 base foundation model. The text to text example makes use of Hugging Face FLAN-T5-XL foundation model. Both foundation models use ml.g4dn.2xlarge instances in Amazon SageMaker to generate inference endpoints. This is configured as default settings in the .env configuration. You can modify the .env values allow to use alternative models and inference instance type. Deploy the CI/CD environment Next, you’ll establish the CI/CD environment for easy updates to your running application. The CI/CD stack makes use of AWS CodePipeline as the release pipeline. It pulls the updated source code from your GitHub repository and uses AWS CodeBuild to build the new version of the container image for your application. The new version of the container image is used to update the running application in Amazon ECS. Change the working directory to cicd_service to create CI/CD pipeline. cd ../cicd_service Create a GitHub token to access the forked repository. You must create this in the same region where the Gen AI services are deployed. aws secretsmanager create-secret --name ecs-github-token --secret-string <your-github-access-token> As before, setup AWS Account and AWS Region environment variables to match your environment. export AWS_ACCOUNT=$(aws sts get-caller-identity --query 'Account' --output text) export AWS_REGION=${AWS_REGION:=us-west-2} sed -e "s/<ACCOUNT_NUMBER>/$AWS_ACCOUNT/g" \ -e "s/<REGION>/$AWS_REGION/g" sample.env > .env In the .env file, you’ll update some environment variables. Essential Props repository_owner: Github Repository owner (use your GitHub username here) CICD Service Props ecr_repository_name: generative-ai-service container_name: web-container task_cpu: 2048 task_memory: 4096 service_name: gen-ai-web-service-new Repository props folder_path: ./cdk/examples/generative_ai_service/web-app/. The resulting env file should look like this: deploy_core_stack="True" # Essential Props account_number="${AWS_ACCOUNT}" aws_region="${AWS_REGION}" repository_owner="<REPO_OWNER>" # Core Stack Props vpc_cidr="10.0.0.0/16" ecs_cluster_name="ecs-blueprint-infra" namespaces="default" enable_nat_gw="True" az_count="3" # CICD Service Props buildspec_path="./application-code/ecsdemo-cicd/buildspec.yml" ecr_repository_name="generative-ai-service" container_image="nginx" container_name="web-container" container_port="80" task_cpu="2048" task_memory="4096" desired_count="3" service_name="gen-ai-web-service-new" ## Repository props folder_path="./cdk/examples/generative_ai_service/web-app/." repository_name="ecs-blueprints" repository_branch="main" github_token_secret_name="ecs-github-token" # ECS cluster Props ecs_task_execution_role_arn="<TASK-EXECUTION-ROLE-ARN>" vpc_name="ecs-blueprint-infra-vpc" # Service discovery Props namespace_name="default.ecs-blueprint-infra.local" namespace_arn="<NAMESPACE-ARN>" namespace_id="<NAMESPACE-ID>" As our web application requires permissions “ssm:GetParameter” and “sagemaker:InvokeEndpoint” to infer the foundation models using the Amazon SageMaker Endpoint, we must add following code to lib/cicd_service_stack.py as well. Add the imports of these Python modules: from aws_cdk.aws_iam import ( Role, PolicyStatement, Effect ) Also, add the below code block following the line which defines the Amazon ECS service in cicd_service_stack.py. This code adds the required permissions to the Amazon ECS Task AWS IAM Role. # Add ECS Task IAM Role self.fargate_service.task_definition.add_to_task_role_policy(PolicyStatement( effect=Effect.ALLOW, actions = ["ssm:GetParameter"], resources = ["*"], ) ) self.fargate_service.task_definition.add_to_task_role_policy(PolicyStatement( effect=Effect.ALLOW, actions=["sagemaker:InvokeEndpoint"], resources=["*"] ) ) In the last step, you’ll deploy the core infrastructure which includes Amazon Virtual Private Cloud (Amazon VPC), required AWS IAM policies and roles, Amazon ECS cluster, and GenAI serving ECS service, which will host your Streamlit application. cdk deploy CoreInfraStack, CICDService --require-approval never Explore the image generation foundation model You can use the Application Load Balancer URL from the AWS CDK output to access the load balanced service. Select image generation model in the sidebar on the left side. When you input image description, it generates an image based on the text written in input image description section. Explore the text generation foundation model Next, select text generation model in the sidebar. You can input context, provide a relevant prompt, and push generate response button. This generates text response for your prompt in the input query section. Cleaning up You can delete the solution stack either from the AWS CloudFormation console or use the AWS CDK destroy command from the directories where you deployed your CDK stacks. This step is important to stop incurring costs after you explore the foundation models. In production, you could either leave your inference endpoints active for continuous inference. You could also periodically schedule deletion and recreation of the inference endpoints, based on your inference needs. cdk destroy --all --force Conclusion In this post, we showed you how you can use Amazon ECS with AWS Fargate to deploy GenAI applications. With AWS Fargate, you can deploy your apps without the overhead of managing your compute. You learned how Streamlit applications can be configured to access Generative AI foundation models on Amazon SageMaker Jumpstart. Foundation models provide a starting point to help build your own generative AI solutions. With serverless containers, your data science team can focus more on effective solutions for your use cases and less on the underlying infrastructure. Your business users can collaborate with data science teams using the user-friendly web interface of Streamlit apps and provide feedback. This can help your organization be more agile in adopting generative AI for your use cases. The resources referenced below provide you more information about the topics we discussed in this post. Further reading SageMaker Jumpstart foundation models Amazon ECS Blueprints Amazon ECS best practices Generative AI with Serverless Workshop View the full article
-
Microsoft Olive was key to boosting performance in Stable Diffusion for Intel's Arc Alchemist graphics cards. View the full article
-
We've tested all the modern graphics cards in Stable Diffusion, using the latest updates and optimizations, to show which GPUs are the fastest at AI and machine learning inference. View the full article
-
 What does it mean for a new technology to go mainstream? First released in 2005, Git was still a new open source version control system when we founded GitHub. Today, Git is a foundational element of the modern developer experience—93% of developers use it to build and deploy software everywhere1. In 2023, GitHub data highlighted how another technology has quickly begun to reshape the developer experience: AI. This past year, more and more developers started working with AI, while also experimenting with building AI-powered applications. Git has fundamentally changed today’s developer experience, and now AI is setting the stage for what’s next in software development. At GitHub, we know developers love to learn by doing and open source helps developers more rapidly adopt new technologies, integrate them into their workflows, and build what’s next. Open source also powers nearly every piece of modern software—including much of the digital economy. As we explore how technologies become mainstream, GitHub continues to play a pivotal role in bridging the gap between experimentation and the widespread adoption of open source technologies, which underpin the foundations of our software ecosystem. In this year’s report, we’ll study how open source activity around AI, the cloud, and Git has changed the developer experience and is increasingly driving impact among developers and organizations alike. We uncover three big trends: Developers are building with generative AI in big numbers. We’re seeing more developers experiment with foundation models from OpenAI and other AI players, with open source generative AI projects even entering the top 10 most popular open source projects by contributor count in 2023. With almost all developers (92%) using or experimenting with AI coding tools, we expect open source developers to drive the next wave of AI innovation on GitHub.2 Developers are operating cloud-native applications at scale. We’re seeing an increase in declarative languages using Git-based infrastructure as code (IaC) workflows, greater standardization in cloud deployments, and a sharp increase in the rate at which developers were using Dockerfiles and containers, IaC, and other cloud-native technologies. 2023 saw the largest number of first-time open source contributors. We continue to see commercially backed open source projects capture the largest share of first-time contributors and overall contributions—but this year, we also saw generative AI projects enter the top 10 most popular projects for first-time contributors. We’re also seeing notable growth in private projects on GitHub, which increased 38% year over year and account for more than 80% of all activity on GitHub. Kyle Daigle Chief Operating Officer // GitHub Oh, and if you’re a visual learner, we have you covered. A global community of developers building on GitHub Globally, developers are using GitHub to build software and collaborate in larger numbers than ever before—and that spans across public and private projects. This not only proves the foundational value of Git in today’s developer experience, but also shows the global community of developers using GitHub to build software. With 20.2 million developers and a 21% increase in developer growth over the past year, the U.S. continues to have the largest developer community globally. But since 2013, we’ve continued to see other communities account for more growth across the platform which we expect to continue. This worldwide distribution of developers on GitHub shows which regions have the most developers. Who do we consider to be a developer? We define “developer” as anyone with a GitHub account. Why? The open source and developer communities are an increasingly diverse and global group of people who tinker with code, make non-code contributions, conduct scientific research, and more. GitHub users drive open source innovation, and they work across industries—from software development to data analysis and design. Developer communities in Asia Pacific, Africa, South America, and Europe are getting bigger year over year—with India, Brazil, and Japan among those leading the pack. Explore our data with the GitHub Innovation Graph To help researchers build their own insights from GitHub data, we have released the GitHub Innovation Graph. With the GitHub Innovation Graph, researchers, policymakers, and developers can now access valuable data and insights into global developer impact to assess the influence of open source on the global economy. Through a dedicated webpage and repository, it offers quarterly data that dates back to 2020 and includes Git pushes, developers, organizations, repositories, languages, licenses, topics, and economic collaborators. Explore the GitHub Innovation Graph > Projecting the top 10 developer communities over the next five years To understand which developer communities are poised to grow the most over the next five years, we built projections based on current growth rates. Under this rubric, we anticipate that India will overtake the United States as the largest developer community on GitHub by 2027. These projections assume linear growth to forecast which developer communities will be the largest on GitHub by 2028. Fastest growing developer communities in Asia Pacific We continue to see considerable growth in the Asia Pacific region driven by economic hubs in India, Japan, and Singapore. # of developers YoY growth 01 Singapore >1M developers 39% 02 India >13.2M developers 36% 03 Hong Kong (SAR) >1.6M developers 35% 04 Vietnam >1.5M developers 34% 05 Indonesia >2.9M developers 31% 06 Japan >2.8M developers 31% 07 The Philippines >1.3M developers 31% 08 Thailand >857K developers 25% 09 South Korea >1.9M developers 22% 10 Australia >1.4M developers 21% Table 1: Developer growth by total developers in 2023, % increase from 2022. India’s developer community continues to see massive year-over-year growth. In last year’s Octoverse, we predicted that India would overtake the United States in total developer population. That’s still on track to happen. India saw a 36% year-over-year increase in its developer population with 3.5 million new developers joining GitHub in 2023. As a part of the UN-backed Digital Public Goods Alliance, India’s been building its digital public infrastructure with open materials—ranging from software code to AI models—to improve digital payments and ecommerce systems. Here’s a list of open source software (OSS) projects that Indian developers have built and are contributing to on GitHub. Singapore saw the most growth in developer population this year in APAC, and ranks first globally with the highest ratio of developers to overall population. The National University of Singapore’s School of Computing incorporates GitHub into its curriculum, and high growth may also be attributable to the country’s regulatory significance in Southeast Asia. We’re also likely to see continued developer growth in Japan over the next year as a result of its investments in technology and startups. Fastest growing developer communities in Africa With the fastest growing population in the world and an increasing pool of developers, African regions have been identified as promising hubs for technology companies. (For example, in Kenya, programming is mandatory to teach in primary and secondary school.) # of developers YoY growth 01 Nigeria >868K developers 45% 02 Ghana >152K developers 41% 03 Kenya >296K developers 41% 04 Morocco >446K developers 35% 05 Ethiopia >94K developers 32% 06 South Africa >539K developers 30% Table 2: Developer growth by total developers in 2023, % increase from 2022. Nigeria is a hot spot for OSS adoption and technological investments, and its 45% year-over-year growth rate—which is the largest worldwide increase—reflects this. There’s also a collection of at least 200 projects on GitHub made by Nigerian developers, which can be found under the “Made in Africa” collection. Fastest growing developer communities in South America Developer growth rates in South America are on par with some of the fastest-growing developer communities in Asia Pacific and Africa. # of developers YoY growth 01 Argentina >925K developers 33% 02 Bolivia >105K developers 33% 03 Colombia >872K developers 31% 04 Brazil >4.3M developers 30% 05 Chile >437K developers 26% Table 3: Developer growth by total developers in 2023, % increase from 2022. In 2023, Brazil’s developer population was the largest in this region and continues to grow by double-digits with a 30% year-over-year increase. This follows continued investment by private and public organizations in Brazil. Check out the list of OSS projects that Brazilian developers made and are contributing to on GitHub. We’re also seeing continued growth in Argentina and Colombia, which have emerged over the last few years as popular investment targets for organizations. Open banking systems have helped to accelerate global growth—and developer activity. Such systems have enabled Indian citizens who are in their country’s welfare system to receive direct benefit transfers to their bank accounts, and helped to disburse emergency funds during the pandemic. Mercado Libre serves as Latin America’s largest e-commerce and digital payments ecosystem. By using GitHub to automate deployment, security tests, and repetitive tasks, its developers stay focused on their mission to democratize commerce. Meanwhile, 70% of Brazil’s adult population and 60% of its businesses have used Pix, the country’s real-time payments infrastructure. The Central Bank of Brazil recently open sourced Pix’s communication protocols. The bottom line: developers want to build great software and rank designing solutions to novel problems among the top things that positively impact their workdays. When investments are made to optimize the developer experience, developers can drive real-world impact that they’re proud of. Fastest growing developer communities in Europe Communities throughout Europe continue to see increases in their overall developer populations, but their development now more closely mirrors the United States in aggregate as communities in South America, Africa, and the Asia Pacific outpace them in growth. # of developers YoY growth 01 Spain >1.5M developers 25% 02 Portugal >410K developers 24% 03 Poland >1.2M developers 24% 04 Germany >2.9M developers 22% 05 Italy >1.1M developers 22% 06 France >2.3M developers 22% 07 United Kingdom >3.4M developers 21% Table 4: Developer growth by total developers in 2023, % increase from 2022. Notably, the growth in France follows its government push to attract more tech startups. We’re also seeing an uptick in growth in Spain and Italy, which speaks to efforts in these two regions to bolster their domestic technology markets. The explosive growth of generative AI in 2023 While generative AI made a splash in news headlines in 2023, it’s not entirely new to developers on GitHub. In fact, we’ve seen several generative AI projects emerge on GitHub over the past several years—and plenty of other AI-focused projects, too. But GitHub data in 2023 reflects how these AI projects have progressed from more specialist-oriented work and research to more mainstream adoption with developers increasingly using pre-trained models and APIs to build generative AI-powered applications. Just halfway through this past year, we saw more than twice the number of generative AI projects in 2023 as in all of 2022. And we know this is just the tip of the iceberg. As more developers experiment with these new technologies, we expect them to drive AI innovation in software development and continue to bring the technology’s fast-evolving capabilities into the mainstream. Developers are increasingly experimenting with AI models. Where in years past we saw developers building projects with machine learning libraries like tensorflow/tensorflow, pytorch/pytorch, we now see far more developers experimenting with AI models and LLMs such as the ChatGPT API. Stay smart: we anticipate businesses and organizations to also leverage pre-trained AI models—especially as more and more developers become familiar with building with them. Open source AI innovation is diverse and the top AI projects are owned by individual developers. Analyzing the top 20 open source generative AI projects on GitHub, some of the top projects are owned by individuals. That suggests that open source projects on GitHub continue to drive innovation and show us all what’s next in the industry, with the community building around the most exciting advancements. Generative AI is driving a significant and global spike in individual contributors to generative AI projects with 148% year-over-year growth—and a 248% year-over-year increase in the total number of generative AI projects, too. Notably, the United States, India, and Japan are leading the way among developer communities with other regions, including Hong Kong (SAR), the United Kingdom, and Brazil following. The massive uptick in the number of developers learning about generative AI will impact businesses. As more and more developers gain familiarity with building generative AI-powered applications, we expect a growing talent pool to bolster businesses that seek to develop their own AI-powered products and services. What will the impact of generative AI be on developers? Earlier this year, we partnered with Harvard Business School and Keystone.AI to conduct some research around the economic and productivity impacts that AI will have on the developer landscape. One of the more striking key findings we uncovered is that the productivity gains that developers stand to benefit from generative AI could contribute an estimated $1.5 trillion USD to the global economy, as well as an additional 15 million “effective developers” to worldwide capacity by 2030. Learn more > The bottom line: over the past year, we have seen an exponential growth in applications being built on top of foundation models, like ChatGPT, as developers use these LLMs to develop user-facing tools, such as APIs, bots, assistants, mobile applications, and plugins. Developers globally are helping to lay the groundwork for mainstream adoption, and experimentation is helping to build a talent pool for organizations. The most popular programming languages Since we saw a massive growth in cloud-native development in 2019, IaC has continued to grow in open source. In 2023, Shell and Hashicorp Configuration Language (HCL) once again emerged as top languages across open source projects, indicating that operations and IaC work are gaining prominence in the open source space. HCL adoption registered 36% year-over-year growth, which shows that developers are making use of infrastructure for their applications. The increase in HCL suggests developers are increasingly using declarative languages to dictate how they’re leveraging cloud deployments. JavaScript has once again taken the crown for the #1 most popular language, and we continue to see familiar languages, such as Python and Java, remain in the top five languages year over year. TypeScript rises in popularity. This year, TypeScript overtook Java for the first time as the third most popular language across OSS projects on GitHub with 37% growth of its user base. A language, type checker, compiler, and language service all in one, TypeScript was launched in 2012 and marked the dawn of gradual types, which allow developers to adopt varying levels of static and dynamic typing in their code. Learn more about Typescript > There has been a notable increase in popular languages and frameworks for data analytics and operations. Venerable languages, such as T-SQL and TeX, grew in 2023, which highlights how data scientists, mathematicians, and analysts are increasingly engaging with open source platforms and tooling. The bottom line: Programming languages aren’t just confined to the realm of traditional software development anymore. We see remarkable parity with the most popular languages used in projects created in 2023 when compared to the overall most popular languages used across GitHub. Some notable outliers include Kotlin, Rust, Go, and Lua, which have seen larger growth across newer projects on GitHub. Rust continues to rise Amid comments from industry leaders about how systems programming should be conducted in Rust and its inclusion in the Linux kernel, Rust continues to attract more and more developers. While its overall usage is comparatively low to other languages, it is growing at 40% year over year and was named by the 2023 Stack Overflow developer survey as the most admired language for the eighth year in a row. Learn why Rust is so admired > Both Rust and Lua are notable for their memory safety and efficiency—and both can be used for systems and embedded systems programming, which can be attributed to their growth. And the recent growth of Go is driven by cloud-native projects, such as Kubernetes and Prometheus. Defining a language vs. a framework A programming language is a formal means of defining the syntax and semantics for writing code, and it serves as the foundation for development by specifying the logic and behavior of applications. A framework is a pre-built set of tools, libraries, and conventions designed to streamline and structure the development process for specific types of applications. Developer activity as a bellwether of new tech adoption In early 2023, we celebrated a milestone of more than 100 million developers using GitHub—and since last year we’ve seen a nearly 26% increase in all global developer accounts on GitHub. More developers than ever collaborate across time zones and build software. Developer activity, in both private and public repositories, underscores what technologies are being broadly adopted—and what technologies are poised for wider adoption. Developers are automating more of their workflows. Over the past year, developers used 169% more GitHub Actions minutes to automate tasks in public projects, develop CI/CD pipelines, and more. On average, developers used more than 20 million GitHub Actions minutes a day in public projects. And the community keeps growing with the number of GitHub Actions in the GitHub Marketplace passing the 20,000 mark in 2023. This underscores growing awareness across open source communities around automation for CI/CD and community management. More than 80% of GitHub contributions are made to private repositories. That’s more than 4.2 billion contributions to private projects and more than 310 million to public and open source projects. These numbers show the sheer scale of activity happening across public, open source, and private repositories through free, Team, and GitHub Enterprise accounts. The abundance of private activity suggests the value of innersource and how Git-based collaboration doesn’t benefit the quality of just open source but also proprietary code. In fact, all developers in a recent GitHub-sponsored survey said their companies have adopted some innersource practices at minimum, and over half said there’s an active innersource culture in their organization. GitHub is where developers are operating and scaling cloud-native applications. In 2023, 4.3 million public and private repositories used Dockerfiles—and more than 1 million public repositories used Dockerfiles for creating containers. This follows the increased use we’ve seen in Terraform and other cloud-native technologies over the past few years. The increased adoption of IaC practices also suggests developers are bringing more standardization to cloud deployments. Generative AI makes its way into GitHub Actions. The early adoption and collaborative power of AI among the developer community is apparent in the 300+ AI-powered GitHub Actions and 30+ GPT-powered GitHub Actions in the GitHub Marketplace. Developers not only continue to experiment with AI, but are also bringing it to more parts of the developer experience and their workflows through the GitHub Marketplace. How will AI change the developer experience? 92% of developers are already using AI coding tools both in and outside of work. That’s one of our key findings in a 2023 developer survey GitHub sponsored. Moreover, 81% of developers believe that AI coding tools will make their teams more collaborative. Developers in our survey indicate that collaboration, satisfaction, and productivity are all positioned to get a boost from AI coding tools. Learn more about AI’s impact on the developer experience > The bottom line: developers experiment with new technologies and share their learnings across public and private repositories. This interdependent work has surfaced the value of containerization, automation, and CI/CD to package and ship code across open source communities and companies alike. The state of security in open source This year, we’re seeing developers, OSS communities, and companies alike respond faster to security events with automated alerts, tooling, and proactive security measures—which is helping developers get better security outcomes, faster. We’re also seeing responsible AI tooling and research being shared on GitHub. More developers are using automation to secure dependencies. In 2023, open source developers merged 60% more automated Dependabot pull requests for vulnerable packages than in 2022—which underscores the shared community’s dedication to open source and security. Developers across open source communities are fixing more vulnerable packages and addressing more vulnerabilities in their code thanks to free tools on GitHub, such as Dependabot, code scanning, and secret scanning. We calculate the top 1,000 public projects by a rubric called Mona Rank, which evaluates the number of stars, forks, and unique Issue authors. We take all public, non-forked repositories with a license and calculate ranks for each of the above three metrics and then use the sum to show the top Mona Ranked projects. More open source maintainers are protecting their branches. Protected branches give maintainers more ways to ensure the security of their projects and we’ve seen more than 60% of the most popular open source projects using them. Managing these rules at scale should get even easier since we launched repository rules on GitHub in GA earlier this year. Developers are sharing responsible AI tooling on GitHub. In the age of experimental generative AI, we’re seeing a development trend in AI trust and safety tooling. Developers are creating and sharing tools around responsible AI, fairness in AI, responsible machine learning, and ethical AI. The Center for Security and Emerging Technology at Georgetown University is also identifying which countries and institutions are the top producers of trustworthy AI research and sharing its research code on GitHub. AI redefines “shift left” AI will usher in a new era for writing secure code, according to Mike Hanley, GitHub’s Chief Security Officer and Senior Vice President of Engineering. Traditionally, “shift left” meant getting security feedback as early as possible and catching vulnerable code before it reached production. This definition is set to be radically transformed with the introduction of AI, which is fundamentally changing how we can prevent vulnerabilities from ever being written in code. Tools, like GitHub Copilot and GitHub Advanced Security, bring security directly to developers as they’re introducing their ideas to code in real time. The bottom line: to help OSS communities and projects stay more secure, we’ve invested in making Dependabot, protected branches, CodeQL, and secret scanning available for free to public projects. New adoption metrics in 2023 show how these investments are succeeding in helping more open source projects improve their overall security. We’re also seeing interest in creating and sharing responsible AI tools among software developers and institutional researchers. The state of open source In 2023, developers made 301 million total contributions to open source projects across GitHub that ranged from popular projects like Mastodon to generative AI projects like Stable Diffusion, and LangChain. Commercially backed projects continued to attract some of the most open source contributions—but 2023 was the first year that generative AI projects also entered the top 10 most popular projects across GitHub. Speaking of generative AI, almost a third of open source projects with at least one star have a maintainer who is using GitHub Copilot. Commercially backed projects continue to lead. In 2023, the largest projects by the total number of contributors were overwhelmingly commercially backed. This is a continued trend from last year, with microsoft/vscode, flutter/flutter, and vercel/next.js making our top 10 list again in 2023. Generative AI grows fast in open source and public projects. In 2023, we saw generative AI-based OSS projects, like langchain-ai/langchain and AUTOMATIC1111/stable-diffusion-webui, rise to the top projects by contributor count on GitHub. More developers are building LLM applications with pre-trained AI models and customizing AI apps to user needs. Open source maintainers are adopting generative AI. Almost a third of open source projects with at least one star have a maintainer who is using GitHub Copilot. This follows our program to offer GitHub Copilot for free to open source maintainers and shows the growing adoption of generative AI in open source. Did you know that nearly 30% of Fortune 100 companies have Open Source Program Offices (OSPOs)? OSPOs encourage an organization’s participation in and compliance with open source. According to the Linux Foundation, OSPO adoption across global companies increased by 32% since 2022, and 72% of companies are planning to implement an OSPO or OSS initiative within the next 12 months. Companies, such as Microsoft, Google, Meta, Comcast, JPMorgan Chase, and Mercedes Benz, for example, have OSPOs. We founded GitHub’s OSPO in 2021 and open sourced github-ospo to share our resources and insights. (By our count, GitHub depends on over 50K open source components to build GitHub.) Learn more about OSPOs > Developers see benefits to combining packages and containerization. As we noted earlier, 4.3 million repositories used Docker in 2023. On the other side of the coin, Linux distribution NixOS/nixpkgs has been on the top list of open source projects by contributor for the last two years. First-time contributors continue to favor commercially backed projects. Last year, we found that the power of brand recognition around popular, commercially backed projects drew more first-time contributors than other projects. This continued in 2023 with some of the most popular open source projects among first-time contributors backed by Microsoft, Google, Meta, and Vercel. But community-driven open source projects ranging from home-assistant/core to AUTOMATIC1111/stable-diffusion-webui, langchain-ai/langchain, and Significant-Gravitas/Auto-GPT also saw a surge in activity from first-time contributors. This suggests that open experimentation with foundation models increases the accessibility of generative AI, opening the door to new innovations and more collaboration. 2023 saw the largest number of first time contributors contributing to open source projects. New developers became involved with the open source community through programs like freeCodeCamp, First Contributions, and GitHub Education. We also saw a large number of developers taking part in online, open sourced education projects from the likes of Google and IBM. Other trends to watch Open source projects focused on front-end development continue to grow. The continued growth of vercel/next.js and nuxt/nuxt (which came within the top 40 projects by contributor growth), we’re seeing more developers in open source and public projects engage with front-end development work. The open source home automation project home-assistant/core hits the top contributors list again. The project’s been on the top list nearly every year since 2018 (with the exception of 2021). Its continued popularity shows the strength of the project’s community building efforts. The bottom line: developers are contributing to open source generative AI projects, open source maintainers are adopting generative AI coding tools, and companies continue to rely on open source software. These are all indications that developers who learn in the open and share their experiments with new technologies lift an entire global network of developers—whether they’re working in public or private repositories. Take this with you Just as Git has become foundational to today’s developer experience, we’re now seeing evidence of the mainstream emergence of AI. In the past year alone, a staggering 92% of developers have reported using AI-based coding tools, both inside and outside of work. This past year has also seen an explosive surge in AI experimentation across various open source projects hosted on GitHub. We leave you with three takeaways: GitHub is the developer platform for generative AI. Generative AI evolved from a specialist field into mainstream technology in 2023—and an explosion of activity in open source reflects that. As more developers build and experiment with generative AI, they’re using GitHub to collaborate and collectively learn. Developers are operating cloud-native applications at scale on GitHub. In 2019, we started to see a big jump in the number of developers using container-based technologies in open source—and the rate at which developers are increasingly using Git-based IaC workflows, container orchestration, and other cloud-native technologies sharply increased in 2023. This enormous amount of activity shows that developers are using GitHub to standardize how they deploy software to the cloud. GitHub is where open source communities, developers, and companies are building software. In 2023, we saw a 38% increase in the number of private repositories—which account for more than 81% of all activity on GitHub. But we are seeing continued growth in the open source communities who are using GitHub to build what’s next and push the industry forward. With the data showing the increase in new open source developers and the rapid pace of innovation that is possible in open communities, it’s clear that open source has never been stronger. Methodology This report draws on anonymized user and product data taken from GitHub from October 1, 2022 through September 30, 2023. We define AI projects on GitHub by 683 repository topic terms, which you can learn more about in research we conducted in 2023 (page 25 to be exact). We also evaluate open source projects by a metric we call “Mona Rank,” which is a rank-based analysis of the community size and popularity of projects. More data is publicly available on the GitHub Innovation Graph—a research tool GitHub offers for organizations and individuals curious about the state of software development across GitHub. For a complete methodology, please contact press@github.com. Glossary 2023: a year in this report is the last 365 days from the last Octoverse release and ranges from 10/1/2022 to 9/30/2023. Developers: developers are individual, not-spammy user accounts on GitHub. Public projects: any project on GitHub that is publicly available for others to contribute to, fork, clone, or engage with. Open Source Projects and Communities: open source projects are public repositories with an open source license. Location: geographic information is based on the last known network location of individual users and organization profiles. We only study anonymized and aggregated location data, and never look at location data beyond the geographic region and country. Organizations: organization accounts represent groups of people on GitHub that can be paid or free and big or small. Projects and Repositories: we use repositories and projects interchangeably, but recognize that larger projects can sometimes span multiple repositories. Notes Stack Overflow, “Beyond Git: The other version control systems developers use.” January 2023. ↩ GitHub, “Survey reveals AI’s impact on the developer experience.” June 2023. ↩
 -
Today, we are announcing two important updates to our Cloud TPU platform. First, in the latest MLPerf™ Training 3.1 results1, the TPU v5e demonstrated a 2.3X improvement in price-performance compared to the previous-generation TPU v4 for training large language models (LLMs). This builds upon the 2.7X price performance advantage over TPU v4 for LLM inference that we demonstrated in September for the MLPerf™ Inference 3.1 benchmark. Second, Cloud TPU v5e is now generally available, as are our Singlehost inference and Multislice Training technologies. These advancements bring cost-efficiency, scalability, and versatility to Google Cloud customers, with the ability to use a unified TPU platform for both training and inference workloads. Since we introduced it in August, customers have embraced TPU v5e for a diverse range of workloads spanning AI model training and serving: Anthropic is using TPU v5e to efficiently scale serving for its Claude LLM. Hugging Face and AssemblyAI are using TPU v5e to efficiently serve image generation and speech recognition workloads, respectively. Additionally, we rely on TPU v5e for large-scale training and serving workloads of cutting-edge, in-house technologies such as Google Bard. Delivering 2.3X higher performance efficiency on MLPerf Training 3.1 LLM benchmarkIn our MLPerf Training 3.1 benchmark for GPT-3 175B model, we advanced our novel mixed-precision training approach to leverage the INT8 precision format in addition to native BF16. This new technique, called Accurate Quantized Training (AQT), employs a quantization library that uses low-bit and high-performance numerics of contemporary AI hardware accelerators and is available to developers on Github. The GPT-3 175B model converged (the point in which additional training would not further improve the model) while scaling to 4,096 TPU v5e chips via Multislice Training technology. Better price-performance implies that customers can now continue to improve the accuracy of their models while spending less money. MLPerf™ 3.1 Training Closed results for v5e, Google Internal data for TPU v4. As of November, 2023: All numbers normalized per chip seq-len=2048 for GPT-3 175 billion parameter model implemented using relative performance using public list price of TPU v4 ($3.22/chip/hour) and TPU v5e ( $1.2/chip/hour).*1 Scaling to 50K chips with Multislice Training technology, now generally availableCloud TPU Multislice Training is a full-stack technology that enables large-scale AI model training across tens of thousands of TPU chips. It allows for an easy and reliable way to train large generative AI models that can drive faster time-to-value and cost-efficiency. Recently, we ran one of the world’s largest distributed training jobs for LLMs over the most number of AI accelerator chips. Using Multislice and the AQT-driven INT8 precision format, we scaled to 50,000+ TPU v5e chips to train a 32B-parameter dense LLM model, while achieving 53% effective model flop utilization (MFU). For context, we achieved 46% MFU when training a PaLM-540B on 6,144 TPU v4 chips. Furthermore, our testing also reported efficient scaling, enabling researchers and practitioners to train large and complex models quickly, to help for faster breakthroughs across a wide variety of AI applications. But we are not stopping there. We are continuing to invest in novel software techniques to push the boundaries of scalability and performance so that customers who have already deployed AI training workloads on TPU v5e can benefit as new capabilities become available. For instance, we’re exploring solutions such as hierarchical data center network (DCN) collectives and further optimizing compiler scheduling across multiple TPU pods. Google Internal data for TPU v5e As of November, 2023: All numbers normalized per chip. seq-len=2048 for 32 billion parameter decoder only language model implemented using MaxText. *2 Customers deploy Cloud TPU v5e for AI training and servingCustomers rely on large clusters of Cloud TPU v5e to train and serve cutting-edge LLMs quickly and efficiently. AssemblyAI, for example, is working to democratize access to cutting-edge AI speech models, and has achieved remarkable results on TPU v5e. “We recently had the opportunity to experiment with Google’s new Cloud TPU v5e in GKE to see whether these purpose-built AI chips could lower our inference costs. After running our production Speech Recognition model on real-world data in a real-world environment, we found that TPU v5e offers up to 4x greater performance per dollarthan alternatives.” - Domenic Donato, VP of Technology at AssemblyAI Separately, in early October, we collaborated with Hugging Face on a demo that showcases using TPU v5e to accelerate inference on Stable Diffusion XL 1.0 (SDXL). Hugging Face Diffusers now support serving SDXL via JAX on Cloud TPUs, thus enabling both high-performance and cost-effective inference for content-creation use cases. For instance, in the case of text-to-image generation workloads, running SDXL on a TPU v5e with eight chips can generate eight images in the same time it takes for one chip to create a single image. The Google Bard team has also been using Cloud TPU v5e for training and serving its generative AI chatbot. "TPU v5e has been powering both ML training and inference workloads for Bard since the early launch of this platform. We are very delighted with the flexibility of TPU v5e that can be used for both training runs at a large scale (thousands of chips) and for efficient ML serving that supports our users in over 200 countries and in over 40 languages." - Trevor Strohman, Distinguished Software Engineer, Google Bard Start powering your AI production workloads using TPU v5e todayAI acceleration, performance, efficiency, and scale continue to play vital roles in the pace of innovation, especially for large models. Now that Cloud TPU v5e is GA, we cannot wait to see how customers and ecosystem partners push the boundaries of what's possible. Get started today with Cloud TPU v5e by contacting a Google Cloud sales specialist today. 1. MLPerf™ v3.1 Training Closed, multiple benchmarks as shown. Retrieved November 8th, 2023 from mlcommons.org. Results 3.1-2004. Performance per dollar is not an MLPerf metric. TPU v4 results are unverified: not verified by MLCommons Association. The MLPerf™ name and logo are trademarks of MLCommons Association in the United States and other countries. All rights reserved. Unauthorized use strictly prohibited. See www.mlcommons.org for more information. 2. Scaling factor is ratio of (throughput at given cluster size) / (throughput at the base cluster size). Our base cluster size is one v5e pod (e.g., 256 chips). Example: at 512-chip scale, we have 1.9 times the throughput at 256-chip scale, therefore leading to a scaling factor of 1.9. 3. To derive TPU v5e performance per dollar, we divide the training throughput per chip (measured in tokens/sec) by the on-demand list price $1.20, which is the publicly availableprice per chip-hour (US$) for TPU v5e in the us-west4 region. To derive TPU v4 performance per dollar, we divide the training throughput per chip (measured in tokens/sec; internal Google Cloud results, not verified by MLCommons Association) by the on-demand list price of $3.22, the publicly availableon-demand price per chip-hour (US$) for TPU v4 in the us-central2 region.
-
A judge in California earlier this week dismissed some claims raised by artists in their fight against AI image-generating websites. The artists believe such sites have been using their work unlawfully. Parts of a class action brought by Sarah Andersen, Kelly McKernan, and Karla Ortiz were dismissed by US District Judge William Orrick, including all the allegations made against DeviantArt and Midjourney, two popular text-to-image AI art generators. However, despite some claims being dismissed and the offer for an amended complaint to be submitted, the artists' attorneys Joseph Saveri and Matthew Butterick confirmed that their “core claim” survived. Artists claim generative AI image creators use their copyrighted work The case goes as follows: “Plaintiffs allege that Stable Diffusion was “trained” on plaintiffs’ works of art to be able to produce Output Images “in the style” of particular artists.” Orrick adds: “Finding that the Complaint is defective in numerous respects, I largely GRANT defendants’ motions to dismiss and defer the special motion to strike.” The hearing on October 30 gave the plaintiffs 30 days to return with an amended complaint addressing “deficiencies” in their arguments, including that some artwork had not been registered with the Copyright Office. TechRadar Pro asked Stability AI, Midjourney, and DeviantArt for further comment on the court case and allegations, but we did not receive any immediate responses. Orrick also dismissed complaints that the companies in question had violated the artists’ publicity rights and competed with them unfairly. Again, the plaintiffs have been granted permission to refile within 30 days – by the end of November. More broadly, copyright issues in an evolving AI landscape are expected to become more complex. Microsoft recently announced that it would defend users of its AI Copilot should they find themselves “challenged on copyright grounds.” More from TechRadar Pro AI generations can be copyrighted now - on one conditionWe’ve rounded up the best AI tools to help save you precious timeAfter something a little less controversial? Here are the best photo editors Via Reuters View the full article
-
.thumb.png.76bbad720e2b8f6c056f54fb105215de.png) Time and again, we have seen how AI helps companies accelerate what’s possible by streamlining operations, personalizing customer interactions, and bringing new products and experiences to market. The shifts in the last year around generative AI and foundation models are accelerating the adoption of AI within organizations as companies see what technologies like Azure OpenAI Service can do. They’ve also pointed out the need for new tools and processes, as well as a fundamental shift in how technical and non-technical teams should collaborate to manage their AI practices at scale. This shift is often referred to as LLMOps (large language model operations). Even before the term LLMOps came into use, Azure AI had many tools to support healthy LLMOps already, building on its foundations as an MLOps (machine learning operations) platform. But during our Build event last spring, we introduced a new capability in Azure AI called prompt flow, which sets a new bar for what LLMOps can look like, and last month we released the public preview of prompt flow’s code-first experience in the Azure AI Software Development Kit, Command Line Interface, and VS Code extension. Today, we want to go into a little more detail about LLMOps generally, and LLMOps in Azure AI specifically. To share our learnings with the industry, we decided to launch this new blog series dedicated to LLMOps for foundation models, diving deeper into what it means for organizations around the globe. The series will examine what makes generative AI so unique and how it can meet current business challenges, as well as how it drives new forms of collaboration between teams working to build the next generation of apps and services. The series will also ground organizations in responsible AI approaches and best practices, as well as data governance considerations as companies innovate now and towards the future. From MLOps to LLMOps While the latest foundation model is often the headline conversation, there are a lot of intricacies involved in building systems that use LLMs: selecting just the right models, designing architecture, orchestrating prompts, embedding them into applications, checking them for groundedness, and monitoring them using responsible AI toolchains. For customers that had started on their MLOps journey already, they’ll see that the techniques used in MLOps pave the way for LLMOps. Unlike the traditional ML models which often have more predictable output, the LLMs can be non-deterministic, which forces us to adopt a different way to work with them. A data scientist today might be used to control the training and testing data, setting weights, using tools like the responsible AI dashboard in Azure Machine Learning to identify biases, and monitoring the model in production. Most of these techniques still apply to modern LLM-based systems, but you add to them: prompt engineering, evaluation, data grounding, vector search configuration, chunking, embedding, safety systems, and testing/evaluation become cornerstones of the best practices. Like MLOps, LLMOps is also more than technology or product adoption. It’s a confluence of the people engaged in the problem space, the process you use, and the products to implement them. Companies deploying LLMs to production often involve multidisciplinary teams across data science, user experience design, and engineering, and often include engagement from compliance or legal teams and subject matter experts. As the system grows, the team needs to be ready to think through often complex questions about topics such as how to deal with the variance you might see in model output, or how best to tackle a safety issue. Overcoming LLM-Powered application development challenges Creating an application system based around an LLM has three phases: Startup or initialization—During this phase, you select your business use case and often work to get a proof of concept up and running quickly. Selecting the user experience you want, the data you want to pull into the experience (e.g. through retrieval augmented generation), and answering the business questions about the impact you expect are part of this phase. In Azure AI, you might create an Azure AI Search index on data and use the user interface to add your data to a model like GPT 4 to create an endpoint to get started. Evaluation and Refinement—Once the Proof of Concept exists, the work turns to refinement—experimenting with different meta prompts, different ways to index the data, and different models are part of this phase. Using prompt flow you’d be able to create these flows and experiments, run the flow against sample data, evaluate the prompt’s performance, and iterate on the flow if necessary. Assess the flow’s performance by running it against a larger dataset, evaluate the prompt’s effectiveness, and refine it as needed. Proceed to the next stage if the results meet the desired criteria. Production—Once the system behaves as you expect in evaluation, you deploy it using your standard DevOps practices, and you’d use Azure AI to monitor its performance in a production environment, and gather usage data and feedback. This information is part of the set you then use to improve the flow and contribute to earlier stages for further iterations. Microsoft is committed to continuously improving the reliability, privacy, security, inclusiveness, and accuracy of Azure. Our focus on identifying, quantifying, and mitigating potential generative AI harms is unwavering. With sophisticated natural language processing (NLP) content and code generation capabilities through (LLMs) like Llama 2 and GPT-4, we have designed custom mitigations to ensure responsible solutions. By mitigating potential issues before application production, we streamline LLMOps and help refine operational readiness plans. As part of your responsible AI practices, it’s essential to monitor the results for biases, misleading or false information, and address data groundedness concerns throughout the process. The tools in Azure AI are designed to help, including prompt flow and Azure AI Content Safety, but much responsibility sits with the application developer and data science team. By adopting a design-test-revise approach during production, you can strengthen your application and achieve better outcomes. How Azure helps companies accelerate innovation Over the last decade, Microsoft has invested heavily in understanding the way people across organizations interact with developer and data scientist toolchains to build and create applications and models at scale. More recently, our work with customers and the work we ourselves have gone through to create our Copilots have taught us much and we have gained a better understanding of the model lifecycle and created tools in the Azure AI portfolio to help streamline the process for LLMOps. Pivotal to LLMOps is an orchestration layer that bridges user inputs with underlying models, ensuring precise, context-aware responses. A standout capability of LLMOps on Azure is the introduction of prompt flow. This facilitates unparalleled scalability and orchestration of LLMs, adeptly managing multiple prompt patterns with precision. It ensures robust version control, seamless continuous integration, and continuous delivery integration, as well as continuous monitoring of LLM assets. These attributes significantly enhance the reproducibility of LLM pipelines and foster collaboration among machine learning engineers, app developers, and prompt engineers. It helps developers achieve consistent experiment results and performance. In addition, data processing forms a crucial facet of LLMOps. Azure AI is engineered to seamlessly integrate with any data source and is optimized to work with Azure data sources, from vector indices such as Azure AI Search, as well as databases such as Microsoft Fabric, Azure Data Lake Storage Gen2, and Azure Blob Storage. This integration empowers developers with the ease of accessing data, which can be leveraged to augment the LLMs or fine-tune them to align with specific requirements. And while we talk a lot about the OpenAI frontier models like GPT-4 and DALL-E that run as Azure AI services, Azure AI also includes a robust model catalog of foundation models including Meta’s Llama 2, Falcon, and Stable Diffusion. By using pre-trained models through the model catalog, customers can reduce development time and computation costs to get started quickly and easily with minimal friction. The broad selection of models lets developers customize, evaluate, and deploy commercial applications confidently with Azure’s end-to-end built-in security and unequaled scalability. LLMOps now and future Microsoft offers a wealth of resources to support your success with Azure, including certification courses, tutorials, and training material. Our courses on application development, cloud migration, generative AI, and LLMOps are constantly expanding to meet the latest innovations in prompt engineering, fine-tuning, and LLM app development. But the innovation doesn’t stop there. Recently, Microsoft unveiled Vision Models in our Azure AI model catalog. With this, Azure’s already expansive catalog now includes a diverse array of curated models available to the community. Vision includes image classification, object segmentation, and object detection models, thoroughly evaluated across varying architectures and packaged with default hyperparameters ensuring solid performance right out of the box. As we approach our annual Microsoft Ignite Conference next month, we will continue to post updates to our product line. Join us this November for more groundbreaking announcements and demonstrations and stay tuned for our next blog in this series. The post The new AI imperative: Unlock repeatable value for your organization with LLMOps appeared first on Azure Blog. View the full article
Time and again, we have seen how AI helps companies accelerate what’s possible by streamlining operations, personalizing customer interactions, and bringing new products and experiences to market. The shifts in the last year around generative AI and foundation models are accelerating the adoption of AI within organizations as companies see what technologies like Azure OpenAI Service can do. They’ve also pointed out the need for new tools and processes, as well as a fundamental shift in how technical and non-technical teams should collaborate to manage their AI practices at scale. This shift is often referred to as LLMOps (large language model operations). Even before the term LLMOps came into use, Azure AI had many tools to support healthy LLMOps already, building on its foundations as an MLOps (machine learning operations) platform. But during our Build event last spring, we introduced a new capability in Azure AI called prompt flow, which sets a new bar for what LLMOps can look like, and last month we released the public preview of prompt flow’s code-first experience in the Azure AI Software Development Kit, Command Line Interface, and VS Code extension. Today, we want to go into a little more detail about LLMOps generally, and LLMOps in Azure AI specifically. To share our learnings with the industry, we decided to launch this new blog series dedicated to LLMOps for foundation models, diving deeper into what it means for organizations around the globe. The series will examine what makes generative AI so unique and how it can meet current business challenges, as well as how it drives new forms of collaboration between teams working to build the next generation of apps and services. The series will also ground organizations in responsible AI approaches and best practices, as well as data governance considerations as companies innovate now and towards the future. From MLOps to LLMOps While the latest foundation model is often the headline conversation, there are a lot of intricacies involved in building systems that use LLMs: selecting just the right models, designing architecture, orchestrating prompts, embedding them into applications, checking them for groundedness, and monitoring them using responsible AI toolchains. For customers that had started on their MLOps journey already, they’ll see that the techniques used in MLOps pave the way for LLMOps. Unlike the traditional ML models which often have more predictable output, the LLMs can be non-deterministic, which forces us to adopt a different way to work with them. A data scientist today might be used to control the training and testing data, setting weights, using tools like the responsible AI dashboard in Azure Machine Learning to identify biases, and monitoring the model in production. Most of these techniques still apply to modern LLM-based systems, but you add to them: prompt engineering, evaluation, data grounding, vector search configuration, chunking, embedding, safety systems, and testing/evaluation become cornerstones of the best practices. Like MLOps, LLMOps is also more than technology or product adoption. It’s a confluence of the people engaged in the problem space, the process you use, and the products to implement them. Companies deploying LLMs to production often involve multidisciplinary teams across data science, user experience design, and engineering, and often include engagement from compliance or legal teams and subject matter experts. As the system grows, the team needs to be ready to think through often complex questions about topics such as how to deal with the variance you might see in model output, or how best to tackle a safety issue. Overcoming LLM-Powered application development challenges Creating an application system based around an LLM has three phases: Startup or initialization—During this phase, you select your business use case and often work to get a proof of concept up and running quickly. Selecting the user experience you want, the data you want to pull into the experience (e.g. through retrieval augmented generation), and answering the business questions about the impact you expect are part of this phase. In Azure AI, you might create an Azure AI Search index on data and use the user interface to add your data to a model like GPT 4 to create an endpoint to get started. Evaluation and Refinement—Once the Proof of Concept exists, the work turns to refinement—experimenting with different meta prompts, different ways to index the data, and different models are part of this phase. Using prompt flow you’d be able to create these flows and experiments, run the flow against sample data, evaluate the prompt’s performance, and iterate on the flow if necessary. Assess the flow’s performance by running it against a larger dataset, evaluate the prompt’s effectiveness, and refine it as needed. Proceed to the next stage if the results meet the desired criteria. Production—Once the system behaves as you expect in evaluation, you deploy it using your standard DevOps practices, and you’d use Azure AI to monitor its performance in a production environment, and gather usage data and feedback. This information is part of the set you then use to improve the flow and contribute to earlier stages for further iterations. Microsoft is committed to continuously improving the reliability, privacy, security, inclusiveness, and accuracy of Azure. Our focus on identifying, quantifying, and mitigating potential generative AI harms is unwavering. With sophisticated natural language processing (NLP) content and code generation capabilities through (LLMs) like Llama 2 and GPT-4, we have designed custom mitigations to ensure responsible solutions. By mitigating potential issues before application production, we streamline LLMOps and help refine operational readiness plans. As part of your responsible AI practices, it’s essential to monitor the results for biases, misleading or false information, and address data groundedness concerns throughout the process. The tools in Azure AI are designed to help, including prompt flow and Azure AI Content Safety, but much responsibility sits with the application developer and data science team. By adopting a design-test-revise approach during production, you can strengthen your application and achieve better outcomes. How Azure helps companies accelerate innovation Over the last decade, Microsoft has invested heavily in understanding the way people across organizations interact with developer and data scientist toolchains to build and create applications and models at scale. More recently, our work with customers and the work we ourselves have gone through to create our Copilots have taught us much and we have gained a better understanding of the model lifecycle and created tools in the Azure AI portfolio to help streamline the process for LLMOps. Pivotal to LLMOps is an orchestration layer that bridges user inputs with underlying models, ensuring precise, context-aware responses. A standout capability of LLMOps on Azure is the introduction of prompt flow. This facilitates unparalleled scalability and orchestration of LLMs, adeptly managing multiple prompt patterns with precision. It ensures robust version control, seamless continuous integration, and continuous delivery integration, as well as continuous monitoring of LLM assets. These attributes significantly enhance the reproducibility of LLM pipelines and foster collaboration among machine learning engineers, app developers, and prompt engineers. It helps developers achieve consistent experiment results and performance. In addition, data processing forms a crucial facet of LLMOps. Azure AI is engineered to seamlessly integrate with any data source and is optimized to work with Azure data sources, from vector indices such as Azure AI Search, as well as databases such as Microsoft Fabric, Azure Data Lake Storage Gen2, and Azure Blob Storage. This integration empowers developers with the ease of accessing data, which can be leveraged to augment the LLMs or fine-tune them to align with specific requirements. And while we talk a lot about the OpenAI frontier models like GPT-4 and DALL-E that run as Azure AI services, Azure AI also includes a robust model catalog of foundation models including Meta’s Llama 2, Falcon, and Stable Diffusion. By using pre-trained models through the model catalog, customers can reduce development time and computation costs to get started quickly and easily with minimal friction. The broad selection of models lets developers customize, evaluate, and deploy commercial applications confidently with Azure’s end-to-end built-in security and unequaled scalability. LLMOps now and future Microsoft offers a wealth of resources to support your success with Azure, including certification courses, tutorials, and training material. Our courses on application development, cloud migration, generative AI, and LLMOps are constantly expanding to meet the latest innovations in prompt engineering, fine-tuning, and LLM app development. But the innovation doesn’t stop there. Recently, Microsoft unveiled Vision Models in our Azure AI model catalog. With this, Azure’s already expansive catalog now includes a diverse array of curated models available to the community. Vision includes image classification, object segmentation, and object detection models, thoroughly evaluated across varying architectures and packaged with default hyperparameters ensuring solid performance right out of the box. As we approach our annual Microsoft Ignite Conference next month, we will continue to post updates to our product line. Join us this November for more groundbreaking announcements and demonstrations and stay tuned for our next blog in this series. The post The new AI imperative: Unlock repeatable value for your organization with LLMOps appeared first on Azure Blog. View the full article -
This April, we announced Amazon Bedrock as part of a set of new tools for building with generative AI on AWS. Amazon Bedrock is a fully managed service that offers a choice of high-performing foundation models (FMs) from leading AI companies, including AI21 Labs, Anthropic, Cohere, Stability AI, and Amazon, along with a broad set of capabilities to build generative AI applications, simplifying the development while maintaining privacy and security. Today, I’m happy to announce that Amazon Bedrock is now generally available! I’m also excited to share that Meta’s Llama 2 13B and 70B parameter models will soon be available on Amazon Bedrock. Amazon Bedrock’s comprehensive capabilities help you experiment with a variety of top FMs, customize them privately with your data using techniques such as fine-tuning and retrieval-augmented generation (RAG), and create managed agents that perform complex business tasks—all without writing any code. Check out my previous posts to learn more about agents for Amazon Bedrock and how to connect FMs to your company’s data sources. Note that some capabilities, such as agents for Amazon Bedrock, including knowledge bases, continue to be available in preview. I’ll share more details on what capabilities continue to be available in preview towards the end of this blog post. Since Amazon Bedrock is serverless, you don’t have to manage any infrastructure, and you can securely integrate and deploy generative AI capabilities into your applications using the AWS services you are already familiar with. Amazon Bedrock is integrated with Amazon CloudWatch and AWS CloudTrail to support your monitoring and governance needs. You can use CloudWatch to track usage metrics and build customized dashboards for audit purposes. With CloudTrail, you can monitor API activity and troubleshoot issues as you integrate other systems into your generative AI applications. Amazon Bedrock also allows you to build applications that are in compliance with the GDPR and you can use Amazon Bedrock to run sensitive workloads regulated under the U.S. Health Insurance Portability and Accountability Act (HIPAA). Get Started with Amazon Bedrock You can access available FMs in Amazon Bedrock through the AWS Management Console, AWS SDKs, and open-source frameworks such as LangChain. In the Amazon Bedrock console, you can browse FMs and explore and load example use cases and prompts for each model. First, you need to enable access to the models. In the console, select Model access in the left navigation pane and enable the models you would like to access. Once model access is enabled, you can try out different models and inference configuration settings to find a model that fits your use case. For example, here’s a contract entity extraction use case example using Cohere’s Command model: The example shows a prompt with a sample response, the inference configuration parameter settings for the example, and the API request that runs the example. If you select Open in Playground, you can explore the model and use case further in an interactive console experience. Amazon Bedrock offers chat, text, and image model playgrounds. In the chat playground, you can experiment with various FMs using a conversational chat interface. The following example uses Anthropic’s Claude model: As you evaluate different models, you should try various prompt engineering techniques and inference configuration parameters. Prompt engineering is a new and exciting skill focused on how to better understand and apply FMs to your tasks and use cases. Effective prompt engineering is about crafting the perfect query to get the most out of FMs and obtain proper and precise responses. In general, prompts should be simple, straightforward, and avoid ambiguity. You can also provide examples in the prompt or encourage the model to reason through more complex tasks. Inference configuration parameters influence the response generated by the model. Parameters such as Temperature, Top P, and Top K give you control over the randomness and diversity, and Maximum Length or Max Tokens control the length of model responses. Note that each model exposes a different but often overlapping set of inference parameters. These parameters are either named the same between models or similar enough to reason through when you try out different models. We discuss effective prompt engineering techniques and inference configuration parameters in more detail in week 1 of the Generative AI with Large Language Models on-demand course, developed by AWS in collaboration with DeepLearning.AI. You can also check the Amazon Bedrock documentation and the model provider’s respective documentation for additional tips. Next, let’s see how you can interact with Amazon Bedrock via APIs. Using the Amazon Bedrock API Working with Amazon Bedrock is as simple as selecting an FM for your use case and then making a few API calls. In the following code examples, I’ll use the AWS SDK for Python (Boto3) to interact with Amazon Bedrock. List Available Foundation Models First, let’s set up the boto3 client and then use list_foundation_models() to see the most up-to-date list of available FMs: import boto3 import json bedrock = boto3.client( service_name='bedrock', region_name='us-east-1' ) bedrock.list_foundation_models() Run Inference Using Amazon Bedrock’s InvokeModel API Next, let’s perform an inference request using Amazon Bedrock’s InvokeModel API and boto3 runtime client. The runtime client manages the data plane APIs, including the InvokeModel API. The InvokeModel API expects the following parameters: { "modelId": <MODEL_ID>, "contentType": "application/json", "accept": "application/json", "body": <BODY> } The modelId parameter identifies the FM you want to use. The request body is a JSON string containing the prompt for your task, together with any inference configuration parameters. Note that the prompt format will vary based on the selected model provider and FM. The contentType and accept parameters define the MIME type of the data in the request body and response and default to application/json. For more information on the latest models, InvokeModel API parameters, and prompt formats, see the Amazon Bedrock documentation. Example: Text Generation Using AI21 Lab’s Jurassic-2 Model Here is a text generation example using AI21 Lab’s Jurassic-2 Ultra model. I’ll ask the model to tell me a knock-knock joke—my version of a Hello World. bedrock_runtime = boto3.client( service_name='bedrock-runtime', region_name='us-east-1' ) modelId = 'ai21.j2-ultra-v1' accept = 'application/json' contentType = 'application/json' body = json.dumps( {"prompt": "Knock, knock!", "maxTokens": 200, "temperature": 0.7, "topP": 1, } ) response = bedrock_runtime.invoke_model( body=body, modelId=modelId, accept=accept, contentType=contentType ) response_body = json.loads(response.get('body').read()) Here’s the response: outputText = response_body.get('completions')[0].get('data').get('text') print(outputText) Who's there? Boo! Boo who? Don't cry, it's just a joke! You can also use the InvokeModel API to interact with embedding models. Example: Create Text Embeddings Using Amazon’s Titan Embeddings Model Text embedding models translate text inputs, such as words, phrases, or possibly large units of text, into numerical representations, known as embedding vectors. Embedding vectors capture the semantic meaning of the text in a high-dimension vector space and are useful for applications such as personalization or search. In the following example, I’m using the Amazon Titan Embeddings model to create an embedding vector. prompt = "Knock-knock jokes are hilarious." body = json.dumps({ "inputText": prompt, }) model_id = 'amazon.titan-embed-g1-text-02' accept = 'application/json' content_type = 'application/json' response = bedrock_runtime.invoke_model( body=body, modelId=model_id, accept=accept, contentType=content_type ) response_body = json.loads(response['body'].read()) embedding = response_body.get('embedding') The embedding vector (shortened) will look similar to this: [0.82421875, -0.6953125, -0.115722656, 0.87890625, 0.05883789, -0.020385742, 0.32421875, -0.00078201294, -0.40234375, 0.44140625, ...] Note that Amazon Titan Embeddings is available today. The Amazon Titan Text family of models for text generation continues to be available in limited preview. Run Inference Using Amazon Bedrock’s InvokeModelWithResponseStream API The InvokeModel API request is synchronous and waits for the entire output to be generated by the model. For models that support streaming responses, Bedrock also offers an InvokeModelWithResponseStream API that lets you invoke the specified model to run inference using the provided input but streams the response as the model generates the output. Streaming responses are particularly useful for responsive chat interfaces to keep the user engaged in an interactive application. Here is a Python code example using Amazon Bedrock’s InvokeModelWithResponseStream API: response = bedrock_runtime.invoke_model_with_response_stream( modelId=modelId, body=body) stream = response.get('body') if stream: for event in stream: chunk=event.get('chunk') if chunk: print(json.loads(chunk.get('bytes').decode)) Data Privacy and Network Security With Amazon Bedrock, you are in control of your data, and all your inputs and customizations remain private to your AWS account. Your data, such as prompts, completions, and fine-tuned models, is not used for service improvement. Also, the data is never shared with third-party model providers. Your data remains in the Region where the API call is processed. All data is encrypted in transit with a minimum of TLS 1.2 encryption. Data at rest is encrypted with AES-256 using AWS KMS managed data encryption keys. You can also use your own keys (customer managed keys) to encrypt the data. You can configure your AWS account and virtual private cloud (VPC) to use Amazon VPC endpoints (built on AWS PrivateLink) to securely connect to Amazon Bedrock over the AWS network. This allows for secure and private connectivity between your applications running in a VPC and Amazon Bedrock. Governance and Monitoring Amazon Bedrock integrates with IAM to help you manage permissions for Amazon Bedrock. Such permissions include access to specific models, playground, or features within Amazon Bedrock. All AWS-managed service API activity, including Amazon Bedrock activity, is logged to CloudTrail within your account. Amazon Bedrock emits data points to CloudWatch using the AWS/Bedrock namespace to track common metrics such as InputTokenCount, OutputTokenCount, InvocationLatency, and (number of) Invocations. You can filter results and get statistics for a specific model by specifying the model ID dimension when you search for metrics. This near real-time insight helps you track usage and cost (input and output token count) and troubleshoot performance issues (invocation latency and number of invocations) as you start building generative AI applications with Amazon Bedrock. Billing and Pricing Models Here are a couple of things around billing and pricing models to keep in mind when using Amazon Bedrock: Billing – Text generation models are billed per processed input tokens and per generated output tokens. Text embedding models are billed per processed input tokens. Image generation models are billed per generated image. Pricing Models – Amazon Bedrock offers two pricing models, on-demand and provisioned throughput. On-demand pricing allows you to use FMs on a pay-as-you-go basis without having to make any time-based term commitments. Provisioned throughput is primarily designed for large, consistent inference workloads that need guaranteed throughput in exchange for a term commitment. Here, you specify the number of model units of a particular FM to meet your application’s performance requirements as defined by the maximum number of input and output tokens processed per minute. For detailed pricing information, see Amazon Bedrock Pricing. Now Available Amazon Bedrock is available today in AWS Regions US East (N. Virginia) and US West (Oregon). To learn more, visit Amazon Bedrock, check the Amazon Bedrock documentation, explore the generative AI space at community.aws, and get hands-on with the Amazon Bedrock workshop. You can send feedback to AWS re:Post for Amazon Bedrock or through your usual AWS contacts. (Available in Preview) The Amazon Titan Text family of text generation models, Stability AI’s Stable Diffusion XL image generation model, and agents for Amazon Bedrock, including knowledge bases, continue to be available in preview. Reach out through your usual AWS contacts if you’d like access. (Coming Soon) The Llama 2 13B and 70B parameter models by Meta will soon be available via Amazon Bedrock’s fully managed API for inference and fine-tuning. Start building generative AI applications with Amazon Bedrock, today! — Antje View the full article
-
BackgroundWith the increasing popularity of AI-generated content (AIGC), open-source projects based on text-to-image AI models such as MidJourney and Stable Diffusion have emerged. Stable Diffusion is a diffusion model that generates realistic images based on given text inputs. In this GitHub repository, we provide three different solutions for deploying Stable Diffusion quickly on Google Cloud Vertex AI, Google Kubernetes Engine (GKE), and Agones-based platforms, respectively, to ensure stable service delivery through elastic infrastructure. This article will focus on the Stable Diffusion model on GKE and improve launch times by up to 4x. Problem statementThe container image of Stable Diffusion is quite large, reaching approximately 10-20GB, which slows down the image pulling process during container startup and consequently affects the launch time. In scenarios that require rapid scaling, launching new container replicas may take more than 10 minutes, significantly impacting user experience. During the launch of the container, we can see following events in chronological order: Triggering Cluster Autoscaler for scaling + Node startup and Pod scheduling: 225 seconds Image pull startup: 4 seconds Image pulling: 5 minutes 23 seconds Pod startup: 1 second sd-webui serving: more than 2 minutes After analyzing this time series, we can see that the slow startup of the Stable Diffusion WebUI running in the container is primarily due to the heavy dependencies of the entire runtime, resulting in a large container image size and prolonged time for image pulling and pod initialization. Therefore, we consider optimizing the startup time from the following three aspects: Optimizing the Dockerfile: Selecting the appropriate base image and minimizing the installation of runtime dependencies to reduce the image size. Separating the base environment from the runtime dependencies: Accelerating the creation of the runtime environment through PD disk images. Leveraging GKE Image Streaming: Optimizing image loading time by utilizing GKE Image Streaming and utilizing Cluster Autoscaler to enhance elastic scaling and resizing speed. This article focuses on introducing a solution to optimize the startup time of the Stable Diffusion WebUI container by separating the base environment from the runtime dependencies and leveraging high-performance disk image. Optimizing the DockerfileFirst of all, here's a reference Dockerfile based on the official installation instructions for the Stable Diffusion WebUI: https://github.com/nonokangwei/Stable-Diffusion-on-GCP/blob/main/Stable-Diffusion-UI-Agones/sd-webui/Dockerfile In the initial building container image for the Stable Diffusion, we found that besides the base image NVIDIA runtime, there were also numerous installed libraries, dependencies and extensions Before optimization, the container image size was 16.3GB.In terms of optimizing the Dockerfile, after analyzing the Dockerfile, we found that the nvidia runtime occupies approximately 2GB, while the PyTorch library is a very large package, taking up around 5GB. Additionally, Stable Diffusion and its extensions also occupy some space. Therefore, following the principle of minimal viable environment, we can remove unnecessary dependencies from the environment. We can use the NVIDIA runtime as the base image and separate the PyTorch library, Stable Diffusion libraries, and extensions from the original image, storing them separately in the file system. Below is the original Dockerfile snippet, code_block[StructValue([(u'code', u'# Base image\r\nFROM nvidia/cuda:11.8.0-runtime-ubuntu22.04\r\n\r\nRUN set -ex && \\\r\n apt update && \\\r\n apt install -y wget git python3 python3-venv python3-pip libglib2.0-0 pkg-config libcairo2-dev && \\\r\n rm -rf /var/lib/apt/lists/*\r\n\r\n# Pytorch \r\nRUN python3 -m pip install torch==1.13.1+cu117 torchvision==0.14.1+cu117 --extra-index-url https://download.pytorch.org/whl/cu117\r\n\r\n\u2026\r\n\r\n# Stable Diffusion\r\nRUN git clone https://github.com/AUTOMATIC1111/stable-diffusion-webui.git\r\nRUN git clone https://github.com/Stability-AI/stablediffusion.git /stable-diffusion-webui/repositories/stable-diffusion-stability-ai\r\nRUN git -C /stable-diffusion-webui/repositories/stable-diffusion-stability-ai checkout cf1d67a6fd5ea1aa600c4df58e5b47da45f6bdbf\r\n\r\n\u2026\r\n\r\n# Stable Diffusion extensions\r\nRUN set -ex && cd stable-diffusion-webui \\\r\n && git clone https://gitcode.net/ranting8323/sd-webui-additional-networks.git extensions/sd-webui-additional-networks \\\r\n && git clone https://gitcode.net/ranting8323/sd-webui-cutoff extensions/sd-webui-cutoff \\\r\n && git clone https://github.com/toshiaki1729/stable-diffusion-webui-dataset-tag-editor.git extensions/stable-diffusion-webui-dataset-tag-editor'), (u'language', u''), (u'caption', <wagtail.wagtailcore.rich_text.RichText object at 0x3ea1b5b8e710>)])]After moving out Pytorch libraries and Stable diffusion, we only retained the NVIDIA runtime in the base image, here is the new Dockerfile. code_block[StructValue([(u'code', u'FROM nvidia/cuda:11.8.0-runtime-ubuntu22.04\r\nRUN set -ex && \\\r\n apt update && \\\r\n apt install -y wget git python3 python3-venv python3-pip libglib2.0-0 && \\\r\n rm -rf /var/lib/apt/lists/*'), (u'language', u''), (u'caption', <wagtail.wagtailcore.rich_text.RichText object at 0x3ea1b5b8e150>)])]Using PD disks images to store libraries PD Disk images are the cornerstone of instance deployment in Google Cloud. Often referred to as templates or bootstrap disks, these virtual images contain the baseline operative system, and all the application software and configuration your instance will have upon first boot. The idea here is to store all the runtime libraries and extensions in a disk image, which in this case has a size of 6.77GB. The advantage of using a disk image is that it can support up to 1000 disk recoveries simultaneously, making it suitable for scenarios involving large-scale scaling and resizing. code_block[StructValue([(u'code', u'gcloud compute disks create sd-lib-disk-$NOW --type=pd-balanced --size=30GB --zone=$ZONE --image=$IMAGE_NAME\r\n\r\ngcloud compute instances attach-disk ${MY_NODE_NAME} --disk=projects/$PROJECT_ID/zones/$ZONE/disks/sd-lib-disk-$NOW --zone=$ZONE'), (u'language', u''), (u'caption', <wagtail.wagtailcore.rich_text.RichText object at 0x3ea1b4687150>)])]We use a DaemonSet to mount the disk when GKE nodes start. The specific steps are as follows: As described in previous sections, in order to speed up initial launch for better performance, we’re trying to mount a persistent disk to GKE nodes to place runtime libraries for stable diffusion. Leveraging GKE Image Streaming and Cluster AutoscalerIn addition, as mentioned earlier, we have also enabled GKE Image Streaming to accelerate the image pulling and loading process. GKE Image Streaming works by using network mounting to attach the container's data layer to containerd and supporting it with multiple cache layers on the network, memory, and disk. Once we have prepared the Image Streaming mount, your containers transition from the ImagePulling state to Running in a matter of seconds, regardless of the container size. This effectively parallelizes the application startup with the data transfer of the required data from the container image. As a result, you can experience faster container startup times and faster automatic scaling. We have enabled the Cluster Autoscaler (CS) feature, which allows the GKE nodes to automatically scale up when there are increasing requests. Cluster Autoscaler triggers and determines the number of nodes needed to handle the additional requests. When the Cluster Autoscaler initiates a new scaling wave and the new GKE nodes are registered in the cluster, the DaemonSet starts working to assist in mounting the disk image that contains the runtime dependencies. The Stable Diffusion Deployment then accesses this disk through the HostPath. Additionally, we have utilized the Optimization Utilization Profile of the Cluster Autoscaler, a profile on GKE CA that prioritizes optimizing utilization over keeping spare resources in the cluster, to reduce the scaling time, save costs, and improve machine utilization. Final results The final startup result is as below: In chronological order: Triggering Cluster Autoscaler for scaling: 38 seconds Node startup and Pod scheduling: 89 seconds Mounting PVC: 4 seconds Image pull startup: 10 seconds Image pulling: 1 second Pod startup: 1 second Ability to provide sd-webui service (approximately): 65 seconds Overall, it took approximately 3 minutes to start a new Stable Diffusion container instance and start serving on a new GKE node. Compared to the previous 12 minutes, it is evident that the significant improvement in startup speed has enhanced the user experience. Take a look at the full code here: https://github.com/nonokangwei/Stable-Diffusion-on-GCP/tree/main/Stable-Diffusion-UI-Agones/optimizated-init Considerations While the technique described above splits up dependencies so that the container size is smaller and you can load the libraries from PD Disk images, there are some downsides to consider. Packing it all in one container image has its upsides where you can have a single immutable and versioned artifact. Separating the base environment from the run time dependencies means you have multiple artifacts to maintain and update. You can mitigate this by building tooling to manage updating of your PD disk images.
-
Stable Diffusion is continually evolving to provide a high-quality image generation experience along with new features for its users. Stable Diffusion is an application of Generative AI having the potential to produce high-quality images based on different inputs. Equipped with amazing and exciting features, it is exceptionally easy to update its Web UI too. This article covers the aspect of demonstration for updating Stable Diffusion Web UI. What are Prerequisite to Update for Stable Diffusion? Before updating Stable Diffusion onto your system, we must verify that our system fulfils certain system requirements. To read more about these system requirements, visit this link. To install or update Stable Diffusion on Windows, follow the prerequisite instructions which are given below: Install Git Install Python Note: It is recommended to use Python 3.10.6 or above versions with Stable Diffusion and make sure to check the “Add Python 3.10 to PATH” checkbox during Python installation. Let us explore the updating of Stable Diffusion on Windows: How to Update Stable Diffusion Web UI? Before installing Stable Diffusion, it is required that Stable Diffusion be installed in the operating system. For this purpose, you can refer to the article “How to Install Stable Diffusion on Windows” which is a comprehensive guide to easily install it. To update to the latest Web UI of Stable Diffusion, here is a step-by-step tutorial: Step 1: Locate the Stable Diffusion Directory To update Stable Diffusion Web UI, open the stable diffusion directory where you have previously installed it: Step 2: Cloned Repository of Stable Diffusion We have cloned the stable diffusion repository from Git. Open the cloned repository to update the Web UI: Step 3: Choose “Webui-user” Batch File Scroll down the directory and you will find a file named “webui-user” batch file. Step 4: Edit the Batch File Open the file by clicking on the “right button” of the mouse and then hit the “Edit” button: Step 5: Command “Git Pull” The file is opened in text format. In this file, write “git pull” at the top of it and save the changes: It automatically updates the Stable Diffusion Web UI whenever the batch file is running. Step 6: Run the Batch File After saving the changes, click on this “webui-user” batch file that you have edited and saved. Click on open to run the file: Now, your Stable Diffusion Web UI will automatically update each time the batch file is executed: In this way, users can update the Stable Diffusion Web UI. Conclusion Stable Diffusion is continually updating its versions to provide high-quality image generation services and a better user experience. If you have installed Stable Diffusion by cloning the git repository, the one-line command “git pull” is all you need to edit your “webui-user” batch file. This article has provided a step-by-step guide of updating Stable Diffusion Web UI. View the full article

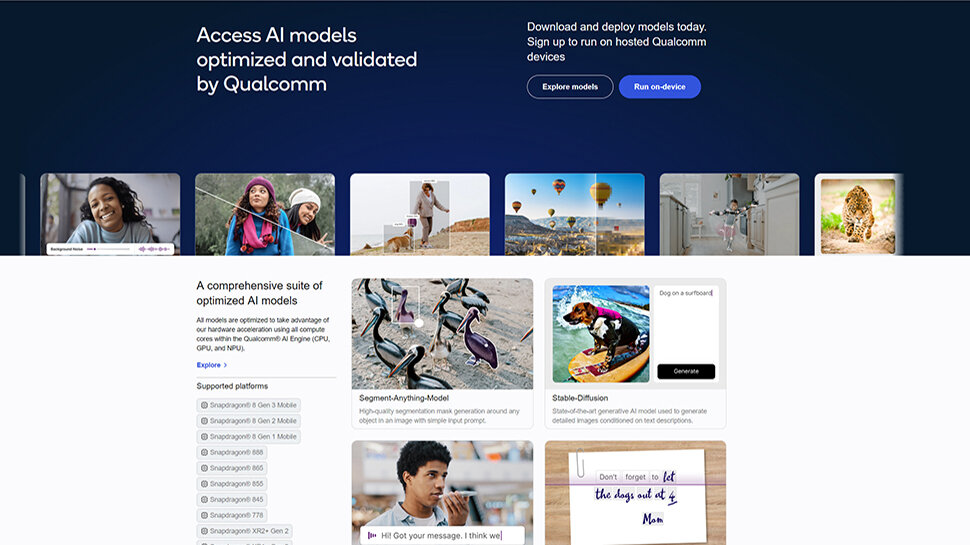


-
Forum Statistics
43.8k
Total Topics43.3k
Total Posts