.png.6dd3056f38e93712a18d153891e8e0fc.png.1dbd1e5f05de09e66333e631e3342b83.png.933f4dc78ef5a5d2971934bd41ead8a1.png)
Search the Community
Showing results for tags 'raspberry pi'.
-
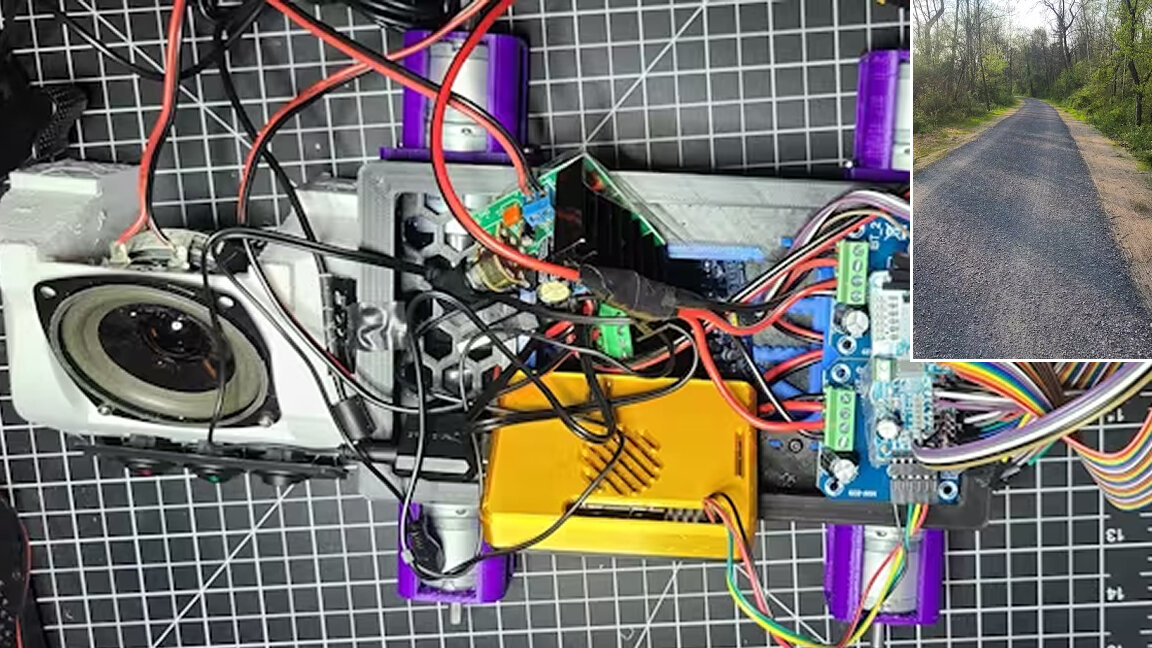
 Sir Walter Richardson is using a Raspberry Pi to power his AI-based robot that follows runners, shouting messages of encouragement or discouragement depending on their performance. View the full article
-
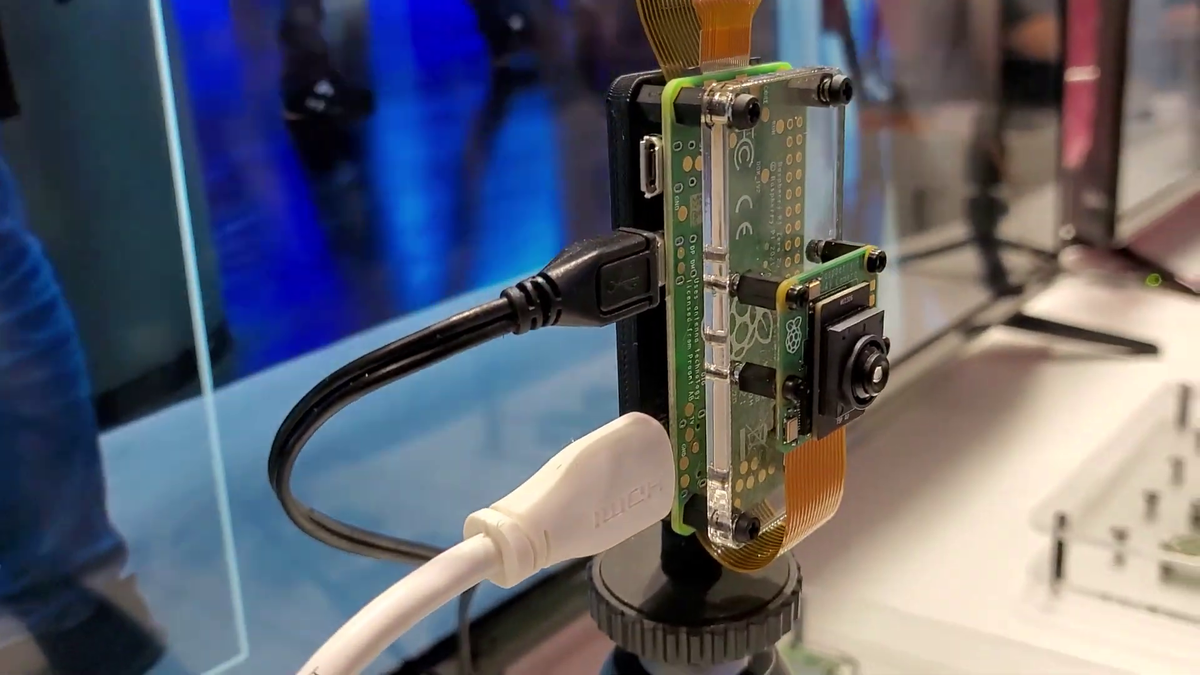
Nekhil is using a Raspberry Pi to power his 3D-printed glasses that can translate sign language into speech using AI. View the full article
-
Seii-FPV is using a Raspberry Pi to power this FPV drone monitor that plays footage from drones for anyone nearby to see. View the full article
-
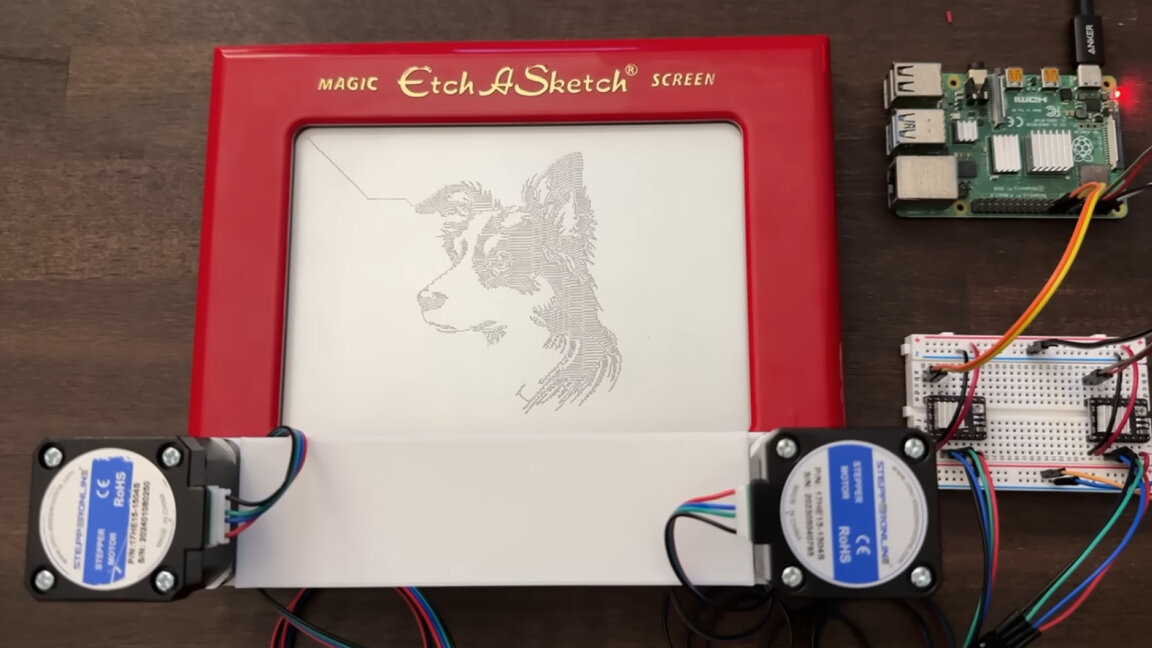
Micah Tilton is using a Raspberry Pi to operate an Etch A Sketch using stepper motors and converting images into Etch A Sketch-friendly files. View the full article
-
Knight Rider Historians show off this incredible Raspberry Pi-powered KITT replica that uses ChatGPT to imitate conversation. View the full article
-
Rob is using a Raspberry Pi Pico to upgrade his Gundam figurine with programmable LEDs and a control panel to make real-time adjustments. View the full article
-
Vilros has released a new dock for the Raspberry Pi 400 that resembles a laptop, providing a display, trackpad, and GPIO access. View the full article
-
Hiro has created Dicemaster 2000, a Pico-powered dice roller for his friend whose vision is worsening but his desire to play tabletop games remains strong. View the full article
-
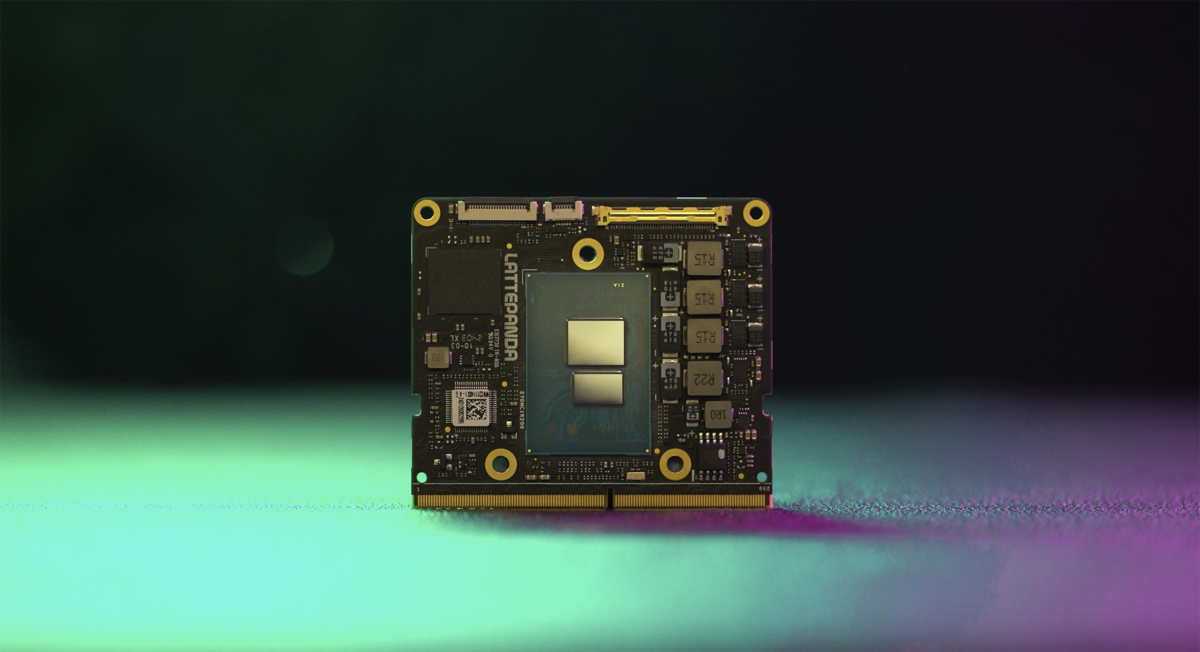
The gloves are off and the N100 totting LattePanda Mu takes aim at the flagship Raspberry Pi 5 hoping to best its stellar performance View the full article
-
At Embedded World 2024, Raspberry Pi's booth is bursting with new products to augment its range or Raspberry Pi compatible devices. New AI kits, screens and the official NVMe SSD add-on for the Raspberry Pi 5. View the full article
-
Mike Tan is using a Pico to power this wireless scoreboard that uses individually addressable LED strips and a remote control to receive updates. View the full article
-
DeSalvo Systems latest Raspberry Pi case is for the flagship Raspberry Pi 5 and it uses CNC machined aerospace grade aluminum to keep your Pi 5 cool and looking great! View the full article
-
David from Element 14 is using a Raspberry Pi to power one of the biggest magic mirrors we've ever seen. The unit also doubles as a retro gaming console. View the full article
-
Abe's Projects has created a Raspberry Pi Pico-powered digital dice that fits in the palm of your hand and is completely portable. View the full article
-
Golbscholar is using a Raspberry Pi to operate this custom BMO-themed 'Adventure Time' TV that plays episodes from the series on loop. View the full article
-
Basically Homeless is using a Raspberry Pi Zero 2W to show off this ultra-tiny display module that measures in diagonally at just under 6mm. View the full article
-
KittenBot has released a Raspberry Pi RP2040-powered keyboard that can be customized with extra peripheral modules. View the full article
-
Prabhjot Singh is using a Raspberry Pi to power Deaf Link, a project that translates speech to sign language and sign language to speech. View the full article
-
The Raspberry Pi 5 has a new way to interact with the GPIO and if you need something a little more advanced than GPIO Zero, python3-gpiod is where you need to look. We introduce this Python module by running through two very basic examples that explain the syntax and thinking of the module. View the full article
-
 In an extra #TheLongView: Everyone’s favorite single-board ARM computer, the Raspberry Pi, has a new generation coming soon. View the full article
 -
There are many text editors like nano, vim, mu but the most used and recommended text editor for the Raspberry Pi and other Debian-based distributions is the VIM text editor. In this write-up, we will explore how we can install and use Vim editor on Raspberry Pi: What Is a Vim Text Editor Vim is the updated version of Vi editor which is used to write, edit, and modify different text files. The Vim editor is a command-line tool that is also known as an IDE as it supports different programming languages like Python and C++ which are not only compiled but also can debug codes, moreover, the Vim text editor is supported by almost all Debian-based Linux distributions. The Vim editor has two different modes, one is known as “Insert” mode and the other is known as the “Command” mode. We can enter by pressing the “I” key of the keyboard and can type different scripts or modify the scripts. In command mode, we can manage the VIM editor by different commands and can go to the command mode simply by pressing the “ESC” key. How to Install the VIM Text Editor on Raspberry Pi We can install the Vim editor on the Raspberry Pi operating system by executing some simple commands, but before proceeding towards the installation of Vim, we will make sure the all the packages of a repository are up to date using the command: $ sudo apt update && sudo apt full-upgrade -y For the installation of the Vim text editor on the Raspberry Pi, we will use the following command: $ sudo apt install vim -y To confirm the installation of the Vim, we will check the version of the installed Vim text editor using the command: $ vim --version How to Create Text Files Using the Vim Editor on Raspberry Pi To create the text files using the Vim editor, we will execute the following command to create a text file, let’s say, we make a text file with the name of “myFile1.txt”: $ vim myFile1.txt Type “I/i” to initialize the insert mode of Vim editor and type the following script: Welcome to the LinuxHint This article is about the VIM editor VIM is the advanced form of Vi editor To save the file and exit the editor, first press the “ESC” key and then type “wq” in the command mode, and press the “ENTER” key: We will use the cat command to display the newly created file “myFile1.txt”: $ cat myFile1.txt How the VIM Editor Can Behave As IDE in the Raspberry Pi As we said in the above section, the Vim editor is not only used for the text files but can also be used as an IDE (Integrated Development Environment), in which it not only compiles the files of different programming languages but also runs the code after debugging it. To understand this, we will create a Python program to display the “Welcome to LinuxHint” and for a creation of a python file with the name of “myFile.py”, we use the command: $ vim myFile.py Type the following script: print(“Welcome to LinuxHint”) To execute the myFile.py, run the command: $ python myFile.py What Are the Basic Commands for the Vim Text Editor There are different commands which are used to manage the Vim text editor, but the basic commands which a beginner user should know are explained in this section. To save and quit the file in a Vim editor: There are various commands for saving the file and exit from the text editor which is described in the table: w To save the file in the Vim editor q To exit the Vim editor wq To save the file and exit the Vim editor q1 To exit the editor without saving the file To rename a file in Vim editor: To rename a file, type the “w” in the command line and a new name for the file, for example, we changed the file name of myFile1.txt to myFile2.txt: To confirm the above changes, we will open the file using the command: $ cat myFile2.txt Set the numbers with the lines of VIM editor: We can set the numbers with every line of the text file using the following command in the command mode: :set number To compare different files using the VIM editor : We can compare the different files using the VIM editor, for example, we will compare the myFile1.txt and myFile2.txt using the command: $ vimdiff myFile1.txt myFile2.txt The lines which are different in both files are highlighted in the output. Conclusion One of the most recommended text editors for the Raspberry Pi operating system is the Vim text editor which can be used to create and manage the text files as well as to compile and execute the code files of different programming languages. In this write-up, we have explained the installation and usage of the Vim text editor on the Raspberry Pi operating system. View the full article
-
 PiAssistant is an Android application used to manage and control your Raspberry Pi device from your mobile phone. This application allows you to access your device information like memory usage, temperature, RAM and much more. It also lets you control GPIO pins and Raspberry Pi terminal through mobile. If you want to access your device storage, you can do so easily within this application, making it easier to copy files from your mobile to your device. In this article, we will guide you on how you can install PiAssistant on your mobile to control your device remotely. Remotely Control Raspberry Pi Through PiAssistant Follow the below-mentioned steps to install PiAssistant on your mobile and control your Raspberry Pi from your mobile. Step 1: First, install PiAssistant on your mobile phone from the Google Play Store. Step 2: Once you have finished installing PiAssistant on your mobile, click on the “Open” button to open the application. Step 3: Enter your Raspberry Pi information such as connection name, host address, username, and password. Once it’s done, tap on the “Save” button. To find out your host address, run the command “hostname -I” in the Raspberry Pi terminal. This will open the PiAssistant dashboard on your mobile and there, you can see your Raspberry Pi information, such as CPU usage, RAM, and others. You can click on the arrow icon in the top right corner to open the detailed information in the form of graphs. To access the GPIO pins, go to the “GPIO” section. In case you want to use the Raspberry Pi terminal, you can easily access it by tapping on the “TERM”. This opens the Raspberry Pi terminal on PiAssistant. You can now easily use this terminal to run commands for installing applications on your Raspberry Pi device. To access the device storage, you can tap on the “SFTP” option. To upload a file from mobile to your Raspberry Pi device, you can tap on the three dots icon and click on the “Upload File” option to upload any file to your device successfully. Conclusion PiAssistant is an Android application for managing your Raspberry Pi device from your mobile and you can install this application from the Google Play Store. After the installation, you can use Raspberry Pi information like username, host address, port number and password to get information about your device on the PiAssistant dashboard. Further, you can control GPIO pins and Raspberry Pi terminal through it and access device storage right to upload a file from your mobile to your device. View the full article
 -
Ntop, formerly known as Ntopng, is an open-source network monitoring solution that provides users with their systems’ real-time network usage information. It uses the web interface to analyze your system’s network traffic and you can easily visualize your network performance and system health on your browser tab. In this article, we will guide you on how you can monitor your Raspberry Pi network traffic by setting up Ntop on your device. So, let’s move toward the setup process. Monitoring Network Traffic Using Ntop on Raspberry Pi Since, Ntop is an open-source monitoring tool so you can easily download its deb package from its official website. However, to set it up on your devce, you must follow the following steps: Step 1: Download Ntop on Raspberry Pi First, you should need to download the Ntop deb package for your Raspberry Pi device from the official website using the following command: $ wget http://packages.ntop.org/RaspberryPI/apt-ntop_1.0.190416-469_all.deb Step 2: Install Ntop deb Package on Raspberry Pi You can install the above downloaded Ntop deb package using the following command: $ sudo apt install ./apt-ntop_1.0.190416-469_all.deb Step 3: Install Ntopng and Required Packages on Raspberry Pi To install web-based monitoring application called Ntopng (the next generation version of Ntop) with required packages like network prob and n2n firewall bypassing tool, you can apply the following command: $ sudo apt install ntopong nprobe n2n -y Step 4: Configure Ntopng on Raspberry Pi After completing the Ntopng installation part, it’s now time to set the network interface and Port number so that you can access the network usage information of the provided interface on your browser. To find out the information of your network interface, you can apply the following command: $ ifconfig To do this part, you will need to open the Ntopng configuration file using the following command: $ sudo nano /etc/ntopng/ntopng.conf Inside the file, uncomment the below following options: $ -i=eth1 $ -w=3000 In the Interface option, you must need to add your own interface name as in our case, it’s wlan0 as highlighted in the image below. With the above changes applied successfully, use the “CTRL+X” keys to save the file. You will also need to add your IP range and the network interface you are going to use within the Ntopng service. To do this, apply the following command to open the configuration file: $ sudo nano /etc/ntopng/ntopng.start Add the following text and save the file. --local-networks "192.168.100.0/24" --interface wlan0 Ensures that you must specify the correct IP range based on your local IP address. Further, if you are using a different network interface, you must need to replace it with the “wlan0”. Step 5: Start and Check Ntopng Service on Raspberry Pi After performing the above configuration step, you will need to start the Ntopng service on your Raspberry Pi by applying the below-mentioned command: $ sudo systemctl start ntopng You should also apply the following command to check the status of Ntopng service on your Raspberry Pi. If the above status outputs “active (running)” status, it confirms that your configurations are correct and you are good to access the Ntopng dashboard. Step 6: Access Ntopng on Raspberry Pi Now, open any browser and use the address https://Pi-IP:3000 to open the login page of Ntopng. Provide the default username and password as admin and select the “Login” button. In the next window, you have to change the default password to make your network information secure and once you are done, click on the “Change Password” button to apply the changes. Afterwards, you will be able to access the Ntopng dashboard where you will find several network related information of your Raspberry Pi device’s network interface. You can also choose “System” instead of “wlan0” to know about your system information on your browser. With the dashboard successfully appearing on your browser tab, you can now have a complete overview of your device’s network interface. Conclusion Ntopng provides you real-time network usage information of your device’s network interface on your browser. You can set it up on your Raspberry Pi by installing the Ntop deb package from the official website and then installing it using the apt installer. Afterward, you can install Ntpong with the required packages and once you perform some configuration, you can access the Ntpong dashboard using your device IP address. View the full article
-
The Raspberry Pi is the king of single-board computers because it offers decent performance packed into a convenient form factor for an attractive price. But its competition hasn’t been asleep while it’s been sitting on the throne. In 2022, there are several cheap Raspberry Pi alternatives that you should consider for your projects, each offering a unique set of features and capabilities. So, without further ado, here’s our list of the best cheap Raspberry Pi alternatives in 2022… View the full article
-
 Back in June 2019, the Raspberry PI 4 model was released, and it was an incredible update over the older model with up to 4GB ram. Today we see the long-rumored 8GB Raspberry Pi 4 released and priced at the just US $75. Here are the complete specs for an updated 64-bit credit card size Raspberry PI 4 8GB model with Linux desktop computer level of performance. The post 8GB Raspberry Pi 4 released for $75 – Specifications appeared first on nixCraft. View the full article


-
Forum Statistics
43.2k
Total Topics42.6k
Total Posts